Friday, 16 January 2015

Payesh

Having Bengali friends around and not posting a single Bengali recipe was not going so well with me. I have tried making a lot of Bengali dishes lately of which Baingan Bhaja and Payesh are my favourites. Aloo Poshto tastes lip smacking too, but i havent tried making it yet. Guess that's this weekend menu, since i do have khas-khas (poppy seeds) in my kitchen! 

Every cuisine have their own distinct flavours and methods of preparation. Let's take Payesh - a kheer made from rice and boiled milk. There are so many different ways of preparing it. Some would boil the rice and milk together, some would boil the milk and then add rice. Some would add jaggery, and some would add sugar or a mix of both. People even make it with condensed milk or a mix of all. A friend of mine doesn't add jaggery but a paste of cashews and sugar. As they say...the food, water, taste changes every few kilometers in India.

I always feel that a particular dish tastes different related to a lot of factors. Lets say a simple bread butter toast would taste different sitting at home or at a dhaba or sitting by the riverside on a picnic or some 5 star hotel. The ambiance, the weather, the people you are with everything matters for the food that we eat. The taste also matters in regard to who is it cooking , and in what frame of mind. The same dish would taste different if i am cooking it with feelings of anger/frustration or so of happiness/ calmness. And it applies to the one eating it too. A dish would taste different if my mind is preoccupied with something else, or if i am watching television while eating or if i am reading a book or watching nature. Don't you all feel so? Give it a try.

Well, coming back to the post. A dear friend of mine got me some nolen gur (Date palm jaggery)during her visit back home. 


Since it was Sankranti yesterday, i thought of making Payesh. I couldn't post any recipe/picture yesterday, since my internet was down for almost 2 days for some reason. Yes, i definitely did make Til-gul (which i had posted last year), and here's wishing you all "Til gul ghya goad goad bola" :)


Payesh, as i made it with Nolen gur (Suggestions from 2 bengali friends):


Ingredients:

Full cream milk - 1 litre
Rice (i took Basmati rice) - 1/4 cup
Nolen gur (Jaggery) - little less than 1/2 cup (add according to taste)
Cardamom powder - 1 tsp
Bay leaf - 2

That's it! 5 ingredients and you are done!! You can add nuts, nutmeg powder, sugar etc according to your wish but i preferred keeping it basic.

Recipe:

Wash the rice till water is clear, drain and keep aside.


Bring the milk to boil and keep boiling it on sim to reduce it. 

Make sure you keep stirring it in between, and also scraping the cream from the sides.

After about 10 minutes, add the 2 bay leaves to the boiling milk.

Once milk reduces to 3/4th, add the rice. Now let the milk boil till rice is fully cooked. The milk will start changing colour to little yellowish.

Once the rice is cooked, the milk will have reduced to almost half. Now add the cardamom powder and mix.

Turn off the stove. Now add the jaggery (Add little pieces or grated jaggery and stir - it will melt automatically when you stir- no need to boil/cook it).


Payesh is ready!!! This one was loved by hubby's colleagues at office :) The nolen gur takes the taste to almost another level, but you can add normal jaggery instead too. 


Happy cooking :)


Sunday, 11 January 2015

Batatyachya Kaachrya

Holiday season is over and we are back to eating the basics - our standard meal of roti, sabzi, daal, chawal. A typical maharashtrian meal would be rice- Saadha varan (plain daal) and batata bhaaji (Potato sabzi). This sabzi can be made in different ways, but the most common and most easiest when you have nothing left in the kitchen but just potatoes is Kaachrya. Also known as Pivlya batatyachi bhaaji (Yellow potato sabzi), this one tastes perfect with daal-chawal (Rice and daal) or even with chapatis. I even love to eat chapatis, kaachrya and lahsun chutney (Garlic chutney). 

Traditionally this dish is made with potatoes, salt and phodni (tadka of hing, mustard seeds, cumin seeds and turmeric powder). But just for change of taste, here i have added a pinch of sesame seeds and fennel seeds to the phodni. You can add onions if you wish, or even roasted peanut powder in the end for change of taste. Any other vegetable can be added to it too, like capsicum, brinjal or french beans as per choice. But i prefer having kaachrya just plain without much of additions. Sometimes, minimalism is the key, right?


Ingredients:

Potatoes - 4 medium
Salt - to taste

For phodni (tadka) :
Oil - 2 tbsp
mustard seeds - 1/2 tsp
Cumin seeds - 1/2 tsp
Sesame seeds - 1/4 tsp (optional)
Fennel seeds - 1/4 tsp (optional)
Methi seeds - 1/4 tsp (optional)
Hing (Asafoetida) - a pinch

If you want a little spice, you can add red chilli powder or green chillies but traditionally it is not added.

Recipe:

Wash and peel the potatoes (In villages, they don't even skin the potatoes. Tastes great even that way)

Cut these potatoes into half and then into thin slices. The slices should not be too thin or too thick. Check photo for reference. If the slices are too thin, the sabzi turns out crispy. If they are too thick, it takes longer to cook and at times, the potatoes remain raw from the middle or inside. 

Heat oil in a kadhai (We normally make this in a kadhai, but you can make it in a pan too)

Add the mustard seeds. When they crackle, add hing and cumin seeds. 
Add the sesame, methi and fennel seeds now (if adding).

Don't let it brown too much, just saute for 30 seconds or so.

Now add the turmeric powder and then the potatoes.

I normally cook this sabzi uncovered and always on low flame, but if you are in a hurry, you can cover and cook or saute on medium/high flame, but make sure the potatoes don't burn.

Add salt and mix well.

Now cover for about 3-4 minutes and cook till potatoes are done.

Now isn't that too simple?

Note : You can even add some lemon juice or garnish with corriander leaves for change of taste.


There are immense options to make this sabzi, try a different one each time and taste the different flavours. But don't forget to make it the traditional style once. - Potatoes, salt and simple phodni cooked in kadhai!!!

Happy Cooking :)

Tuesday, 6 January 2015

Rum cake

I know i am late in wishing you all! A very Happy New Year to all of you. Thank you for all the support you gave reading my posts last year and i hope there is more and more of cooking and blogging this year than the last :) Not only cooking and blogging, but i have seen some tremendous talented fellow bloggers, or should i say multi-talented fellow bloggers? Some paint, some write poems, some teach and some craft...So, i wish success to all of you in whatever you do. It feels great to see immense amount of "art" and "talent" everywhere around. Keep it going.


New Year's this time was cold, foggy and windy. Coping up with the season, i thought of indulging in some warm, moist, soft Rum cake. And i must say, this one was baked to perfection!!! It turned out so well that it was finished in almost a day (Yeah, it was just the two of us, but it was "holiday-eating" season :)) This time i forgot to pre-soak the fruits well in advance, as i already had my hands full with pet-sitting, you can see it here...


Some do soak almost a month in advance, the last year (2013 Christmas Cake ) i had soaked 15 days in advance but this year, i only soaked it for 3 days before making the cake and i guess, it wasn't bad either. A day in advance is good too, but the more the better. I have mentioned this before that me and hubby usually like normal cakes (ones without icing), so this one was served just as it is. But you can add any toppings/icing of your choice if you wish.


Recipe adapted from : Anshu-My Mom's recipes

Ingredients:

To soak :
1 cup of any mixed nuts/dry fruits of your choice - I soaked raisins, orange zest, cashews, dried dark strawberries and tutti fruiti.
1/4 cup Rum 

For the cake:
Rum - 1/4 cup
Maida - 1 2/3 cup
Baking powder - 3/4 tsp
Baking soda - 1/4 tsp
Cocoa powder - 1/3 cup
Sugar - 1 1/4 cup
Egg - 1
Butter - a little less than 3/4 cup
Soaked nuts/dry fruits

Recipe:

Soak the nuts/dry fruits in rum and keep in air tight container. If soaking for days, then stir and mix it well once a day.

Grease and dust a baking pan and keep aside.

Powder the sugar in mixer/grinder.

Sieve together Maida, baking soda, baking powder and cocoa powder.

Add the powdered sugar to it. Mix well with a spatula to make sure no lumps exist.

Boil 1 cup of water and add the rum to it. Also add the soaked nuts. Mix well. Let this come to room temperature before adding anything.

Melt butter in microwave and keep aside. Do not let the butter solidify again and make sure you don't add hot/warm butter to anything. Let it come to room temperature.

Beat egg in a bowl. Add butter and beat again.

Add this to the rum mixture. 

Now slowly add the dry Maida mixture to this and mix. Do not over-mix. Gently mix till everything mixes well together.

Pour this mixture in the baking pan and bake in a pre-heated oven at 180 degree Celsius for about 40-45 minutes. Start checking after 40 minutes if the toothpick is coming out clean. If yes, remove from the oven and let it cool.


This cake comes out a perfect texture, colour and taste. Don't miss trying this one :) I have dusted a little powdered sugar on top (which is completely optional).

Happy Cooking! Happy Blogging! And Happy New Year once again :)


Monday, 29 December 2014

Gajar Halwa using condensed milk

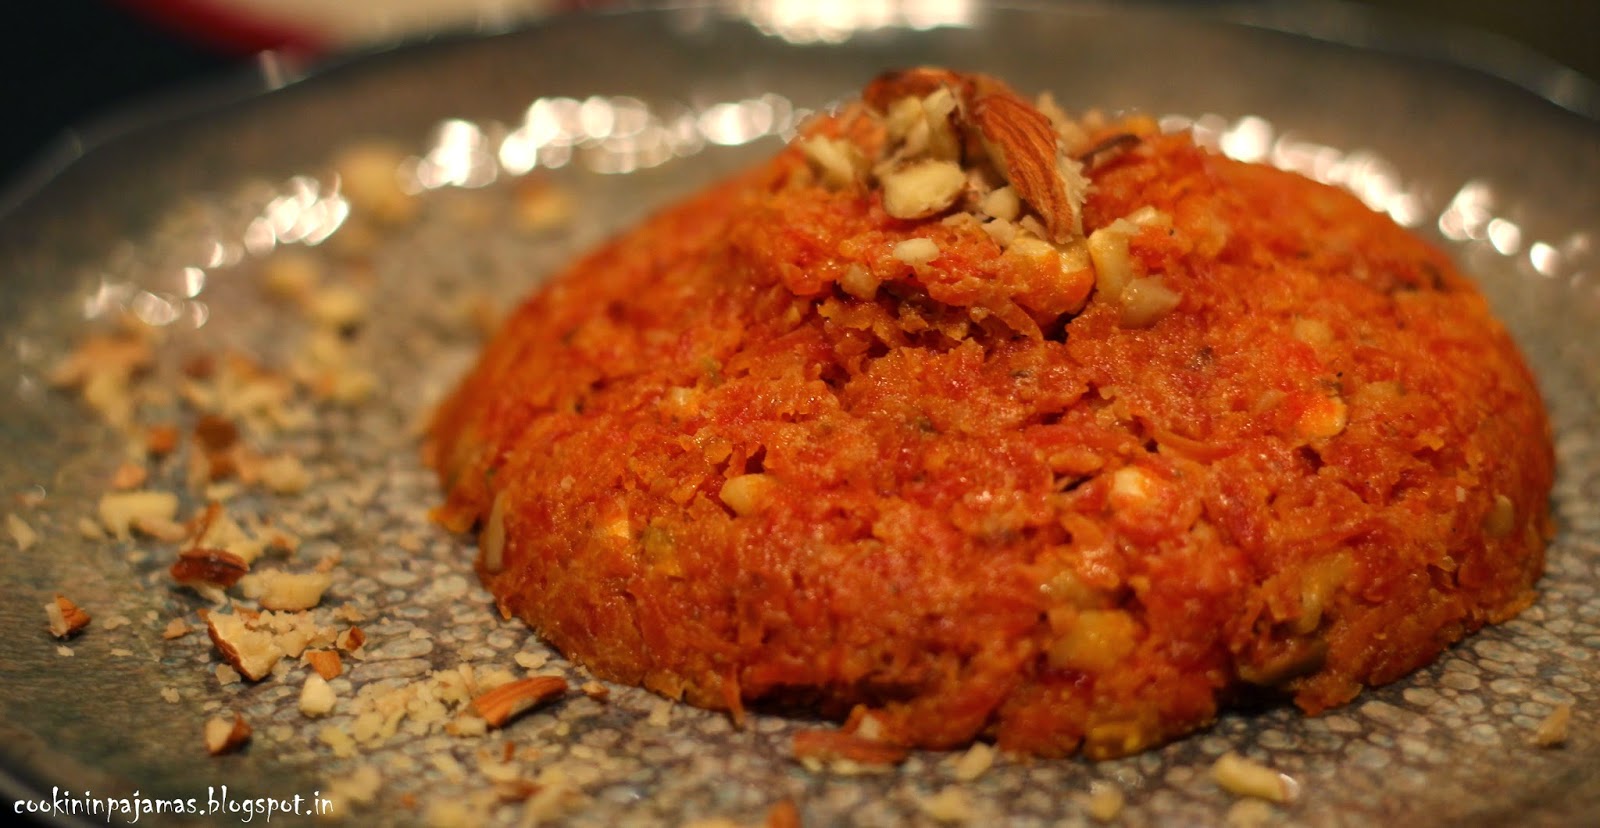
I have already posted the traditional method of making Gajar halwa using khoya before : Gajar ka halwa . This time, i made the recipe using condensed milk (Milkmaid). Not only did it make the halwa quicker, but the thick consistency and texture was perfect! I saw this recipe on a food show on television and decided to try it out, since i wanted to make a quick dessert for guests coming over.

Yes, grating the carrots is no quick thing, and requires tremendous efforts and patience if you are making the halwa in bulk quantity. But one spoonful of the halwa melts in your mouth, and all the efforts seem worth it :) And when better to make it than this season!!! The carrots these days are so red and juicy, that we are eating it as a salad with almost every meal! 


Adding milkmaid already makes the halwa sweet, so there is no need to add extra sugar (we like it a bit less sweet), but if you like it very sweet, then do add more milkmaid or some extra sugar on top. Adding kesar is totally optional, but i somehow love it.

Ingredients:

Carrots - 1/2 kg
Ghee - 3 tbsp
Milkmaid - A little less than 1/2 tin
Cardamom powder - 1/2 tsp
Nuts - Almonds, cashews, raisins - add any of your choice. I crushed almonds and cashews coarsely in a mortar and pestle. Keep some aside to garnish.
Kesar - a few strands
Milk - 1 tbsp


Recipe:

Wash, peel and grate the carrots.

Warm the milk and add the kesar strands to it and keep aside.

Heat ghee in a pan and add the carrots. Saute them till they are cooked. They will change a bit of colour and leave water. Keep stirring in between to avoid burning.

Now add the condensed milk. Stir well and then add the cardamom powder.

Always keep the flame low. Keep stirring to let the halwa cook. You will know it's cooked when it dries up and starts forming a ball.

Check the taste if you need to add more milkmaid or sugar.

Now add the kesar and nuts and mix it all well.

Garnish with some nuts and tastes best when served warm in this season.


You can store it in air-tight container and refrigerate. The halwa stays good for almost a week.

Happy Cooking :)))

Friday, 26 December 2014

Nankhatai

Nankhatai's are basically Indian cookies or shortbreads, majorly made with Maida or All-purpose flour. They are a popular tea-time snack and serve as a nice pop-in-the-mouth sweet when you have those midnight cravings ;) They are made with ghee instead of butter and hence the aroma of these nankhatai's when they are baked is enigmatic. Nankhatai's are found in different flavours/versions and popularly available in local bakeries all over India. 

Here i am posting a recipe of Nankhatai that i saw recently on a blog which was made from Atta (Wheat flour). I decided to try them for Christmas, since i wanted to bake some cookies anyway. And they turned out absolutely great. The addition of rava made the nankhatai's more crispy and i am surely going to make them again with a little additions and twist.


Note: The original recipe calls for 1/2 cup sugar, but i would advise putting a little less than half, as mine turned out a little too sweet with 1/2 cup (For our taste). It is according to personal liking, but at first try making it with a little less than half cup. 

Recipe adapted from : My Cooking Journey


Ingredients:

Wheat flour (Atta) - 3/4 cup
Maida - 1/4 cup
Rava (Sooji) - 2 tbsp
Ghee - 1/2 cup (melted) - Might require more or less
Baking powder - 1/4 tsp
Sugar - 1/2 cup (Please read the 'note' above)
Cardamom powder - 1/2 tsp
Chopped almonds and cashews to garnish (Any nuts of your choice)

Recipe:

Grind the sugar to powder in a mixer/grinder.

Grease a baking tray and keep aside.

In a mixing bowl, take the flours, rava, baking powder, powdered sugar and cardamom powder. Mix it all well.

Now slowly, add the ghee and knead it into a crumbly dough. It shouldn't be too soft or too stiff, hence add ghee little by little and knead.

Keep the dough covered for 10 minutes or wrap in a cling foil and set aside for 10 minutes.

Meanwhile, preheat the oven to 180 degree celcius.

Make small round balls of the dough after 10 minutes (original recipe says 18, but i made 16) and flatten them a little. Line them on the greased baking tray.

Now bake them at 180 degree C for about 15 minutes. (You will come to know it's done when they change colour a bit to brown)

Let them cool (They become stiff and crunchy after they cool)


Now, isn't your home smelling of some real good aroma?

Happy Cooking :))

Thursday, 25 December 2014

Sabudana Khichdi

As much as the health experts say to control eating the 5 white things in kitchen - Sugar, Sabudana, Rice, Salt and Maida - we can't keep ourselves away from any of it ;) Rice is one ingredient that we don't make too often as compared to rotis, but both of us love Sabudana. So, this recipe is a fixed once-a-week breakfast menu on our list. Hubby loves it so much, that whenever (i really mean, whenever) i ask what should i make for breakfast, Sabudana Khichdi is his reply! :)

Well, it tastes best when served warm and is a hassle-free recipe, if you have your things ready, especially the peanut powder. We Maharashtrians normally stock the "Danyacha kut" (Roasted Peanut powder) as we call it, and use it in various curries, sabzis or even chutneys. Danyacha kut is basically a coarse powder of peanuts which are dry roasted and skin removed.


The recipe varies from place to place. Some people add crushed roasted peanuts instead of powder, some add red chilli powder instead of green chillies, some add onions instead of potatoes or both, some don't add sugar but only salt. I make it in different ways each time, just to give a different taste. But this one is the way my mom used to make it and it absolutely tastes delicious!!

The key to make a good khichdi is to soak the sabudana in proper quantity of water. It shouldn't be a lot, as we soak our sprouts in, niether too less that the sabudana doesn't remains raw. Also, we normally leave it to soak overnight, so a minimum of 7-8 hours of soak is good.


Ingredients:

Sabudana - 3/4 cup
Green chillies - 2 (chopped finely)
Boiled potato - 1 (chopped)
Salt - to taste
Sugar - 1/2 tsp (optional)
Peanut powder (Danyacha kut) - Just enough to marinate the sabudana well, so add little by little and see how much is required
Oil - 2 tbsp + ghee 1 tbsp (This is the way to get a great taste out of the khichdi, you can make it in only oil or only ghee, but we prefer mixing both)
Cumin seeds - 1 tsp
Red chilli powder - 1/2 tsp (i added green chilli and red chilli powder both, as we like it little spicy)
Turmeric powder - 1/4 tsp (optional)
Lime juice - on top (optional but gives a nice tangy taste)
Corriander leaves - to garnish (optional)

Recipe:

Wash the sabudana well in cold water 2-3 times and then soak it in water overnight. The water level should be just a little above the sabudana.

Heat oil + ghee in a pan, and add cumin seeds. Once they crackle, add the green chillies and then boiled potato and fry till the potatoes are little golden brown.

Now, marinate the sabudana well with peanut powder, sugar, salt, red chilli powder, and turmeric powder. Add peanut powder little by little, just enough to coat the sabudanas well.

Now add this to the pan and fry well till the sabudana gets cooked. It should take about 4-5 minutes. Make sure to keep stirring, so it doesn't get sticky or stick to the pan.

I normally cook uncovered, that way it doesn't become sticky. 
You will know when it's cooked when it starts changing colour. Also taste for salt and add more if required.

Serve hot and garnish with corriander leaves if you want and put some lemon juice on top.


Isn't it absolutely tempting?

Happy Cooking!!! :)

Wednesday, 24 December 2014

Appe from Readymade Idli Batter

Appe as it is called in Maharashtrian or Konkani language, this is a popular breakfast recipe is South India known as Paddu. They are made of various ingredients - Sometimes with rice, sometimes adding Poha, and at times only with lentils (majorly Urad daal). 

These days, we get readymade Dosa/Idli batter in the market. I have sourced one amazing south indian guy who makes this fresh and sells it near to our home. So, one packet of this in fridge and i can make varied breakfast of idli, dosa, uttapas and at times Appe. My aunt gifted me this special "Appe Tava" that is required to make these. It is a non-stick tava, so naturally makes for a healthy breakfast with less oil. You can make it with no oil too, but i prefer brushing a little oil, just to get a nice brown colour and also to make sure the batter doesn't stick to the tava (as the batter varies from place to place).


Ingredients:

Idli batter - as required 
French beans - a few (chopped finely)
Onions - Half for about 1/4 kg batter (chopped finely)
Turmeric powder - 1/4 tsp
Salt - to taste
Water - little
Corriander leaves - 1/2 cup chopped
Oil - to brush the tava

You can also add pepper for a different taste and replace/add vegetables of your choice like cauliflower, carrots or even peas.

Recipe:

In the appe tava, brush little oil and place it on the stove.

Mix turmeric powder, salt, beans, onions, corriander leaves with the dosa batter and add little water if the batter is too thick. Don't make it too thin like a dosa batter. It should just have the consistency to pour easily.

Once the tava is hot, put small amounts in each mould (about a spoonful), cover the tava with a lid and let it steam-cook till the outer sides become brown. 

Now turn over the appe's, so the other side is cooked. This time don't cover the tava.

Serve hot along with coconut chutney or tastes great with any chutney :)

Happy Cooking!!! :)

Tuesday, 23 December 2014

Peanut butter squares

It's always my worry on a weekday night, of what different breakfast to pack in tiffin for hubby the next morning. I guess each of the ladies with kids or working husbands would have this worry before going off to bed. Not only different, but something that can be made quick and is easy, yet, healthy and tasty. Now to get all these adjectives in one recipe is really a task. There are times when i make the ever-green poha, Upma , Bread poha or Sabudana Khichdi. And at times when i am extremely sleepy or bred, i would even pack away a simple bread-butter toast or a cheese and tomato sandwich. But there are times, when i have time at hand, and i am all excited to make something new. So, those are the times, i make recipes such as today's post.


Peanut squares are basically peanut butter sandwiches with a twist. You can just apply the peanut butter on bread and eat it like that, (I love it this way!!!), or toast the bread and apply the peanut butter or make it this way. I also added mayonnaise in a few bread pieces to make it interesting and believe me, this makes for an awesome breakfast recipe. A little sweet but absolutely delicious!!!


Ingredients:

Bread slices - 4
Peanut butter - to apply on the bread (as per needed or by choice) - Can be replaced with Mayonnaise.
Egg - 1
Cream (I used Amul fresh cream, but you can use homemade cream or even skip this) - 1 tbsp
Milk - 2 tbsp
Sugar - 1 tsp
Butter - 1-2 tbsp to toast the bread


Note: If you don't want a sweeter taste, skip the sugar and add salt. Or add little of both for a neutral taste.


Recipe:

Apply peanut butter on the bread slices. I have kept the sides of the bread, so it gives a crispy feel after toasting. But you can cut the sides, if you don't like them.

In a bowl, break the egg and whisk it. Now add milk, cream, and sugar (or salt) and whisk it all well.

In a pan, heat butter.
Keep one slice of bread on top of the other and dip in in the egg mixture and immediately put it on the heated pan. Let it toast till brown and crispy. Now flip it to the other side and toast till brown.

Remove it and cut the bread into squares.

Have it with a warm cuppa milk or chai. Some great winter mornings are like this: 


Happy Cooking!! :)

Monday, 22 December 2014

Winter special : Tomato soup

Before i start writing about today's recipe, i wanted to share a very funny photograph that i clicked recently at one of the wholesale markets selling masalas and spices. People do make spelling errors always, and some of them are so funny that they are worth capturing :) Here is one example:


Meet the "Meet" Masala :)

Well coming back to the post, Soups are easy to make, soups are healthy, soups are appetizing! Well...errr...No...At least that doesn't hold true with me and hubby. Infact, we feel soup almost fills you up and since we both like to eat something "solid" always, most of the time we skip having soup when we go out. Even at home, i would make a soup very rarely. But since winters are here, feels nice to dig into that warm bowl and hence i made a simple tomato soup along with Matar Bhaat (i will post that recipe next). Tomato soup, Matar rice and papad is how my hubby has been eating it all these years. I don't really know if it's a Vidarban way of eating, but it surely tastes awesome.


Everyone knows the recipe of a tomato soup. Yes, it's the most easy and most common soup. But i wanted to post the recipe, just because it came out very well and this time, i had cream at hand. So, the soup tasted even better :) Tomato soups taste different at different places. Sweet, sour, tangy, creamy, the variations are immense. You can make it thick or make it to a thinner consistency. The taste also varies according to how the tomato is - Red, ripe, soft, raw, fresh, yellowish etc. 

Recipe adapted from : Dassana 


Ingredients:

Tomatoes - (Preferably red and ripe) 4
Butter - 1 tbsp
Onion - 1 small (chopped)
Garlic - 3 (crush to a paste in mortar and pestle)
Cream - to garnish
Salt- to taste
Pepper - to taste
Maida - 1 tbsp (optional)
Water - 1 1/4 cup or as required according to choice to maintain consistency


Recipe:

Boil enough water in a pan, that the tomatoes get completely immersed in water. Once the water comes to boil, add tomatoes, let it boil for another 2 minutes and then put lid. Close off the gas and let it stand for 15-20 minutes.

After 20 minutes, you will see the skin of the tomatoes peeling off naturally. Take out the skin.

Now make a puree of the tomatoes. Heat butter in a pan, add garlic. Once they turn brown, add onions. Fry them well.
Now add the tomato puree. Let it come to a boil and then add the maida. It will become a thick puree. Now add water as the consistency required and let it simmer for a while.

Mix in salt and pepper according to taste. Garnish with cream or butter as per liking.

Note: You can also add a bay leaf to the butter (just to enhance the taste)

If you have bread croutons or soup sticks, nothing like it. 


Enjoy this warm easy soup anytime in winters :)

Happy Cooking! :)


Wednesday, 3 December 2014

Chicken Curry

People always say that it becomes difficult when you marry a person with different food habits. Just as, i am a vegetarian (egg-etarian) and my husband is a non-vegetarian. Well, i guess it doesn't remain an "issue" when you take food as food (and don't really categorize it), and respect what the other person likes or dislikes. Like our day-today meals are vegetarian, but i make sure i make one non-vegetarian dish on weekend, just to satisfy hubby's cravings. At times, when we go out, i insist that he eats chicken or meat and i love it when he enjoys it. So, we maintain a balance of our habits and things become simpler.

Last weekend, i made Chicken curry. I don't really like to give names to a curry as the basic ingredients are always the same - onions, tomatoes, garlic, and ginger. What differs is the spices (masalas) that you add. It brings out a different taste and flavour to the onion-tomato paste. The last time, i had posted Kaala Masala Chicken curry recipe, this time i kept it quite simple and didn't add any special masalas but the regular kitchen masalas that we have. Guess keeping minimalistic is always the key ;)


Ingredients:

Chicken pieces - 250 gms
Onions - 3 medium
Tomatoes - 2 medium
Garlic - 8-10 pieces
Ginger - 1/2 inch piece
Red chillies - 2 (optional). 
Salt - to taste
Oil - 3 tbsp
Red chilli powder - 1 tsp
Turmeric powder - 1/2 tsp
Corriander powder - 2 tsp
Garam masala - 1 tsp
Water - as required
Asafoetida - a pinch

To marinate :
Ginger garlic paste - 1/2 tsp
Lemon juice - 1 tsp
salt - a pinch

Recipe:

Wash the chicken pieces and marinate it with ginger garlic paste, lemon juice and salt and keep aside for an hour. You can cover it with a cling foil and refrigerate or just keep it aside till you make your masalas.

Roughly chop the onions and heat little oil on tava and fry the onions till they turn golden brown. Make sure the onions don't burn.

In a mortal and pestle, crush the ginger and garlic together.

Burn the whole tomatoes directly on flame (As we burn brinjal while making Baingan Bharta). This way, the tomatoes get a burnt/smoked flavour. Remove the skin if it has already come out, or use it as it is. Chop the tomatoes roughly when cooled.

Let the onions cool down and make a paste of it in mixer grinder (Add little water only if needed, or else avoid).

In a kadhai, heat 3 tbsp oil, add the red chillies and asafoetida. Now add the onion paste and fry till it becomes more brown. 

Meanwhile, make a paste of tomatoes in mixer-grinder. The paste should be smooth.

Now, add the crushed ginger-garlic to the onions and fry for about a minute.

Then add the tomato paste and mix well.

Now add the red chilli powder, turmeric powder, corriander powder and some salt. Mix it all well and keep frying the masala till oil starts leaving the sides (takes about 20-25 minutes). Keep adding water little by little (from the sides, and not in the middle) when the masala starts to thicken and become sticky. 
Don't add a lot of water at a time, as the masala would lose the colour and look.

Now add the chicken pieces, and mix well so that the pieces are quoted well with the masala.

Cover and cook for about 5 minutes. Now, add garam masala and adjust salt.

Add water to the desired consistency (from the sides) and cook uncovered till the chicken is done.

I served it alongwith Bhaakri (the traditional Maharashtrian bread), but it can be eaten with chapati/paratha or even rice as per your choice.


Enjoy this simple chicken curry :)

Happy Cooking :)