Showing posts with label Maharashtra cuisine. Show all posts

Thursday, 25 June 2015

Kataachi Amti

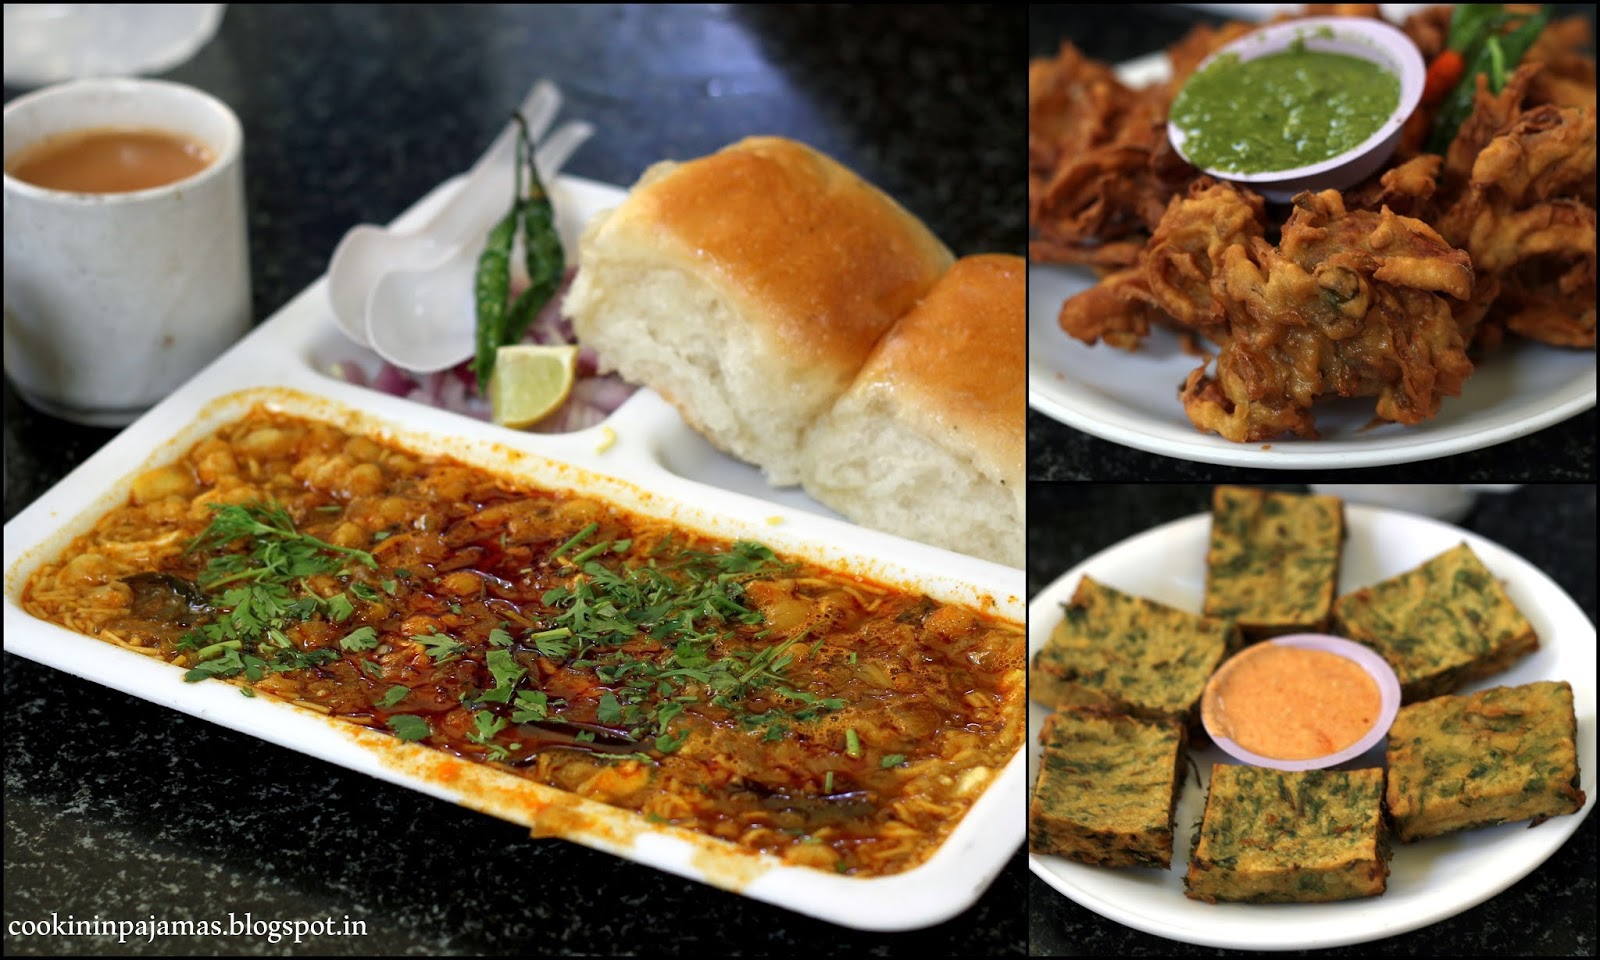
"Such awesome climate", "Such a romantic weather", "It's raining", "It's cloudy", "Oh, there are cold winds" , "All i need is kandaa bhaji, bhutta and chai" or "A cup of coffee and a book"!! Yes people! It's Monsoon!!! The season has arrived. A lot of people hate this season for the mud, dirt and traffic jams. Yes, for the restaurants, events and fashionistas, rains surely play a spoilsport. But there are people like us, who love to get wet, get the clothes dirty and hands muddy. There is a different form of energy and newness everywhere in the season. Maybe because rains give a life. A life to a plant to form a tree. A life to a seed to grow into a fruit or a flower. Rains, i feel, connects us back to our roots.

Happy Monsoon!!!

There is a very beautiful article i came across recently which talks about "Dirt not being dirty". I could completely relate to the writer and am of the opinion that throwing ourselves in mother nature only develops our immune system and makes us strong. So, we should come out of the fears of "You will catch cold if you get wet in the rain", "Wash hands or change clothes as soon as you get them dirty" or " Use sanitizer even for popping a chocolate in the mouth". In fact we should be friends with the germs, so they can help us survive in any possible conditions. Read this article here . So all i can say is Let go... get dirty... be free... Just like them :))


Talking about connecting to the roots, there are some things, incidents, or words that bring the memoirs of our roots and instantly connects with us. Food does so too. Even though we are living in the fast food era of pav bhajis and pizza's, there are some dishes that connect us back to our roots. I am not only talking about the ancestral recipes here but regional dishes too. Like a simple daal has so many names and versions of dhal, curry, bele, paripu, varan or amti. The recipe i am posting today connects me to my roots. Its a typical Maharashtrian delicacy served with Puran poli. I have only made Puran poli twice and fortunately they have come out well! It is said that Puran poli is most difficult to make, and the one who is able to make it successfully is called a "Sugran" (a competent housewife). 


Puran poli and kataachi amti is a terrific sweet-spicy-tangy combination. This amti is made from the reserved water after boiling and draining the chana daal when making puran. Usually it is made in the same pan, and a little cooked daal (gram) is added for the taste but by nature, this amti is very thin like a soup consistency.


Ingredients:

Leftover water after pressure cooking 1 cup of chana daal ( bengal gram ) in about 2 and half cups of water for 3-4 whistles.
Cooked bengal gram - 4-5 tbsp
Cumin seeds - 1/2 tsp
Tamarind pulp - 1 n half tbsp
Chilli powder - 1/2 tsp
Goda masala - 1/2 - 3/4 tsp
Grated jaggery - 2 tsp
Salt - to taste
Coconut - 2-3 tbsp (Tastes great with fresh grated coconut but i didn't have it handy, so used dry coconut (kopra))
Oil - 1 tbsp
Cinnamon stick - 2 small
Cloves - 2-3
Bay leaf - 1
Curry leaves - 5-6


Recipe:


The leftover water after cooking the chana daal would come around 1 and half to 2 cups. Add about 2 cups of water to it and keep aside.

Try making the amti in the same pan in which puran is made. If not, use a fresh pan/kadhai. 

Scrape the puran from the sides and bottom of the pan and mix it with the gram water kept aside.

Note: I had forgotten to keep 4-5 tbsp of chana daal aside for the amti. So i boiled it again in another bowl. But you can keep some aside before making the puran.

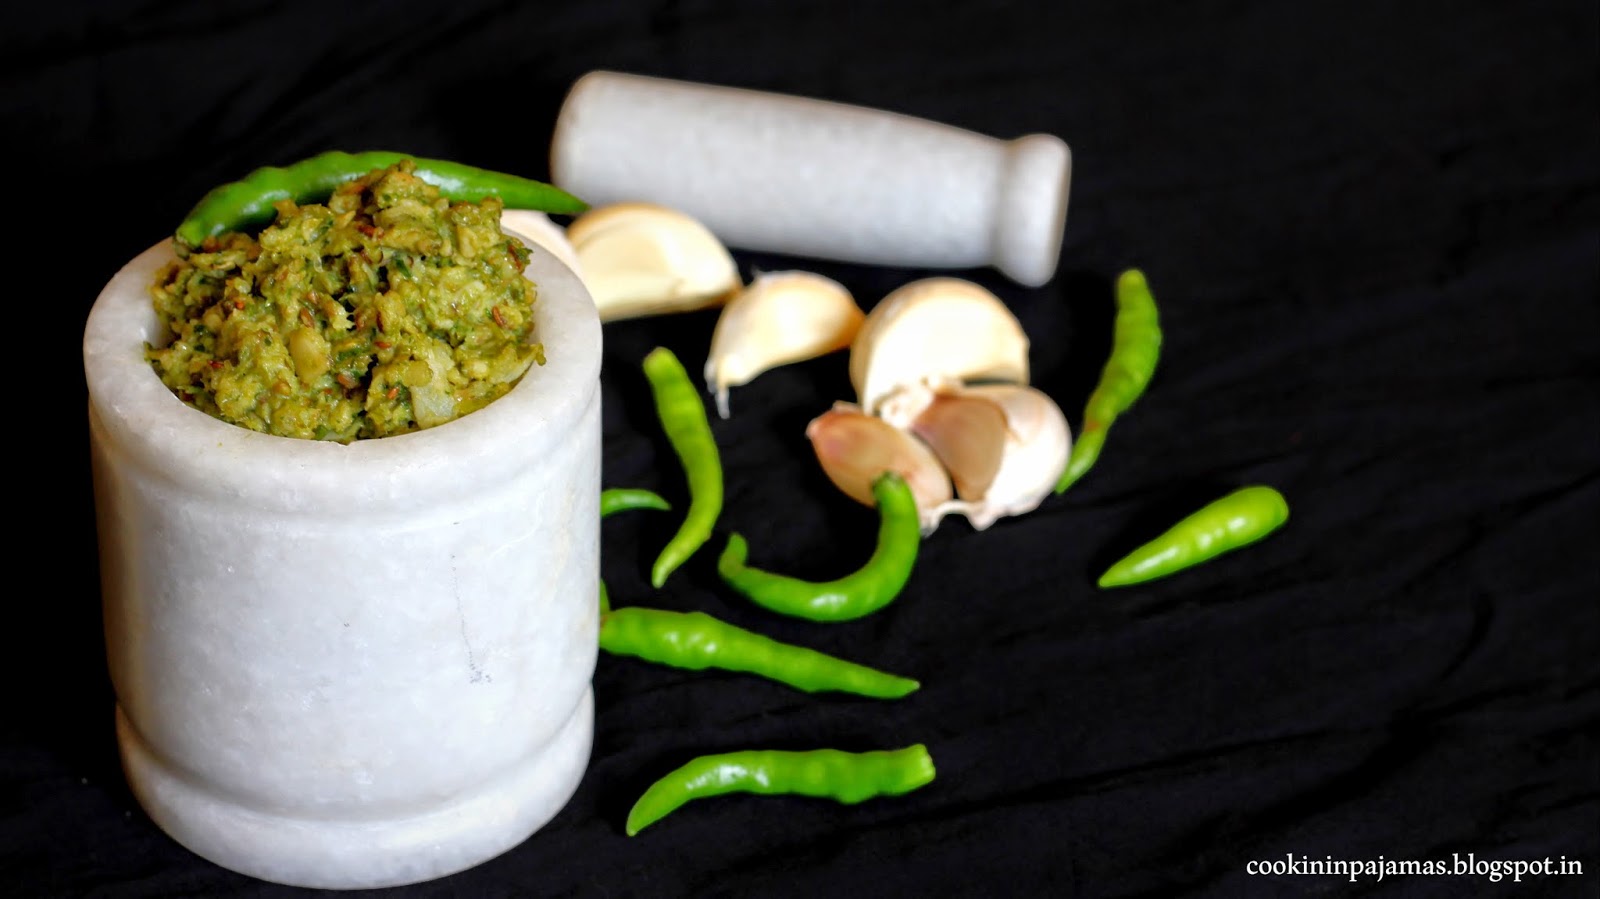
Dry roast the coconut and cumin till golden brown and grind it together into a powder.

Heat oil in a kadhai. Add bay leaf, cinnamon and cloves. When it starts leaving aroma, add in curry leaves. Now add about 1 cup of the gram water to it. It will splutter, so make sure the flame is low. Add in the tamarind pulp.

Stir and bring to a boil. Now add salt, chilli powder, goda masala and simmer for about 5 minutes. Add the jaggery (can also be replaced with salt), and the remaining gram water.


Let it simmer for about 5 minutes. Add the coconut-cumin powder and mix well.( If adding fresh coconut, add cumin seeds in the tadka and coconut in the end as garnish )

Tastes best when served either hot or cold with puran poli or steamed rice.

NOTE: If you are not making Puran or Puran Poli and just want to make Kataachi amti, then you can pressure cook or boil some chana daal on stove top for approx. 40 minutes till the daal is tender. Drain and use the water for kataachi amti and use the chana daal to make something else.


Happy Cooking :)


Thursday, 25 December 2014

Sabudana Khichdi

As much as the health experts say to control eating the 5 white things in kitchen - Sugar, Sabudana, Rice, Salt and Maida - we can't keep ourselves away from any of it ;) Rice is one ingredient that we don't make too often as compared to rotis, but both of us love Sabudana. So, this recipe is a fixed once-a-week breakfast menu on our list. Hubby loves it so much, that whenever (i really mean, whenever) i ask what should i make for breakfast, Sabudana Khichdi is his reply! :)

Well, it tastes best when served warm and is a hassle-free recipe, if you have your things ready, especially the peanut powder. We Maharashtrians normally stock the "Danyacha kut" (Roasted Peanut powder) as we call it, and use it in various curries, sabzis or even chutneys. Danyacha kut is basically a coarse powder of peanuts which are dry roasted and skin removed.


The recipe varies from place to place. Some people add crushed roasted peanuts instead of powder, some add red chilli powder instead of green chillies, some add onions instead of potatoes or both, some don't add sugar but only salt. I make it in different ways each time, just to give a different taste. But this one is the way my mom used to make it and it absolutely tastes delicious!!

The key to make a good khichdi is to soak the sabudana in proper quantity of water. It shouldn't be a lot, as we soak our sprouts in, niether too less that the sabudana doesn't remains raw. Also, we normally leave it to soak overnight, so a minimum of 7-8 hours of soak is good.


Ingredients:

Sabudana - 3/4 cup
Green chillies - 2 (chopped finely)
Boiled potato - 1 (chopped)
Salt - to taste
Sugar - 1/2 tsp (optional)
Peanut powder (Danyacha kut) - Just enough to marinate the sabudana well, so add little by little and see how much is required
Oil - 2 tbsp + ghee 1 tbsp (This is the way to get a great taste out of the khichdi, you can make it in only oil or only ghee, but we prefer mixing both)
Cumin seeds - 1 tsp
Red chilli powder - 1/2 tsp (i added green chilli and red chilli powder both, as we like it little spicy)
Turmeric powder - 1/4 tsp (optional)
Lime juice - on top (optional but gives a nice tangy taste)
Corriander leaves - to garnish (optional)

Recipe:

Wash the sabudana well in cold water 2-3 times and then soak it in water overnight. The water level should be just a little above the sabudana.

Heat oil + ghee in a pan, and add cumin seeds. Once they crackle, add the green chillies and then boiled potato and fry till the potatoes are little golden brown.

Now, marinate the sabudana well with peanut powder, sugar, salt, red chilli powder, and turmeric powder. Add peanut powder little by little, just enough to coat the sabudanas well.

Now add this to the pan and fry well till the sabudana gets cooked. It should take about 4-5 minutes. Make sure to keep stirring, so it doesn't get sticky or stick to the pan.

I normally cook uncovered, that way it doesn't become sticky. 
You will know when it's cooked when it starts changing colour. Also taste for salt and add more if required.

Serve hot and garnish with corriander leaves if you want and put some lemon juice on top.


Isn't it absolutely tempting?

Happy Cooking!!! :)

Tuesday, 2 September 2014

Bharli vaangi : Stuffed Brinjals

I wanted to post this recipe since a long time,it being one of my favourite dish. I never really used to like brinjals so much in childhood, but as i grew up, my taste buds became adventurous and i experimented a lot with food. Has it happened to you all that you didn't like any particular ingredient or dish as a child, and now you love it?

The famous two dishes of the vegetable in India are Bharta (Bharit as we call it in Marathi) and Bharli Vaangi (Bharwan Baingan or stuffed brinjals). Although majority of the brinjals are purple, there are also the green or white variety. Also known as aubergine or eggplant, brinjal is the common word in India. Having immense health benefits, the major one (and the one i should mention here for all my beautiful ladies reading this blog) is brinjal helps skin look younger as it has a good amount of antioxidants and vitamins. So there is no reason not to eat this vegetable right?

There are different methods of making Bharli vaangi... some stuff the masala inside the brinjals and saute it or even roast it. Some saute the masala and then stuff into brinjals and cook it covered. Some make the curry, and add roasted/cooked brinjals to it, but the one my mother makes is a little different. I like her version a lot, though at times i myself make the dry version too to give it in tiffin to hubby. But whenever i go home, i "demand" my mom to make this dish her way. And she makes it lip smacking!!!


So, the last time i visited her, i took some pics of the dish she had made ( took them in a hurry, as i was so hungry and slurrping that i didn't have the patience to click pics with the DSLR). So these pics are clicked with my I-phone and hence sorry for the image quality :) But guess you can make out, how tempting the curry is :)

Ingredients:

Brinjals - 8 medium sized ( my mother here has used green variety, but the purple variety tastes great too )

Red chilli powder - 1 tbsp ( adjust to taste )

Goda masala - 2 tsp

Salt - to taste

Onions - 4 

Garlic - 4-5 pods

Oil - 2-3 tbsp

Corriander leaves - to garnish

Cumin seeds -1/2 tsp

Turmeric powder - 1/2 tsp

Mustard seeds - 1/4 tsp

Asafoetida - a pinch

Peanut powder - 2 tbsp

Recipe:

Wash the brinjals thoroughly. Now remove the stem and cut slit the brinjal keeping the other end intact ( cut both horizontally and vertically).

Take some water in a bowl, add about 1/4 tsp salt to it. Now put the cut brinjals into water and keep aside.

Grate the onion ( Yes, that's her secret!!! ). Takes time and you might end up with loads of sneezes and tears, but trust me it's totally worth it !!! The grated onions give a nice thickness to the gravy.

Chop the garlic finely or you can even crush it.

Take oil in a kadhai/pan. This sabzi requires a little more oil, as it gives good taste and "tari" (a layer of oil) on top. Let the oil really heat up well.

Add mustard seeds, when they crackle, add asafoetida and cumin seeds. Now add the crushed/chopped garlic. Saute for about 30 seconds and immediately add the grated onions.

Saute for about a minute ( don't burn it ) on low flame and then add the turmeric powder,salt and red chilli powder. Mix it all well and let it cook till it starts leaving oil. 

Now add the cut brinjals and mix it, so that the brinjals coat with the masala. After about 1-2 minutes, add enough water so that the brinjals are immersed in it. Let it come to a boil on high flame, and then reduce to flame to low. 

Cook till brinjals are done. Now add the goda masala and peanut powder. Mix it well and add little more water (according to the consistency of the gravy needed). Adjust salt, and garnish with corriander leaves.


Traditionally we serve it with Bhaakri (roti made of jowar, bajra or rice powder), but it tastes great even with normal chapati or paratha.

Happy Cooking :)


Friday, 8 August 2014

A lion roars on Sinhagad

I had written this post long back but had not sorted the photographs, and hence the delay in posting. Past few days i was down with viral and didn't have an inch of energy to even login and check emails, less sorting the photos. So here i am continuing my post from our Mumbai-Pune food trip ! On the 3rd day of our trip, we headed to my in-laws place at Pune and here are some interesting experiences in Pune that i would love to share with you guys! 


The Mumbai-Pune Expressway drive is any rider's delight and eating the traditional cuisine on the way at food mall is our routine. So here's what we tasted on-the-go :)


Misal-pav, Kanda bhaji and Kothimbir vadi
Pune is a city full of history and culture. With forts, parks, and home to the most famous Lord Ganesh (Dagdusheth), Pune attracts tremendous tourists from all over world. Located on the bank of Mutha river, Pune was the first capital of the Maratha Empire under Chhatrapati Shivaji Raje Bhosale. Now known as the IT hub and a city with lots of educational institutes, Pune resides a lot of migrants as students and working people. And though there is a lot of international cuisine popular in Pune nowadays, the traditional flavours of Pithla Bhakri, Misal pav, Puran poli and Bhelpuri is unbeatable. 


A special mention here about the Landslide that occured about 104 kms ahead of Pune in the village of Malin that killed about 136 people. Prayers to those who lost life and much more... Read More.... The landslide is said to have occured due to increased activities by humans for farming and road constructions. More and more cutting of trees, and building of concrete is inviting disasters all over, and i wonder when people will understand the importance of planting trees.

Source : Google images

Well, coming back to the post...During our stay at Pune, my father-in-law suggested we visit "Sinhagad Fort". I had some vague memories of visiting this fort as a kid during one of our family outings, and so the idea of visiting it again got me and hubby thrilled. We had time at hand, the sun-God favoured us that day and it was such a pleasant lovely climate. To top it all my father in law mentioned that the traditional "tapris" of pithla Bhakri and matka dahi is still available on top. Now that made me jump in the car straight away ! Food really gets me going :)


The journey was as exciting, with roads of twists and turns driving up-hill (and to be honest, at a point or two, the turns were so sharp that it got my adrenaline high, but the drive was enjoyable and we safely managed it through)


Since we went on an odd-day, there was no rush. My father in law mentioned that on weekends, and especially in rainy season, the place gets so crowded that people have to park their vehicles halfway and climb the rest on foot. And special mention here for my father in law, who at the age of 65, often takes his bike uphill with a friend to enjoy some traditional pune delicacies. He is full of energy and enthusiasm and would give a complex to youngsters anyday :)


My Father-in-law posing

So we reached, and were greeted "Namaskar" by the man selling shelled peanuts and raw mangoes, just at the entrance where one has to start climbing about 300 odd steps. There is something so simplistic about the people we met there, that the honesty and humbleness shows on their face. Their faces have stories to tell and they are keen to help you, come what may. Yes, there are people who would have vested interest of you buying stuff from them, like a pot of curd for INR20 or a slice of cucumber for INR10. But when you hear the efforts they take to get all the ingredients right on top, you don't mind paying them their due share.


Sinhagad is a popular destination for trekking enthusiasts who climb the hill from the base village of Sinhagad. But since we had 2 elders (my father in law and my mom) with us, we took the car half way (yes, the roads are pretty good) and from there, we had no choice but to climb up the steps. Sinhagad falls on the Bhuleshwar range of Sahyadri Mountains of Maharashtra and was previously called Kondhana. The caves and carvings in the Kaundinyeswar temple gives the proof that this fort was built about 2,000 years ago and named after the sage Kaundinya.


The Battle of 1670: Though Sinhagad saw many battles, the most famous was the one fought by the general of Shivaji Maharaj named Tanaji Malusare. He and his troops climbed the fort with the help of Ghorpad (common Indian monitor lizards), to whom they tied ropes and sent crawling up to the ramparts. Fierce battle occured between UdayBhan and Tanaji in which Tanaji lost his life but won the fort. A bust of Tanaji is commemorated atop as a memorial.


The name: On hearing about Tanaji's death, Shivaji raje said, "Gad aala pan sinha gela" meaning to say, "we won the fort, but lost the lion" and so the name fell as Sinhagad (fort of a lion) from Kondhana.


We reached atop enjoying the small stalls on the trail selling titbits to keep you going. Before starting to explore the fort, we couldn't help but eat a plate of "Kanda Bhaji". Also known as "Khekda bhaji " (Khekda- crab, since they look like one), this deep fried fritters are served along with some really hot and spicy chutney. But enjoying these hot bhajis with some cool breeze and a view of the valley from top, you feel you are in heaven! 


Khekda Bhaji
We finished with a pot of the special "Matka dahi" (pot-curd) from one of the well known mingling female there "Chorge Mausi". She followed us all the way from the foot of the hill to the top, serving also as our guide, so we take the curd-pots from her :). We got a free guide and some delicious curd which we were anyway going to buy. But jokes apart, she seemed one genuine lady who works hard to earn her daily living. She gets these curd-pots from her home, Kalyan village seen from the Kalyan Darwaza of the fort.


Chorge Mausi and the famous curd-pots
Then we started our tourist exploration and saw some breath-taking views from the top. The wind-point being my favourite, it was so breezy that we had to hold each other to stand straight. 


There is a memorial of Rajaram (Shivaji's youngest son), Kondhaneshwar temple, Kali temple, military stables (as the fort is part of training at National Defence Academy, Khadakvasla) and two gates Pune Darwaza and Kalyan Darwaza.


And by the time we finished seeing all this, we were famished. Oh, not to forget, we had a canine friend guide with us throughout our journey. And another one joined too. She was too docile and sweet and we had to give her buiscuits :) 


So we sat down below a huge tree on a "chatai" (Mat) and ordered the ever-famous Pithla-Bhakri. Pithla is basically chickpea flour cooked in water along with onions and other spices. Bhakri is a roti made with jowar or bajra, or sometimes with rice flour. We also ordered a plate of Baingan Bharta for change of taste but didn't quite like the taste as compared to the Pithla.
Served along with onions and red chutney, this combination is a hit and one specially must visit the fort to eat it. 


The cooking method is still traditional, and the taste is as authentic or it just tastes better with the view and the natural ambiance. Whatever it is, we had fun looking at the lady making Bhakris pressing with her hands in her little tapri that even had a "chul" (traditional stovetop where cooking is done burning wood and coal). 


With our stomachs full, we finished the meal along with some more pot-curd from Chorge Mausi and started walking back towards our car. And there we saw the Kulfi wala! Remember I had mentioned about him in my post of Mango Kulfi!! So how could we not taste one of these? And the taste was just the same that took me back to my childhood days, and yes, this malai kulfi was for INR20 :) But all worth it!


Thus ended our adventurous trip to the fort, and by the time we went home, it was already siesta-time for us and all others :))


Monday, 9 June 2014

Paatvadya : Microwave recipe

Besan squares : Paatvadya are basically small vadis ( squares like a patty ) which make a great tea-time snack. I remember my mother giving me these vadis in tiffin for breakfast as kids. They are a much healthy option than to snack in chips or any fried items and well, they taste delicious. The traditional way of cooking paatvadi is on stovetop, but recently i saw a post from my friend Prabha Iyer on her blog ( http://prabhacooks.blogspot.in/2014/06/microwave-khandvi.html ) of making khandvi in microwave. I have made paatvadis the traditional way earlier (i shall upload that recipe too sometime soon when i make them after these finish ), but decided to try the same recipe of khandvi for paatvadis. And believe me, as experimental as it may sound, they have turned out super flavourful with a hint of tanginess ( due to the curd added ).


These vadis can be eaten along with any spicy chutney  or some even make a daal out of it ( Paatvadi-amti as we say in Marathi ). Well, for this time,  as pleasant as they are looking, i would want to eat them as it is. You can add red chilli powder to the paste while putting the mixture in microwave. I was not sure of the spiciness of the chilli paste, hence i didn't add it to the mixture but sprinkled red chilli powder on top. Another important ingredient of Paatvadi is grated dried or fresh coconut. I didn't have it handy, but you can sprinkle it on top if you have it fresh or dry roast it and add to the mixture before putting it in microwave.


Ingredients :

Besan( Gram flour ) - 1 n half cup
Curd - 1 n half cup
Corriander leaves - to sprinkle
Oil - 2 tbsp
Turmeric powder - 1/2 tsp
Mustard seeds - 1 tbsp
red chilli powder - to sprinkle ( if adding to the mixture, add about 1 tsp )
Garlic-green chilli paste- I used about 2 tsp of thecha( http://cookininpajamas.blogspot.in/2014/06/kharda-mirchicha-thecha.html ) that i had.
Asafoetida - a pinch
Salt - to taste
Oil - to grease a plate

Recipe :

Sift Besan and remove all lumps.
Beat the curd, so that no lumps remain. Add about 1 cup of water to it and mix well.

In a microwave safe bowl, add this curd mixture, besan , asafoetida, turmeric powder and salt. Mix it all well.

Microwave on high for 5 minutes. Stir the mixture well twice after every 1 n half minute.

After 5 minutes, remove from microwave, and add about 1/2-1 cup of water and mix it well and make a smooth paste.

Microwave again on high for 5 minutes.

Grease a plate with oil. You can sprinkle some corriander leaves and grated/shredded coconut if you have. Now put the mixture in the plate and with a spatula or a flat spoon, spread it evenly.

Let it cool and cut them in squares.

Heat about 2 tbsp oil and add 1 tbsp mustard seeds. When they splutter, add this tempering on top of the cut-squares. Sprinkle some corriander leaves on top. Since i didn't add chilli powder to the mixture, i sprinkled some on top.

Yummy easy snack is ready :)

Happy Cooking :)


Saturday, 7 June 2014

Kharda : Mirchicha Thecha

I haven't posted a lot lately as i had some crazy-busy weeks. Honestly, i had not cooked anything special to write about, apart from the regular sabzi-roti or daal-chawal. One for the fact, that i was too busy to cook anything special, yes... the 4 legged canine angels ( from my pet sitting appointments ) were keeping me busy. Since it's a vacation time, a lot of people going on holidays, my hands and my home was full. And believe me, nothing gets better than spending time with these cute bundles of joy. The walks, the play, the treat times everything keeps you on toes, but it's all worth it.
Here's a recent pic of mine, just to show you all how happy i have been.


But yes, i missed my kitchen and i missed my blog. It always was on the back of my mind to write something, but another reason took it's toll. Laziness!!! Yes, it's so super hot in Delhi that it really gets tough to stand long in the kitchen and cook something special. Managing the temperature for cooking becomes a difficult task, with everything going in the refrigerator every now and then. The fruits and vegetables rot, the chocolates melt, the cooked food becomes stale soon, and i hate to waste food. As the temperature rose to 44 degrees, all i wanted to do was drink water/fluids/juices/aam panna ( http://cookininpajamas.blogspot.in/2014/05/kairiche-panhe-aam-panna.html )
rather than eat. A light diet seems just enough than a whole cooked meal.

Now that i have some free time for couple of days with just one dog, i decided to get right in the kitchen and get going. Kharda is one of the Maharashtrian chutneys that you can enjoy alongside a daal-chawal or a paratha or traditionally we eat it with Bhaakri ( jowar/bajre ki roti ). Just yesterday i had made Vaangyacha Bharit ( Baingan Bharta ) and rotis and had it with Kharda. Also known as Thecha or Hirvya Mirchicha Thecha, this basically has two main ingredients of green chillies and garlic. 
You can even make it in bulk, store in refrigerator and add to any daal or sabzi , just to give a dish that "zing" of taste. Easy to make, it gets ready within minutes and for those who love things spicy, this is definitely worth a try.


Kharda is again a regional dish. Some make it roasting chillies in oil, some dry roast it, some add peanut powder, some make it without. Adding corriander leaves is optional too. It all depends on personal taste. I make all versions every now and then. This one is with peanut powder and corriander leaves.

Ingredients :

Green chillies - Around 30-35 
Garlic - 8-10 ( This time i had a different variety of garlic which had big chunks, if you have the normal variety take about 15 pieces )
Cumin seeds ( jeera ) - 1 tsp
Oil - 1 tsp
Corriander leaves - a few
Lemon juice - 1 tsp ( adjust to taste )
Black salt - to taste ( You can also use normal salt, but black salt adds to the taste)


Recipe :

Wash the green chillies, pat them dry and cut both the ends.

In a kadhai, put 1 tsp oil and fry the green chillies till they start getting brown spots. Frying chillies is a really tough task and the vapours get inside your nose and eyes, resulting in coughing, sneezing and running nose. So make sure to switch on your exhaust fan while doing this or keep the window/door of the kitchen open to let the vapour out.

Add the cumin seeds and fry for half a minute.

Now add the garlic and fry for about 5 minutes till the garlic gets properly sauteed and starts browning.

Let it cool and transfer it into a mixer jar. Throw in some corriander leaves, black salt and lime juice. mix it all well and grind to a coarse paste ( not too smooth and do not add water ).

Traditionally, the mixture is well grinned in a mortar and pestle. But since i don't have one here, i grind it in a mixer.

Now, would you like this "Death by chillies" ? ( Name derived from the famous sauce by Blair : Pure Death and After Death )

Happy Cooking :)


Tuesday, 20 May 2014

Methamba : One tangy relish !

Summers are associated with vacations from schools and colleges, holidays to hill stations, lots of play, visiting cousins and having ice-cold water right from the refrigerator! Yes, it has it's own fun! But for me ( and well, a lot more others, i am sure ) Summers meant ( and still does ) Mangoes!!! From the day mangoes would arrive in market, my mother used to convert the kitchen into a "Mangitchen"!!! Aamras along with puri or poli ( chapati) was a daily affair at lunch and dinner. Then there were days of mango milkshake, and mango icecreams. My Mom used to make great mango kulfi too. And of course, the pickle from raw mangoes, the refreshing drink Aam panna ( kairiche panhe http://cookininpajamas.blogspot.in/2014/05/kairiche-panhe-aam-panna.html )  and not to forget The Methamba.


Methamba is a raw mango chutney that is so sour, tangy and sweet that the flavours will burst in your mouth. It is a very simple Maharashtrian recipe. Some even call it "Methi-amba". Methi is fenugreek seeds and Amba is mangoes ( here raw mangoes or kairi are used ). It makes a great accompaniment with rice and daal or makes a great tiffin recipe when spread on a roti and made into a roll. It can also be eaten with a plain paratha or spread on a bread.


Ingredients :

(Makes about 1 n half cups of Methamba )

Raw Mangoes - 2
Mustard seeds - 1/2 tsp
Cumin seeds - 1/2 tsp
Asafoetida - a pinch
Oil - 2 tsp
Jaggery ( Grated ) - 3/4 cup ( You can even mash the jaggery with hand and mix if the jaggery is soft. Mine was hard, hence i had to grate it and it mixes well this way )
Red chilli powder - a pinch ( optional - just to get a hint of spicy taste )
Turmeric powder - a pinch ( optional )
Water - around 1/2 cup ( Just enough to cook the mangoes and make them soft )
Fenugreek seeds - 1/2 tsp
Salt - to taste

Recipe :

Peel the skin of the mangoes. Cut the mangoes into medium size pieces ( not too big, not too small - around 1 inch )

Heat oil in a kadhai. Add Mustard seeds, asafoetida and cumin seeds together. When they start to crackle, add the methi ( fenugreek seeds ). 

Saute till the methi is reddish in colour. Now add the chopped mango pieces. 

Saute it well, for about 2-3 minutes, so they get coated with oil and the seasonings.

Now add water and let the mangoes cook. You will know when they turn soft. If needed, add more water, but add little by little, as we don't want our methamba to be too watery. You can cover the kadhai or cook it in open. Mangoes anyway won't take long to cook.

Add in the jaggery and keep stirring continuously as the mixture will start becoming thick, the jaggery will melt. Make sure it doesn't stick to the kadhai.

Now add the red chilli powder, turmeric powder and salt. Mix it all well and let it simmer for about 2-3 minutes. Remove from heat and let it cool.

This can be stored in refrigerator for almost a week. But am sure it won't last a week, as it tastes so yummy that you would want to finish it off soon. 


This is a must-try summer recipe and am sure you all will love it :)

Happy Cooking :) 


 Linking this recipe to Favourite recipe event at Fullscoops and Swathi's event announcement page

Friday, 28 March 2014

Kaala Masala Chicken/Egg Curry

I don't know if i have mentioned this earlier, but since me a vegetarian( Egg-etarian and Dessert-arian actually ), and hubby being a non-vegetarian, we always have to cook two dishes when making Chicken/Meat. So i found an easier way out of separating the gravy before adding chicken and then adding either eggs or paneer to it. Sometimes even adding boiled aloo ( potatoes) tastes great! 

So this way hubby gets to eat his favourite chicken, and i don't have to stress on making two curries :)
I have already posted the Kaala Masala Recipe earlier. ( http://cookininpajamas.blogspot.in/2014/03/khandeshi-masala-kaala-masala.html )

While making the curry with the masala, what's important is to cook the masala and let it blend very well with the onions/tomatoes paste to form a nice brown gravy. It would take a while, but guess the real taste comes from slow-cooking! 
One of the main ingredients i learnt from my mother-in-law while making this curry is Garlic. My MIL loves garlic... she would add it in raw form, or in a paste form or just crush and add to any and every thing from daal to dry sabzis to curries. Another important thing to keep in mind is the law of minimalism. Since the Kaala Masala itself has a strong and intense flavour, adding a lot of other masalas would dominate the taste. So, just a spoonful of corriander powder and little red chilli powder is enough.


Make this one, and you will end up licking your fingers and craving for more...:)

Ingredients :

( The gravy proportion is for 250 gm chicken and 2 eggs for the egg gravy as mentioned above, so you adjust accordingly )

Onions - 3
Chicken - 250 gms (The best part about making this one is you don't have to marinate the chicken for long. Just clean the cut chicken pieces and add a pinch of salt and keep aside while your masala is cooking )
Tomatoes - 2
Garlic - 12-15
Fennel seeds - 1 tsp
Khas khas ( optional ) - 1/2 tsp
Ginger - 1 inch piece
Oil - 3 tbsp
Dry coconut ( roasted till brown ) - 2 tbsp ( I had mentioned about this one in one of my earlier posts... I normally grate dry coconut and roast it and keep in air tight container and then add to different curries/ sabzis as required, gives a very different taste and colour to any dish ) Looks somewhat like this :

Kaala Masala - 2 tbsp
Corriander powder - 2 tsp
Red chilli powder - 1 tsp
Turmeric powder - 3/4 tsp
Hing ( Asafoetida) - a pinch
Salt - to taste
Corriander leaves - to garnish

Recipe :

Heat 1 tbsp oil in a pan. (This pan should be the one you are going to cook the chicken in ). Add roughly chopped onions and fry well till they are golden brown. Let them cool down.

Make a paste of the fried onions in a grinder along with roasted coconut, khas khas, ginger and garlic.

Now Heat 2 tbsp oil in the same pan. Add the fennel seeds and then add the paste and fry for around 2-3 minutes.
Meanwhile chop tomatoes roughly and make a paste in the grinder.
Add the tomato paste to the pan and let it cook for 2-3 minutes. 

Now add the turmeric powder, red chilli powder, corriander powder and the kaala masala. Add salt and mix it all well. Keep frying the masala stirring occasionally, as once the water evaporates, it might stick to the pan. Keep adding water ( maybe a spoon or two) in between , so the masala blends well and doesn't burn out. Fry till the masala starts leaving oil.

Now separate the gravy, if you want to make a paneer or egg curry along with, else add the chicken pieces to this.

Let the pieces get coated with the masala and fry it for 5 minutes or so.
Now add about 2 cups of water, depending on the gravy consistency that you desire.
Remember, the chicken will also leave it's juices.

Cover and cook for about 10 minutes.
Now add half of the chopped corriander leaves to this and let it cook in open till the chicken is done.

Once done, keep it covered on the gas stove and let it rest for about 5 minutes.

Garnish with corriander leaves and serve with roti, paratha or rice :)

Isn't it mouth-watering?? 


Happy Cooking :)


Thursday, 12 December 2013

Thalipeeth : Maharashtrian Delicacy

A pancake is not a cake??? : I remember an incident when one of my very good friends, who is not much of an experimental foodie ( prefers to stick to the regular diet and cuisine), came out for lunch with me at a popular food-joint in Mumbai. Not understanding half of the ingredients that were mentioned as toppings and fillings in sandwiches and pizzas listed in the menu card, he asked me to order the simplest pizza for him! Pizza Margherita it was !!! After finishing our meal, i asked for the menu card to order some Crepes, that the place was famous for !!! "What's a Crepe?", he asked me... And i said, "They are thin pancakes"...He said ok, and liked the idea of ordering a Hazelnut Crepe with Honey...
And when the Crepe was on the table, his reaction was a "Click" moment... He was surprised/shocked to see a flat, thin batter based cake....
"This looks like an omlette,i thought it was a cake", was his reaction and i almost died there laughing!!! 
I sooo remember this incident that its glued to my memory and everytime i think of it, i can't stop laughing... 
As for my friend, well, now he surely knows what pancakes are, and even tasted a few (banana, chocolate to start with ) and relished them :))

Thalipeeth is a pancake : So Thalipeeth is a typical Maharashtrian dish, often eaten for breakfast or even for dinner. It is a pancake made from a dough. The dough can be prepared in different ways. Besan ( Gram Flour ), Jowar flour, Urad daal powder, wheat flour, rice flour, poha ( puffed rice ).... any 3 or all combinations can be mixed together and it just tastes great and healthy!!! The combination flour is called Bhajani mix which is readily available in market these days or you can get all the flours and mix it yourself. Thalipeeth is a good substitute to the normal poha, upma and bread butter that we have for breakfast! We normally make this for dinner and just 2 each makes our tummy's full due to it's rich nutrients.
Thalipeeth is best served with "Loni" ( White butter, that too homemade ), but if you don't have that, you can serve it with butter on top or even Ghee!! Curd tastes best with Thalipeeth too, some even have it with Tomato Ketchup :)

So here's a quick -to-make recipe of traditional Maharashtrian dish : ( My mom makes her own Bhajani, getting all the grains grinded together from a local flour mill... so i have used that Bhajani mix to make this . It has wheat, jowar and chana daal ). The additions can be done according to personal likings, such as onions, cumin seeds and/or cumin powder, sesame seeds, fennel seeds, corriander powder, green chillies or red chilli powder, black salt or normal salt, pepper, chaat masala, ajwain, ginger-garlic or paste, turmeric powder, garam masala, corriander leaves or even mint leaves or basil....You can make it as you like !!!!


Ingredients :

Bhajani mix : 2 cups
Ajwain : 1/2 tsp
Cumin seeds : 1/2 tsp
Green chillies - 2 ( chopped finely )
Corriander powder - 1 tsp
Black salt - to taste
Onion - 2 small ( You can chop finely, but i grated it- Gives a nice and different taste...)
And yes,....
Pepper - Our Favourite!!!! ( Add according to taste )
I normally add 1 tsp sesame seeds and 1/2 tsp saunf ( fennel seeds ), but this one i made in a hurry to pack tiffin for hubby...so forgot to add them both...

Recipe :

Mix together all the ingredients and knead to form a dough. The grated onions will leave water, so dont add water at first as adding too much water will make the dough sticky... First knead all the ingredients and add water slowly ( spoon by spoon ), just enough to knead it all together. It might not form a tough firm dough...
Take around 1/2 tsp of oil now on your palm and knead the dough again applying the oil all over...
Let the dough rest for 15 minutes.
Now take a thin plastic sheet or aluminium foil and place a small ball from the dough on it.
Start to flatten it with hand ( if it sticks to your hand, wet your hand with water and flatten again, it wont stick ).
Make it in a round flat bread ( not too thick, not too thin ).
Make 4 small circles in the flattened bread with your finger.
Heat a tava and grease it with oil... 
Gently hold one end of the foil, and take the thalipeeth in your hand by turning it over and remove the foil and place it on the tawa.( You can even place the Thalipeeth , gently place the edges on the tava and then separate the foil.)
Put little oil in each of the circle made and around. 
Cover the Thalipeeth and keep on low flame.
After about 2-3 minutes , remove the lid... If it has started browning from the sides, means it is cooked. Or else put the lid back again and cook on low flame for another minute.
Now, turn it so it gets cooked on the other side too. This time, don't cover it...
Keep turning it over till both sides are brown and cooked.

Serve hot with Ghee, Curd or White Butter :)

If You are Fasting, you can even make these with Sabudana ( Tapioca Pearls )... I will post that recipe sometime later.

Happy Cooking :)