Showing posts with label Vegetarian Delights. Show all posts

Friday, 2 December 2016

Babycorn Jalfrezi

Birthday speech : "Speech as i would like to call it, though it's more of a write up"...So, for all those who didn't know, 25th November was my birthday! I was lucky enough to be kept busy with phone calls and messages from my family and friends wishing the best for me, and while a lot were happy that i was spending my day at home with the furries and keeping the Cafe open, a few did mention that I should have taken the day off and gone out partying or somewhere. 


So, here's my question to you all : Should a person do what one loves to do on his/her birthday or should he/she just follow the norm of going out, drinking and partying with friends?

I, for always, would go with the former. I decided to take bookings for my petsitting services as I WANTED to be amongst the "four's" for my birthday. I decided to keep the Cafe open as I LOVE being in the kitchen. And what more, when during all this I had my loving husband and a supportive family by my side. Spending a day like this made me much happier than going out to a restaurant and spending a few thousands over beer and food. Doing what you love is so IMPORTANT. We might earn a little less but are the happiest. That way, niether do we lose sleep worrying about the black money in the cupboard ( The DE-MO effect ) nor do we have to wake up to meet the targets. 

I decided to make Mushroom rice and Babycorn Jalfrezi for the birthday dinner. I shall post the rice recipe in next post as the combination tastes wonderful. But meanwhile, here is the recipe of Babycorn Jalfrezi that you can make and serve with roti, paratha or naan.


This dish is popular in Indian restaurants and i would always order it as a child. This is the first time i tried making it. You can skip babycorn and add vegetables to make Vegetable Jalfrezi or even paneer to make Paneer Jalfrezi. The dish gets ready very soon as the basic method of cooking is stir fry. 


Ingredients:


Babycorn - 200 gms
Capsicum - 1 
Onion - 1
Tomato - 1 small
Tomato puree - 1/2 cup ( I made at home by boiling tomatoes, removing skin and pureeing it but you can buy readymade )
Salt - to taste
Pepper - to taste
Corriander leaves - to garnish
Cumin powder - 1/2 tsp
Corriander powder - 1/2 tsp
Turmeric powder - 1/4 tsp
Red chilli powder - 1/2 tsp
Kitchen king masala - 1/4 tsp ( You can also use Garam masala instead )
Red chillies ( dry ) - 2
Ginger garlic paste - 1 tsp
Vinegar - 1/2 tsp
Sugar - 1/2 tsp
Butter - 2 tbsp ( can also use oil... i went a little overboard not worrying about calories ;))


Method :

Cut the babycorn horizontally into bite-size pieces. You can cut them in any shape as you like.

Slice the onion and capsicum lengthwise.

Chop the tomato

Boil water in a pan, add a pinch of salt and then add the chopped babycorn to it. Cover and let it rest for a while. This process is known as blanching. Drain the water.

In a wok/kadhai, add butter. Put in the red chillies and then add the sliced onions and saute till they are translucent. Now, add the ginger garlic paste and let the raw smell go away.

Add the chopped tomato and salt. Let it cook till the tomatoes turn soft. Now add all the masalas ( turmeric powder, red chilli powder, cumin powder, corriander powder and kitchen king masala ). If adding garam masala, then don't add now. Add rest of the masalas.

Add the sliced capsicum and let it all cook till oil starts leaving the sides. Now add the blanced babycorn and saute for 2-3 mins. 

Pour in the tomato puree. If you don't have a puree, use tomato ketchup.

After about a minute or two, add vinegar, sugar and garam masala ( if adding ).

Mix it all well and put off the flame after about a minute or two.

Garnish with corriander leaves.

If you want a little gravy, add water if it gets too dry after adding the puree.


Enjoy this tangy, sweet and spicy dish with roti or rice. Here's how i served it :


Happy Cooking :)

Sunday, 13 September 2015

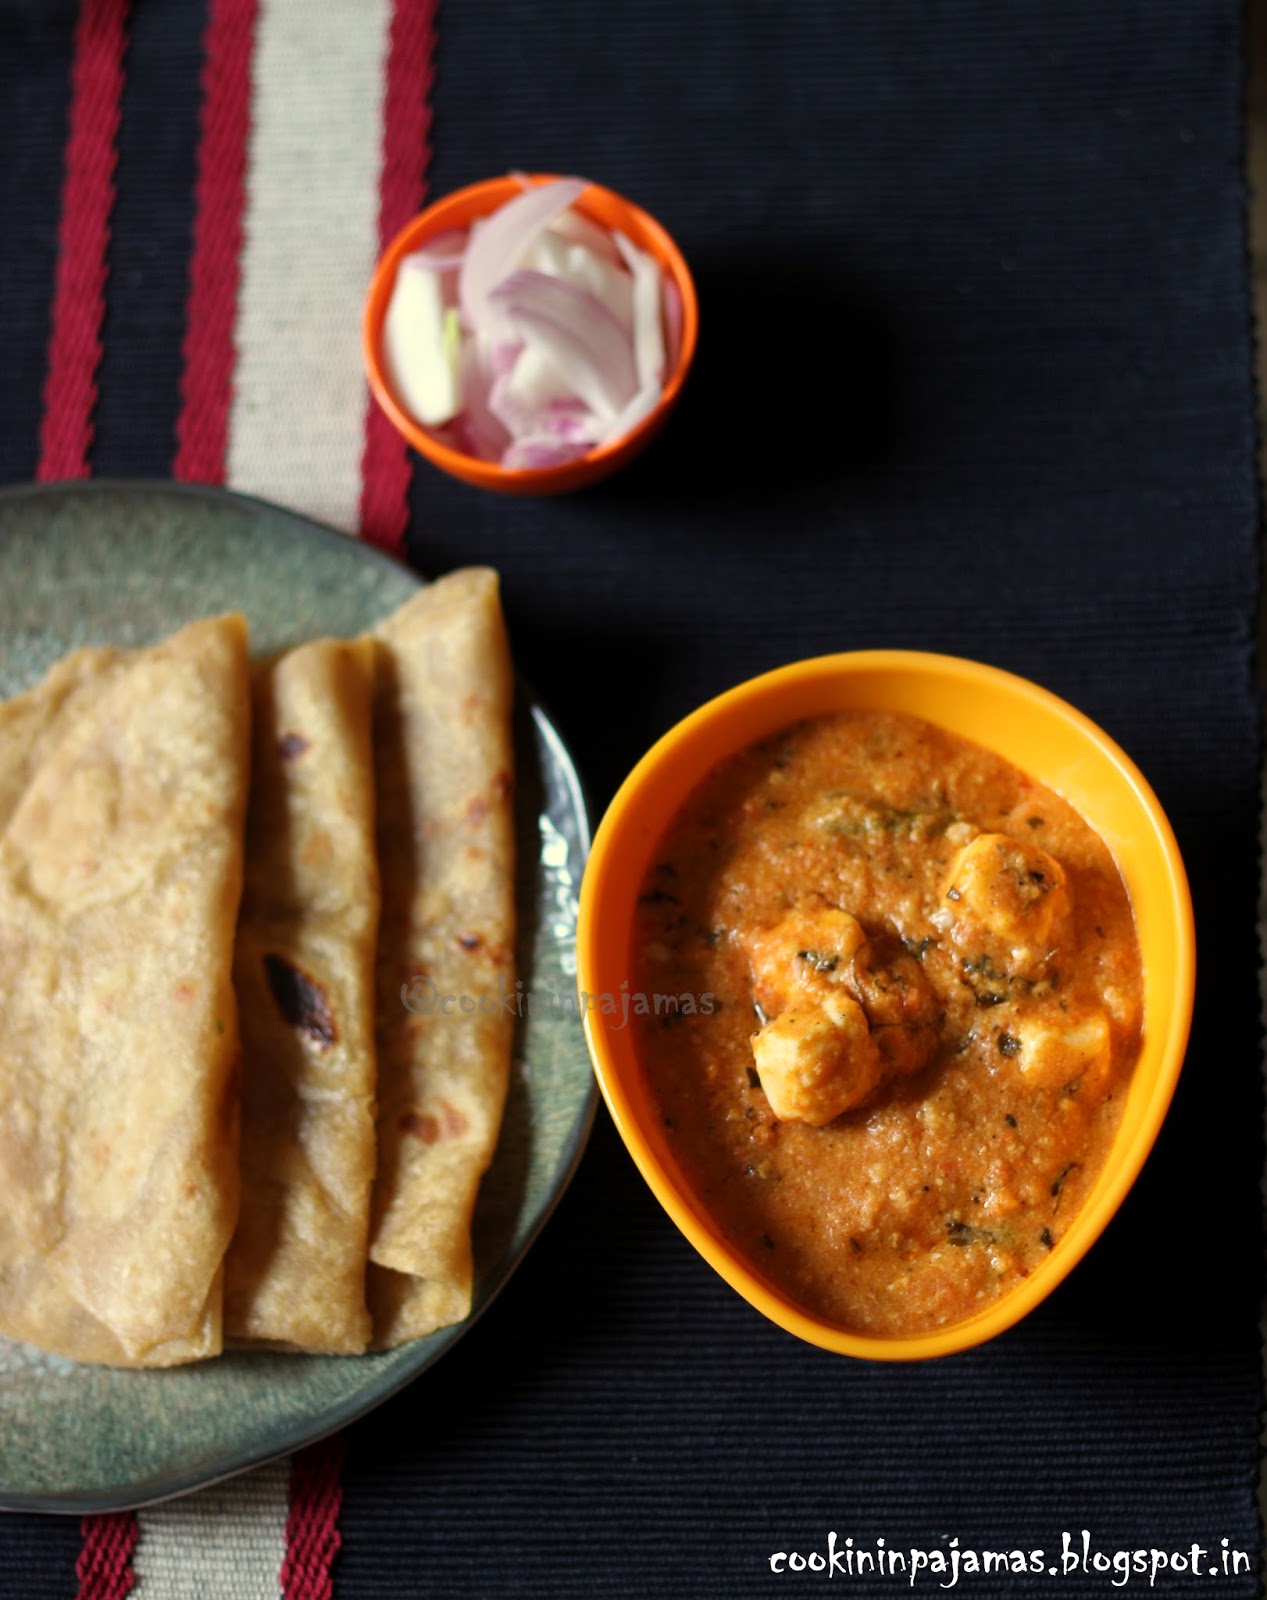
Cheese Butter Masala

Hello all you lovely people! Hope you are having a fabulous weekend :) Today i am posting the recipe of Cheese butter masala which i made couple of days back. I had not heard this recipe ever, until my husband asked me to make it. He remembered eating it in his early childhood in some restaurant at his native place - Akola. Sometimes, i really feel lucky to have a foodie husband - a lot i have learnt in life about food is because of him, and so i owe the blog to him in some way :)

On finding out more, i learnt that this is a typical north Indian recipe, just as paneer butter masala. The only difference here is paneer is substituted with cheese. When i made this recipe, i simply loved it and in just a month, i have made it twice :) Yes, cheese and me sort of have a close bonding, can't keep away from it for long, hehe.


Both the times that i tried the recipe, i made it in a different way. The first time, i did add onions and the second time i didn't. Once i made it with cashew paste, and the other time i skipped that and added cream. Also, the first time i didn't boil tomatoes before making a puree while the other time i did. So there are whole lot of variations you can make with this simple dish, just to enhance or suit the flavours and taste according to personal preferences. Here i will post the one with onions.


As the name suggests, it does call for a generous amount of butter, so don't compromise on that. Also, in restaurants, food colour is added to get a nice colour. Here i have chosen red ripe tomatoes instead. You can also skip adding kasuri methi and add corriander leaves in the end while garnishing.


The recipe gets ready within minutes and tastes delicious on it's own. So just serve some parathas or naan or plain roti by the side along with some salad, and you save yourself a lot of time standing in the kitchen!

Preparation time :10 minutes
Cooking time : 30-35 minutes
Serves - 2-3 people
Recipe type : Main course (vegetarian)

Ingredients:

Tomatoes - 4 medium
Onion - 1 medium
Cheese cubes - 4 (I used Amul cheese cubes)
Butter - 4 tbsp
Cumin seeds - 1 tsp
Kasuri methi - 1 tsp
Salt - to taste
Ginger-garlic-green chilli paste - 1 tbsp (I crushed 1/2 inch ginger, 3-4 garlic and 1 green chilli in a mortar and pestle)
Turmeric powder - 1/4 th tsp + 1/4 tsp
Red chilli powder - 1/2 tsp + 1/4 tsp
Corriander powder - 1 tsp +1/4 tsp
Cumin powder - 1/4 tsp
Garam masala - 1/4 - 1/2 tsp
Cream and corriander leaves to garnish (optional)
Sugar - 1 tsp (optional)


Recipe:

Chop the onions. Make 4 square pieces of each cheese cubes (You can even cut them into half)

Wash the tomatoes, chop and make a puree of it in grinder. If adding cashews, add soaked cashews to the tomatoes while making puree.

Now, heat 1 tbsp butter in a kadhai and add this tomato puree. Saute well and add salt and 1/4 tsp each of turmeric powder, red chilli powder, cumin powder and corriander powder. Saute for about 10 minutes till the puree starts leaving oil. Add water little by little if the puree sticks to the kadhai and gets dry.

You can entirely skip this step and add the puree later on. This just enhances the flavour as the masalas get mixed well with the puree.

Heat 3 tbsp butter in a kadhai. Add cumin seeds. When they splutter, add onions. When onions become translucent, add the ginger-green chilli-garlic paste and saute for about 1/2 a minute till the raw smell goes away.

Now add the tomato puree (either sauteed with masalas or without). Now add the spices ( red chilli powder, turmeric powder, corriander powder and salt) and mix well till the masala starts leaving the sides of the kadhai.

Add about 3/4-1 cup water and sugar and let it come to a boil on low flame. Now add the cheese cubes. Add kasuri methi and garam masala. Mix it all well.

Don't cook for long after adding cheese cubes.

You can even add some cream for garnish on top.

Cheese butter masala is ready :)


Happy Cooking!!! :)


Wednesday, 26 August 2015

How to make Poori or Puri

Puris are Indian deep-fried bread made with wheat flour or maida (all-purpose flour). I have grown up helping my mom in the kitchen to fry the puris and i remember, i would get so excited if my puri would puff up in a perfect round. Yes, i could hardly get 1-2 to the perfection, while my mom would just know the right trick to get each of them puffed up. So, there are a few tricks that i have learnt which i would like to share with you all to get a perfect round puffed puri :


1. Make sure the dough is not too soft, not too hard to roll. Hence while making the dough, add water little by little so you know the dough consistency while you knead. If at all your dough gets a little sticky, add more flour but if your dough gets too hard, even kneading it with oil afterwards won't help that much. So knead a stiff but not hard dough.

2. While rolling the puris, try not to use flour but brush the dough-balls with oil instead, so it is rolled well.

3. The puri should be rolled into an even round shape. Many a times the middle portion remains thin and the outer portions are thicker. So make sure, you roll an even puri.

4. The oil for frying the puris should not be too hot or else the puris will brown immediately and will remain uncooked from inside. So, heat the oil well and then put the flame on sim while frying the puris.

5. This is the perfect tip to puff up the puris : While frying the puris, just press a little on the side of the puri gently. I don't know whats the logic behind this, but i have seen my mother doing it and it has worked with me too.


Puri-sabzi or Puri-bhaji is the best combination to have for breakfast. The bhaji is usually a dry or curried potato sabzi. Puri-bhaji is even served as a "prasad" ( offering ) to God at temples or at any auspicious occassion. A typical Maharashtrian meal at any pooja is Puri-bhaji-shrikhand. On festivals or ceremonies, puris are also eaten with Basundi or kheer. In North India, Puri-sabzi-halwa is eaten as breakfast. Puris are made in different versions - some add spices to it, some even add rava (suji ) to make them crispy, or some add flavouring or purees and sauce for colour, texture and flavour. Like masala puris or spinach puris or beetroot puris are quite common. There is also the Tiranga puris which are tri-coloured made with the use of spinach and beetroot. 


Last weekend was hubby dearest's birthday and our lunch menu was his favourite: Shrikhand-puri :)) I have already shared the recipe of Shrikhand before. Here's a pic from this time making homemade "chakka" from curd :


Let's get to the puri recipe -

Preparation time : 5 minutes
Cooking time : 30 minutes
Serves : 2-3 people
Makes : 15-20 puris
Recipe type : Breads

Ingredients:


Whole wheat flour - 2 cups
Salt - to taste
Ghee/oil - 1-2 tsp
Water - to knead the dough
Oil - for frying the puris

You can add any spice like turmeric powder, red chilli powder, ajwaiin or any of your choice.

Recipe:

Mix together the flour and salt. Add oil or ghee. You can even heat the oil or ghee and then mix it ( known as "Mohan" in Marathi language). This helps to make the puris soft.

Add water little by little to knead a tight dough. 

Set the dough aside for about 10 mins covered.

Apply little oil on hand and now divide the dough into equal sized balls ( about 15-20 )

Roll each of the ball into small puris. Remember to roll it even. Dust flour if needed, but best is to apply little oil on the ball instead of flour.

Heat oil in a kadhai for frying the puris. When hot, lower the flame and fry puris one by one.

Press the puri gently and it will puff up, now turn it and fry the other side till golden brown.

Remove the puris on a tissue paper to drain excess oil.


Your puffed puris are ready :))

Happy Cooking :))


Thursday, 25 June 2015

Kataachi Amti

"Such awesome climate", "Such a romantic weather", "It's raining", "It's cloudy", "Oh, there are cold winds" , "All i need is kandaa bhaji, bhutta and chai" or "A cup of coffee and a book"!! Yes people! It's Monsoon!!! The season has arrived. A lot of people hate this season for the mud, dirt and traffic jams. Yes, for the restaurants, events and fashionistas, rains surely play a spoilsport. But there are people like us, who love to get wet, get the clothes dirty and hands muddy. There is a different form of energy and newness everywhere in the season. Maybe because rains give a life. A life to a plant to form a tree. A life to a seed to grow into a fruit or a flower. Rains, i feel, connects us back to our roots.

Happy Monsoon!!!

There is a very beautiful article i came across recently which talks about "Dirt not being dirty". I could completely relate to the writer and am of the opinion that throwing ourselves in mother nature only develops our immune system and makes us strong. So, we should come out of the fears of "You will catch cold if you get wet in the rain", "Wash hands or change clothes as soon as you get them dirty" or " Use sanitizer even for popping a chocolate in the mouth". In fact we should be friends with the germs, so they can help us survive in any possible conditions. Read this article here . So all i can say is Let go... get dirty... be free... Just like them :))


Talking about connecting to the roots, there are some things, incidents, or words that bring the memoirs of our roots and instantly connects with us. Food does so too. Even though we are living in the fast food era of pav bhajis and pizza's, there are some dishes that connect us back to our roots. I am not only talking about the ancestral recipes here but regional dishes too. Like a simple daal has so many names and versions of dhal, curry, bele, paripu, varan or amti. The recipe i am posting today connects me to my roots. Its a typical Maharashtrian delicacy served with Puran poli. I have only made Puran poli twice and fortunately they have come out well! It is said that Puran poli is most difficult to make, and the one who is able to make it successfully is called a "Sugran" (a competent housewife). 


Puran poli and kataachi amti is a terrific sweet-spicy-tangy combination. This amti is made from the reserved water after boiling and draining the chana daal when making puran. Usually it is made in the same pan, and a little cooked daal (gram) is added for the taste but by nature, this amti is very thin like a soup consistency.


Ingredients:

Leftover water after pressure cooking 1 cup of chana daal ( bengal gram ) in about 2 and half cups of water for 3-4 whistles.
Cooked bengal gram - 4-5 tbsp
Cumin seeds - 1/2 tsp
Tamarind pulp - 1 n half tbsp
Chilli powder - 1/2 tsp
Goda masala - 1/2 - 3/4 tsp
Grated jaggery - 2 tsp
Salt - to taste
Coconut - 2-3 tbsp (Tastes great with fresh grated coconut but i didn't have it handy, so used dry coconut (kopra))
Oil - 1 tbsp
Cinnamon stick - 2 small
Cloves - 2-3
Bay leaf - 1
Curry leaves - 5-6


Recipe:


The leftover water after cooking the chana daal would come around 1 and half to 2 cups. Add about 2 cups of water to it and keep aside.

Try making the amti in the same pan in which puran is made. If not, use a fresh pan/kadhai. 

Scrape the puran from the sides and bottom of the pan and mix it with the gram water kept aside.

Note: I had forgotten to keep 4-5 tbsp of chana daal aside for the amti. So i boiled it again in another bowl. But you can keep some aside before making the puran.

Dry roast the coconut and cumin till golden brown and grind it together into a powder.

Heat oil in a kadhai. Add bay leaf, cinnamon and cloves. When it starts leaving aroma, add in curry leaves. Now add about 1 cup of the gram water to it. It will splutter, so make sure the flame is low. Add in the tamarind pulp.

Stir and bring to a boil. Now add salt, chilli powder, goda masala and simmer for about 5 minutes. Add the jaggery (can also be replaced with salt), and the remaining gram water.


Let it simmer for about 5 minutes. Add the coconut-cumin powder and mix well.( If adding fresh coconut, add cumin seeds in the tadka and coconut in the end as garnish )

Tastes best when served either hot or cold with puran poli or steamed rice.

NOTE: If you are not making Puran or Puran Poli and just want to make Kataachi amti, then you can pressure cook or boil some chana daal on stove top for approx. 40 minutes till the daal is tender. Drain and use the water for kataachi amti and use the chana daal to make something else.


Happy Cooking :)


Friday, 29 May 2015

Aai's easy Uttapam's

Well, as most of you know by now about our new launch of Tshirts for animal lovers a week ago under the name "The Woofy Tales", the branding is keeping me quite busy! Its all a "two-people show" since it is just a start-up! So, me and hubby have to do the publicity, marketing, track orders, ship them, click pictures, edit and the list goes on.. Managing all this and also our little paw-friends that i board gave me very little time to stand in the kitchen and cook some elaborate dishes! So mostly it would be a quick daal-chawal with the pickles (a whole lot of them i had mentioned in my earlier post, of which i still have to click pictures and blog about) or a simple stir fried sabzi and roti or at times, just a snack item like bhel or some heavy salad! Also, the temperature is rising here day by day , and even if i cook a small meal, I am always drenched in sweat! So that gives me even less motivation to stand in the kitchen for long hours!


Our logo 


So, to eat light in summers, our meals are small and we top it up with some milkshake or ice cream sundaes or Popsicles. Just like this watermelon Popsicle which remains our favourite. I make this with just 4 ingredients : Watermelon juice, lemon juice, black salt and sugar or honey if needed.


The recipe i am sharing here is one that i have learnt from my mother. She used to make these quick delicious uttapams with the readymade dosa batter. This recipe comes to my rescue when i have to spend less time in the kitchen, such as past few days! This is quite easy to make and the addition of red chilli powder is totally optional. I have made it in 2 ways - one just as my mom made it with onions, tomatoes and red chilli powder and the second one with green chillies, onions, tomatoes and cumin powder! You can even add corriander leaves if you like.


Ingredients:

Readymade dosa batter - As needed. We normally use 1/4 kg  (a small packet that we buy from the store)
Onion - 1 small chopped
Tomato - 1 small chopped
Red chilli powder - according to taste (optional)
Green chilli - 1 chopped finely
Cumin powder - 1 tsp (or as needed)
Oil - 3-4 tbsp
Salt - to taste


Recipe:

Heat a non stick tava. 

Add little water to the dosa batter to make it to desired consistency. The batter should not be too thick nor too thin (like the normal dosa consistency). To make uttapams, it's best to have the batter a little on the thicker side but of pouring consistency. The readymade batter is too thick, hence this step. If your batter is already of pouring consistency, then skip this step.

Add salt to the batter as needed.

Put about 1-2 tsp of oil on the tava. Now, with a laddle ful, spread the batter on the greased hot tava in a circular motion to make the uttapam round in shape.

Reduce the flame and put little oil on the sides of the uttapam. Add about 1-2 tbsp of onions, tomatoes and red chilli powder or green chillies and cumin powder as needed.

When one side is cooked and becomes brown, flip it on the other side carefully and cook the other side as well.


Please note to keep the flame to minimum or else the toppings will burn and become black. It will give a burnt look and flavour.

Remove it in a serving plate and serve along with Naralachi chutney .

This dish is absolutely easy, quick and makes a perfect breakfast recipe or a tiffin recipe too. It is an absolute favourite of my hubby and taste delicious with the coconut chutney (Link mentioned above).


Happy Cooking and wish you all a great weekend ahead :)


Friday, 15 May 2015

Wafola : Cabbage Cake

When i sent this picture to my sister in law in US, she said "Looks like dhokla"!! Well, yes, it surely looks like one, but this is more denser. Moreover, though the name suggests it to be steamed (Waaf in Marathi means Steam), this one is baked. Hence i think it is known as a Cabbage cake.


The recipe was new to me, i had not really heard about this one! We make "Kobichya vadya" with almost similar ingredients but we steam it. The tempering and garnishing remains the same. Here, in the cookbook of "The essential Marathi cookbook", this cake is baked. The author, Ms. Kaumudi Marathe, says - "During the years of food rationing around the Second World War, when semolina and refined wheat flour were hard to come by, gram flour based snacks were a great alternative. Traditionally, wafola was cooked over an open charcoal fire but these days, a conventional oven works just fine".


Wafolas make a perfect tea-time snack or a good breakfast dish too! What more? It is baked!!! That makes it super healthy too :) The addition of tempering on top takes the dish to a completely new level of flavours!!


Ingredients:

Green cabbage : 1 n 1/4 cup grated
Ginger - 1/2 inch piece grated or made into a paste
Turmeric powder - 1/4 tsp
Salt - to taste
Green chillies - 2 (The recipe said sliced, but i prefer making a paste in a mortar and pestle)
Ajwain - 1/2 tsp
Sugar - 1/4 tsp
Oil - 2 tbsp
Asafoetida - a pinch
Besan (gram flour) - 1 cup
Soda bicarbonate - 1/4 tsp (optional)
1/8 cup yogurt + 1/4 cup warm water

To garnish:
Ghee - 1/2 tbsp
Mustard seeds - 1/2 tsp
Turmeric powder - 1/4 tsp
Red chilli powder - 1/4 tsp
Grated fresh coconut - to garnish
Corriander leaves - to garnish
Lime juice - to taste


Recipe:

Mix together cabbage, green chilli paste, ginger paste, salt, turmeric, ajwain and sugar in a bowl.

Heat 1 tbsp oil and add asafoetida to it. Mix this in the cabbage mixture.

Slowly add the gram flour and keep mixing it well.

Add the soda bicarbonate in the yogurt mixture and add this to the cabbage mixture stirring well.

If the mixture is too thick, add water as required to make the consistency as thin as a cake batter.

Grease a 9 inch baking tray with 1/2 tbsp oil. Put the batter in the baking tin.

Preheat oven to 180 degrees Celsius. Bake the wafola for about 20 minutes. Now brush a little oil on top and bake again for another 10 minutes or till the toothpick comes out clean.

Remove from the oven and allow to cool for about 10 minutes. Now cut the cake into squares or as desired shape.

Heat 1 tbsp oil in a wok for garnishing. Add mustard seeds and let them pop. Then add the turmeric and chilli powder. Stir well and pour over the cut square cakes. Sprinkle coconut and corriander leaves on top.

Add lime juice if and as desired.

Tastes best when served with green chutney - Corriander chutney, mint chutney but i served it with Peru chi chutney (Guava chutney). I will upload the recipe in next post!


Serve the wafolas warm, and am sure they will be relished by everyone in the family :)

Happy Cooking! :)


Friday, 17 April 2015

Beetroot chi dahyatli koshimbir : Beetroot Yogurt salad

Koshimbir forms an important part of a balanced Maharashtrian meal. These salads, usually eaten during lunch or dinner mostly consist of two versions :

1. Vegetables mixed with yogurt
2. Vegetables topped with phodni (tadka)
Sometimes they are even eaten plain with just an addition of cumin powder and chilli powder.

The vegetables here can either be chopped, grated or diced. These salads are most easy to prepare and are simple too. No sauces, no fancy dressings or no cooking. Maintaining the health factor, at times, peanuts and coconut are added which are popular in Maharashtrian cuisine. 


Dahyatli koshimbir is basically Raita as we popularly call in Hindi, where the vegetables are mixed in yogurt dressing. I have already posted recipe of Kakdichi Koshimbir and Tomato chi koshimbir in the Koshimbir special . My mother makes grated beetroot salad with phodni (spiced oil or tadka), but here i am posting Beetroot salad with yogurt. This salad can also be served without yogurt, or at times by skipping the tadka and simply adding cumin powder, chilli powder, salt and sugar.


Recipe adapted from : "The Essential Marathi cookbook"

Ingredients:

Beetroot - 2 medium
Onion - 1 (optional)
Yogurt - 3/4 cup whisked
Sugar - a pinch
Salt - to taste
Oil - 1 and half tsp (you can also use ghee)
Cumin seeds - 1/2 tsp
Green chillies - 1-2 sliced lengthwise
Corriander leaves - a few to garnish


Recipe:

Boil the beetroot till soft. It takes about 15-20 minutes. After it cools down, peel it and grate it.

Chop the onions finely. Mix them with the grated beetroot.

If the whisked yogurt is too thick, add in 4-6 tbsp of milk or water. Add salt and mix well.

Add this yogurt to the beetroot-onion mixture.

Heat oil in a pan till smoking hot.

Add cumin seeds and let them pop. Add the green chillies. 

Now mix this with the beetroot mixture.

Garnish with corriander leaves.


Happy Cooking :)


Tuesday, 14 April 2015

Methi chi bhaaji - Fenugreek stir fry

As i had mentioned in my Methi thepla post that it is important to keep in touch with your "girl-friends", my happiness knew no bounds when recently i got in touch with all my beautiful school friends. So we have made a "girls-only" whatsapp group and kept it small and close, so we can share anything and everything there without getting biased or judgmental. Imagine a place where you can blabber anything and everything and no one really bothers to make comments about you - Just what we need in our day-to-day stressful lives, right? Well, so one of my friend there ( I don't know if she will like me taking her name here on a public page, so keeping it as N ) had mentioned about this simple Methi bhaaji that she used to get in tiffin that her mom used to make. 


"The best way to make this bhaaji delicious is to use tons of onion and garlic", these were her words. True to that, the garlic gives a terrific twist to the otherwise simple bhaaji which has nothing but regular spices (Tadka as we call it popularly). I also feel that addition of coconut takes it to other level altogether. Or maybe i am just a little biased towards coconut. I love adding fresh coconut to anything and everything. The Maharashtrian genes you see ;)


This bhaaji makes a perfect tiffin recipe and goes very well with rotis/phulkas. It tastes great with daal-chawal too.

Ingredients:

Methi leaves (Fenugreek leaves) - 1 bunch
Onions - 2 medium
Garlic - I used around 8-10 pods
Oil - 2 tbsp
Mustard seeds - 1/2 tsp
Cumin seeds - 1/2 tsp
Asafoetida - a pinch
Turmeric powder - 1/4 tsp
Green chillies - 2
Fresh grated coconut - to garnish
Salt - to taste


Recipe:

Remove the methi leaves from the stem and wash them well. 

You can either chop them roughly.

Crush the garlic pods in a mortar and pestle. You can also chop it or make a paste.

Chop the green chillies.

Chop the onions finely.

Heat oil in a kadhai. Wait till the oil is smoking hot.

Now add the mustard leaves. Let them pop. Add in cumin seeds, asafoetida and turmeric.

Now add the crushed garlic and green chillies. Saute for about 30 seconds.

Add in onions and saute till they are translucent (Don't over fry or brown the onions).

Now add in methi leaves, salt and mix everything well.

Cook covered for about 8-10 minutes checking and stirring after every 2-3 minutes, so the methi gets cooked well and doesn't stick to the kadhai. If you feel it is sticking to the kadhai, you can add about 1 tbsp of water or more, but methi leaves water, so normally it shouldn't stick when you steam cook.

Once the methi is cooked, stir fry it in the open (without the lid) for about 1-2 minutes.

Garnish with coconut.


Quite easy and tastes delicious!

Happy Cooking :))


Monday, 23 March 2015

A bowl of goodness

Salad is a very important part of a diet. Every nutritionist or a dietitian would advise you to include raw vegetables, fresh fruits and nuts in your diet. A very interesting book that i am reading now by the name of "Curry" talks about how food culture evolved in India. Though there was a significant influence of the Portuguese who invaded the southwest India, the Great Mughals who invaded the North of India and the British Raj who ruled us, the importance of "Ayurveda" and "vegetarianism" was very much rooted in the country who preferred and ate "Saatvik" food. Saatvik food is basically "pure food" - that which doesn't impure your body, and is hence able to improve your thoughts making you more kind, generous and calm. It was also believed that growing vegetables or fruits and eating them raw was much more beneficial, as it captures the essence of the soil and water and connects you to your roots.


So, a normal saatvik diet would consist of seasonal foods, fruits, vegetables, oil, dairy products, nuts, whole grains and legumes - basically a non-meat diet. It becomes a little difficult to follow a saatvik diet when we are overpowered with the cravings of eating "masaaledaar" and "lajjatdaar" food :) But to maintain a balance, having a salad is always helpful. Even if one or two fruits a day, and a simple cut vegetable salad is added to our meals, it balances out all the sinful cravings that we indulge into otherwise. 

Normally, i always have a koshimbir in our meal. Some of the koshimbir posts from before : Kakdichi koshimbir, Tomato carrot koshimbir, Fruit salad .


But at times, i make a wholesome salad which serves as a complete meal. Here i have added boiled peanuts and boiled chana, but you can get as creative and replace/add/reduce the nuts and other ingredients according to personal preference.


Ingredients:

Peanuts - 1/2 cup
Kala chana (Black chickpea) - 1/2 cup
Lettuce leaves - to garnish ( or you can even chop them and add to the salad)
Walnuts - 3-4 chopped (optional)
Almonds - 3-4 chopped (optional)
Onion - 1 small chopped
Tomato - 1 small chopped
Green chilli - 1-2 chopped
Red chilli flakes - to taste (Add red chilli powder if you don't have flakes)
Oregano - to taste
Black salt - to taste
Pepper - to taste
Lime juice (optional) - 1/2 tsp
Pomegranate - 1/4 cup (optional)


Recipe:

Wash the black chana and soak it overnight.

Drain the water, pat them dry and keep it in air tight container at room temperature or in refrigerator if you want them to sprout. 

Even if they are not sprouted, they taste great.

Wash the peanuts.

Boil the black chana and peanuts till they become soft. The peanuts will start losing colour and become pale. Alternatively, you can also pressure cook them for one whistle.

In a mixing bowl, mix the boiled chana and peanuts. Add the chopped tomatoes, onions, green chillies, salt, pepper, pomegranate, walnuts, almonds and mix it all well.

Line the serving bowl with washed lettuce leaves. Add the salad into the bowl. Now sprinkle oregano and chilli flakes and finish it with some lemon juice.

Mix it all well and enjoy the bowl of goodness as one wholesome nutritious meal.


Happy Cooking :)