Showing posts with label Quick snacks. Show all posts

Saturday, 10 October 2015

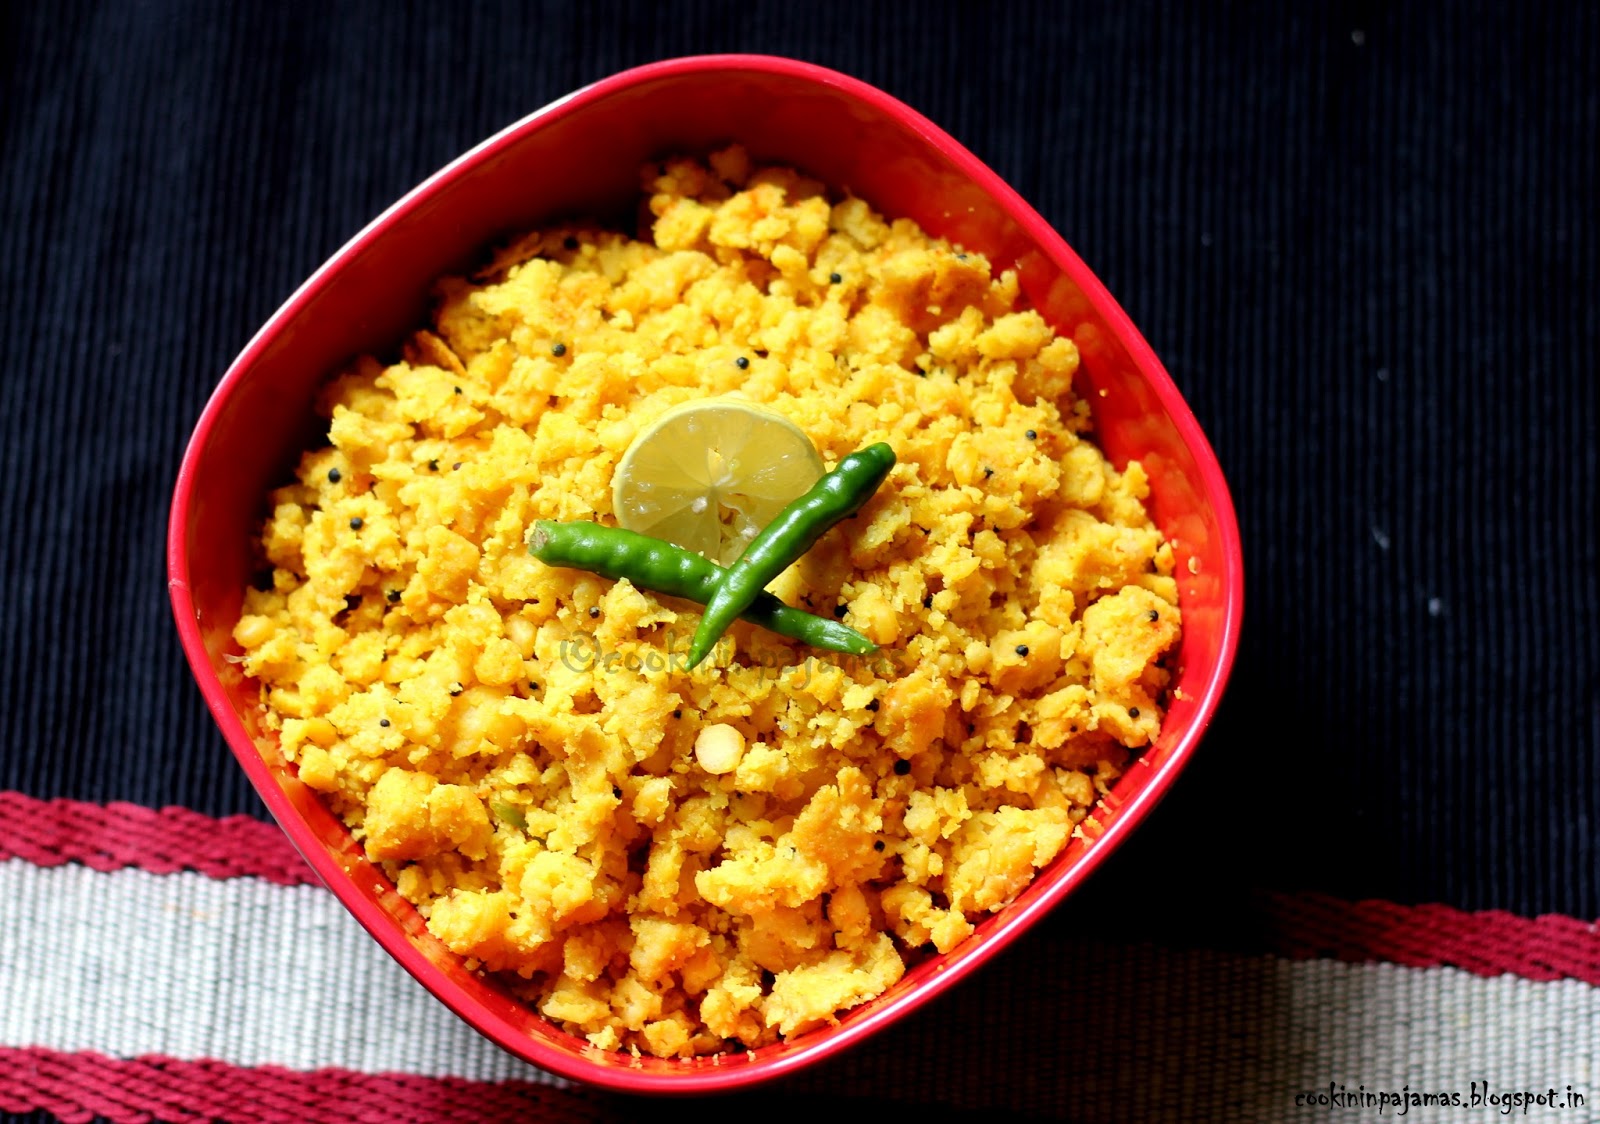
Vaatli Daal : Ground Chana daal snack

I love this part of the year!! Yes, i have mentioned it before and i will say it again and again. With so many festivities come so many traditions, celebrations and of course food specialties. More so, the sweets and snacks that are prepared in each household adds so much more excitement to the air, that it's fun not only gorging on them but learning about the whole "making" process too. Yes, as kids, it would hardly matter but since the time i have started blogging, i try as much as possible to learn/read about different cuisines, and the history behind each dish or the method it is prepared. Am sure my fellow bloggers will understand this urge to explore :) Here today, am posting the recipe of a typical Maharashtrian delicacy often served on Anant Chaturdashi (the last day of Ganesh Chaturthi)that i made for the first time. I have always seen my mother or aunt making this on the traditional grinding stone (Paata-varvanta as we call it) during Ganesh festival but never really knew that this tasty dish can be made even in mixer-grinder. Of course, the hand ground adds in more flavour but the mixer does justice too. It is also an easy recipe to serve as a tea time snack or for breakfast.


Vatli Daal is literally translated as "Ground Daal"- the daal here being Chana Daal (split and husked Bengal gram). This is a highly nutritious dish and has a nice tangy flavour to it, with the addition of raw mangoes. Since raw mangoes was not easily available during this time here, i have used lime juice. You can also add Amchur powder instead, but the tanginess in the dish is important. There is also a raw version of this daal which i will post soon.


Preparation time: 8-10 hours soaking
Cooking time: 20 minutes
Serves: 2 people
Recipe type: Snacks

Ingredients:

Chana daal - 1 cup 
Lime juice - 2-3 tsp or grated green mango (3 tbsp)
Salt - to taste
Sugar - 1/2 tsp

For tadka:
Oil - 3 tbsp
Mustard seeds - 1 tsp
Turmeric powder - 1/2 tsp
Green chilli - 2(sliced)
Grated ginger - 1 inch piece

For garnish :
Grated fresh coconut
Chopped corriander leaves (optional)


Recipe:

Wash and rinse the chana daal well.

Soak the chana daal in about 2 cups of water for 8-10 hours of overnight. It should turn to be so soft that when you press it, the daal grain should break. Hence, if needed, soak for more time.

Drain the water and clean the daal under running water.

Now grind this to a grainy consistency in mixer grinder adding little water at a time. Don't make it to a runny consistency. It has to be grainy.


Heat oil in a pan. Now add mustard seeds and let them splutter. Add the turmeric, green chilli and ginger.

After about half a minute, add in the ground chana daal. Mix it all well. Add the lime juice, salt and sugar and again mix it all well.

Add a little water and cover the pan. Steam cook the daal for about 5-7 minutes. Keep stirring occasionally.

Garnish with grated fresh coconut and corriander leaves (if used).

Tangy yummyliscious snack is ready. Hope you all try it and love it.


Happy Cooking :)


Friday, 17 July 2015

Mathri

We all get cravings from time to time...Burger cravings, sweet cravings ( my favourite!!! :)), cheesy cravings, specialty cuisine cravings and then there are tea-time cravings, midnight cravings... The list goes on.. But i always wonder how most of our cravings are related to food, like we don't get a shopping craving at midnight or a craving to read a book one fine day!!! Isn't it? Well, i still remember when we were kids and it was summer vacations, we cousins or friends used to get together for night-sessions of playing games or watching movies or just chit-chats and the next day Mom would find the buiscuits dabba half empty!!! Yes, we would always feel hungry at nights and would hunt down buiscuits or namkeen  from the kitchen :)


I no more get midnight cravings. Maybe because i am not awake so late nights these days or maybe because my eating habits have matured enough to eat right at right time! Or i am just getting old ;) But yes, i do get sweet cravings, so even if it is just a small bite of chocolate or a mini bite of some mithai, i need it after my meals. Thankfully, my mother-in-law keeps sending some homemade stuff and some from my favourite sweet shop "Chitale Bandhu" in Pune, like these "Mango burfi" and "badam burfi" that she sent last month!!!


Also, the last time she came here, she got a huge slab of what is called "Gul-Patti". I specially wanted to mention it in the blog. This is a specialty of Akola, the Vidarba region of Maharashtra in India - My hubby's hometown! It is made with a special type of jaggery that is available there, peanuts and water! That's it! It tastes so so awesome that just writing about it has got me drooling :) It made a perfect in-between snack for us and what more? Healthy too! 


Tea-time cravings or rather coffee-time (since i am a coffee-drinker) have always stayed with me, since the time i have started drinking coffee. So, a piece of Cake ( Chocolate nut cake, Yogurt cake, Fruity sponge cake ) or some Nankhatai or just a small Peanut ladoo is good enough for me. Sometimes snacks such as wafola or Paatvadya tastes awesome and is filling enough till dinner time too. But this time, when my mother-in-law visited us, she taught me one awesome snack that goes so well with tea or coffee. My husband has grown up eating these and now they are my favourites too. I would always have it when we visited Pune, but never really learnt the method of making it. This time, though, i made them along with my mother-in-law. Its so easy that now i always make them and store them in air tight containers. 


There is a different type of Mathri that i see in stores here in Delhi, but they are solid, heavy and stuffy. These, on the other hand, are crunchy, light and super tasty.


Ingredients:

Maida (All purpose flour)- 2 cups
Atta (Wheat flour) - 1 cup
Suji (Rava) - 2 tbsp (optional but helps in making the mathris crisp)
Cornflour - 2 tbsp (optional)
Salt - to taste
Cumin powder - 1 tsp or more as per taste
Pepper (crushed) - 1 tsp or more as per taste
Oil - 1/4 cup


Recipe:

In a mixing bowl, mix maida, atta, rava, cornflour, salt, cumin powder, and crushed pepper. 

Heat 1/4 cup oil and mix it in the mixing bowl with the help of a spoon. Dont mix it with hand as the oil is too hot.

Now warm some water (Not too hot) and knead a dough adding water little by little. The dough should not be too soft and sticky niether too hard. So use water little by little to knead.

Cover the dough and let it rest for about 30 minutes.

Now make equal sized balls of the dough. The balls should be of size of a puri.

Try not to apply flour while rolling the balls. Use only if necessary. Or you can apply some oil on your hands while making the balls from the dough. That way, you won't require to use flour.

Roll the balls into small puris. Now make small cuts on the puri along with a knife. This is to prevent the puri from fluffing up and for the mathri to be crisp. Make sure the cuts are just small and all over the puri.

Heat oil in a kadhai for frying. Now, add the mathris one by one both sides and fry till golden on low flame. Don't fry the mathris too brown.

Let the mathris cool down. They become crisp only when they are cool. If you eat it immediately, they will be soft. Once the mathris have cooled down, store them in air tight containers and enjoy along with tea or coffee :)


Happy cooking!!! :)

Friday, 12 June 2015

Kolhapuri Khichadi

Hello all you lovely people! The weekend is already here and the rainy season too! No, not in Delhi yet, but back home in Mumbai it seems the season has already shown it's glimpses of showers! From all my friend's pictures and messages and status updates, i already felt as if I am in Mumbai! Each of us has a memory with rains - sometimes good, sometimes otherwise! My love affair with the rains has been associated with watching it pouring down sitting by the window! Yes, other than getting drenched in the first rains, i don't like to travel much in the season. The reason : Traffic jams!!! Unless it's an outdoor trip or a trek, i prefer staying home, listening to music, reading, or just lazing around.

Image source : Google


And how can we forget food? Hot cuppas of coffees and teas being made in the kitchen with some fried bhajiyas or poha or warm sabudana khichdi! Uffff...Nothing beats this food in rainy season. I would have mentioned "Maggi" too, but with the recent controversies and news about it, i would rather not add it to the list ( Though, i must say, the damage has already been done as Maggi was a saviour during the stay-alone days :)). I found 2 very nice images from Google which i am sharing. Its true... Rains bring happiness :)

Image source : Google


Coming to the post, i have already posted the recipe of Sabudana Khichdi . The one i am posting here is a different version which is popular in Kolhapur. The only difference is adding extra corriander leaves and coconut and making a paste. Some even make it a little spicier (we are all aware of the kolhapuri spicy masala, so eating spicy is natural to them) by adding more green chillies or addition of red chilli powder. I had tasted this khichdi when i visited Kolhapur in 2010 to the famous Mahalaxmi Temple. And of course, couldn't resist buying some authentic (and cheap) Kolhapuri chappals :


Though the regular Sabudana Khichdi is our comfort food and remains a weekly breakfast dish at my home, this version is a hot-favourite too :)


Ingredients:

Sabudana - 1 cup
Danyacha kut or coarsely ground peanuts - 1/2 cup
Ghee or oil - 2 tbsp
Green chillies - 3
Salt - to taste
Sugar - 1/2 tsp (optional)
Cumin seeds - 3/4 tsp
Potatoes - 1 (Peeled and cut into small cubes)
Corriander leaves - 2 tbsp
Grated fresh coconut - 2-3 tbsp


Recipe:

Rinse the sabudana thoroughly in a strainer 2-3 times under cold water. Since sabudana is starch, make sure you don't over rinse it as it will turn soggy. Drain well.

Place the sabudana in a covered bowl for about 8 hours or overnight. Add just a little water to it (Don't soak, or immerse the sabudana in water. This will make the khichdi sticky.) Sabudana should be soft and milky white the next day. They would have expanded. If not, add just a little water and soak for some more time. 

Make a paste of peanuts (if using grounded peanuts or powder, then mix it later along with salt or sugar), coconut, green chillies and corriander leaves. Add this paste along with salt and sugar to the sabudana. Mix well as if the sabudana is marinated with the paste. 

Heat oil or ghee in a pan. Ass cumin seeds. When they splutter, add the potatoes. Saute briefly and cook covered for 4-5 minutes till done. Alternatively, you can also add boiled potato cubes. That will reduce the cooking time.

Now, add the sabudana and mix well. Cook covered for about 10-12 minutes, stirring well to avoid sticking and clumping.

Each pellet should be separate yet cooked. You will know it's done when it turns translucent.

Garnish with corriander leaves. You can also add grated fresh coconut on top for garnishing.

Serve along with curd.


Happy weekend everyone and Happy Cooking :)


Friday, 29 May 2015

Aai's easy Uttapam's

Well, as most of you know by now about our new launch of Tshirts for animal lovers a week ago under the name "The Woofy Tales", the branding is keeping me quite busy! Its all a "two-people show" since it is just a start-up! So, me and hubby have to do the publicity, marketing, track orders, ship them, click pictures, edit and the list goes on.. Managing all this and also our little paw-friends that i board gave me very little time to stand in the kitchen and cook some elaborate dishes! So mostly it would be a quick daal-chawal with the pickles (a whole lot of them i had mentioned in my earlier post, of which i still have to click pictures and blog about) or a simple stir fried sabzi and roti or at times, just a snack item like bhel or some heavy salad! Also, the temperature is rising here day by day , and even if i cook a small meal, I am always drenched in sweat! So that gives me even less motivation to stand in the kitchen for long hours!


Our logo 


So, to eat light in summers, our meals are small and we top it up with some milkshake or ice cream sundaes or Popsicles. Just like this watermelon Popsicle which remains our favourite. I make this with just 4 ingredients : Watermelon juice, lemon juice, black salt and sugar or honey if needed.


The recipe i am sharing here is one that i have learnt from my mother. She used to make these quick delicious uttapams with the readymade dosa batter. This recipe comes to my rescue when i have to spend less time in the kitchen, such as past few days! This is quite easy to make and the addition of red chilli powder is totally optional. I have made it in 2 ways - one just as my mom made it with onions, tomatoes and red chilli powder and the second one with green chillies, onions, tomatoes and cumin powder! You can even add corriander leaves if you like.


Ingredients:

Readymade dosa batter - As needed. We normally use 1/4 kg  (a small packet that we buy from the store)
Onion - 1 small chopped
Tomato - 1 small chopped
Red chilli powder - according to taste (optional)
Green chilli - 1 chopped finely
Cumin powder - 1 tsp (or as needed)
Oil - 3-4 tbsp
Salt - to taste


Recipe:

Heat a non stick tava. 

Add little water to the dosa batter to make it to desired consistency. The batter should not be too thick nor too thin (like the normal dosa consistency). To make uttapams, it's best to have the batter a little on the thicker side but of pouring consistency. The readymade batter is too thick, hence this step. If your batter is already of pouring consistency, then skip this step.

Add salt to the batter as needed.

Put about 1-2 tsp of oil on the tava. Now, with a laddle ful, spread the batter on the greased hot tava in a circular motion to make the uttapam round in shape.

Reduce the flame and put little oil on the sides of the uttapam. Add about 1-2 tbsp of onions, tomatoes and red chilli powder or green chillies and cumin powder as needed.

When one side is cooked and becomes brown, flip it on the other side carefully and cook the other side as well.


Please note to keep the flame to minimum or else the toppings will burn and become black. It will give a burnt look and flavour.

Remove it in a serving plate and serve along with Naralachi chutney .

This dish is absolutely easy, quick and makes a perfect breakfast recipe or a tiffin recipe too. It is an absolute favourite of my hubby and taste delicious with the coconut chutney (Link mentioned above).


Happy Cooking and wish you all a great weekend ahead :)


Friday, 13 February 2015

Paneer tikka

There is always a debate about the origin of paneer and there are stories around it. Of late, i am following two terrific shows on channel "EPIC" on television. One is "Raja, rasoi aur anya kahaniya" (The king, the kitchen and various stories) and another one being "Lost recipes". Both shows give a lot of information about the history of food and how some ingredients were adapted in Indian cuisine and recipes were evolved.

In one such episode, i learnt that Paneer actually came from Persia. In India, paneer existed in the form of "Chenna" but the word Paneer (also known as Panir) came from Persia. It is so said, that Paneer was accidentally invented when a merchant was carrying milk in a pouch made of raw-Hyde for his days of travel. The heat of the dessert and the rennet in the leather turned milk into Paneer. It started gaining popularity in Indian cuisine during the Mogul ruling period, it's said.

As of today, it's a household dish. Not majorly used in everyday cuisines in west or south of India, but mostly in North India. To a lot of friends of mine from different countries, "Saag paneer", or "Palak paneer" or infact Indian vegetarian cuisine relates to "Paneer". The best or worst part about Paneer is, it doesn't have a taste of it's own, but blends itself so well in whatever spice/curry it is cooked in. So, today i am going to write about Paneer tikka. This is a dry version and not the famous "Paneer tikka masala" with the gravy. This paneer tikka can be served as a starter or a side dish, and mind you, it does make you full with just a few pops in the mouth! Tastes delicious, juicy and just the right amount of spice !!!


Recipe adapted from : Vegrecipesofindia

Ingredients:

Paneer - 100 gms
Ginger garlic paste - 1 tsp
Red capsicum (bell pepper) - Half 
Yellow capsicum (bell pepper) - Half

If you don't have both, use any one variety. If not, use green capsicum and/or onions.

Red chilli powder - 1/2 tsp
Corriander powder - 1/2 tsp
Salt - to taste
Cumin powder - 1/2 tsp
Garam masala - 1/4 tsp
Besan or cornflour - 1.5 tbsp
Lemon juice - to sprinkle on top
Oil - for shallow frying 


Recipe:

Cut the paneer and bell peppers in equal size squares.

Take them in the mixing bowl and add everything else except oil.

Mix it all well and let it stand marinated for about 15 minutes.

Now heat oil in a pan.

Attach the paneer and bell pepper alternatively on a toothpick. (Normally 3 fit well in a toothpick and lets it fry well).


Shallow fry these until golden brown. If you fry for a longer time, the paneer will become chewy.

You can sprinkle some chaat masala and lemon juice on top.

Serve along with tomato ketchup.


Easy mouth watering tikkas are ready :))

Happy Cooking :)

Tuesday, 20 January 2015

Sprouts Cutlets

It's winter time, and there is always that urge to have a hot snack in evenings like Appe , Bread Poha, Upma, Peanut butter squares, Batata Vadas or a simple Maggi does good too. But what better than to make and serve something new? And there came a whatsapp picture from one of my pet-clients, now a friend, of Sprouts cutlets that she had made for her son's birthday!!! I couldn't help asking her for the recipe, since coincidentally i had sprouted moong in my kitchen. And there - my saturday evening snack was ready!!!

I made a few changes to the recipe she told me. She made a paste of the sprouts directly, i fried them which gave them a little crispier texture. I added a few other spices than red chilli powder and salt, just to give that zing. So, you can make it either ways, and trust me, you will have an explosion of flavours bursting in your mouth. I normally make Usal or misal or just dry sprout sabzi with moong and matki, but this one is a great addition to the snack menu. Do try it, it's quite simple.


And well, if you have guests coming over, you can make these well in advance and warm them in microwave- they don't turn soggy or lose their texture/taste even after long. So, here's how i made them (Thanks to Amita for the original recipe)

Ingredients:

Sprouted moong (Soak about 1/2 cup moong overnight, drain and keep in air tight container in refrigerator. It will automatically start sprouting, or else buy readymade sprouted moong. You can also use matki or any other sprouts)
Oil - 1 tsp and for frying
Cumin seeds - 1/2 tsp
Asafoetida (hing) - 1/4 tsp
Salt - to taste
Green chillies - 2 -3 (Adjust according to taste)
Ginger - 1/2 inch
Garlic - 4 cloves
Turmeric powder - 1/4 tsp
Garam masala - 1/2 tsp
Corriander powder - 1 tsp
Besan - 1 tbsp (Though the moong paste acts as a binding agent, i added this just so my cutlets turn out more crispier)
Corriander leaves - a few (chopped)
Chopped vegetables of your choice ( I used carrots, cabbage and french beans but you can add any like onions, capsicum, peas etc)

Recipe:

Chop the ginger, garlic and green chillies and crush them to a paste in a mortar and pestle.

Heat 1 tsp oil in a pan, add cumin seeds and hing. When they crackle, add the chilli-ginger-garlic paste. Sprinkle the turmeric powder and salt.
At this stage, you can also add some chopped onions and fry if you wish to.

Now add the sprouted moong and on medium flame, keep frying them till they change colour (turns a little yellow).

Let it cool down. Now, make it into a paste in a mixer-grinder. Try not to add water, but if needed add a little water. 

In a mixing bowl, take this paste, add garam masala, corriander powder, besan, chopped vegetables, salt and corriander leaves. Mix together well.

Waiting to the fried

Now shape them as you like and deep fry the cutlets till the outer cover turns brown. 

They give a perfect texture of crispy from outside-soft from inside and are melt in the mouth when served with ketchup. You can also serve them along with some mayo-mint chutney.


Happy Cooking :)

Wednesday, 24 December 2014

Appe from Readymade Idli Batter

Appe as it is called in Maharashtrian or Konkani language, this is a popular breakfast recipe is South India known as Paddu. They are made of various ingredients - Sometimes with rice, sometimes adding Poha, and at times only with lentils (majorly Urad daal). 

These days, we get readymade Dosa/Idli batter in the market. I have sourced one amazing south indian guy who makes this fresh and sells it near to our home. So, one packet of this in fridge and i can make varied breakfast of idli, dosa, uttapas and at times Appe. My aunt gifted me this special "Appe Tava" that is required to make these. It is a non-stick tava, so naturally makes for a healthy breakfast with less oil. You can make it with no oil too, but i prefer brushing a little oil, just to get a nice brown colour and also to make sure the batter doesn't stick to the tava (as the batter varies from place to place).


Ingredients:

Idli batter - as required 
French beans - a few (chopped finely)
Onions - Half for about 1/4 kg batter (chopped finely)
Turmeric powder - 1/4 tsp
Salt - to taste
Water - little
Corriander leaves - 1/2 cup chopped
Oil - to brush the tava

You can also add pepper for a different taste and replace/add vegetables of your choice like cauliflower, carrots or even peas.

Recipe:

In the appe tava, brush little oil and place it on the stove.

Mix turmeric powder, salt, beans, onions, corriander leaves with the dosa batter and add little water if the batter is too thick. Don't make it too thin like a dosa batter. It should just have the consistency to pour easily.

Once the tava is hot, put small amounts in each mould (about a spoonful), cover the tava with a lid and let it steam-cook till the outer sides become brown. 

Now turn over the appe's, so the other side is cooked. This time don't cover the tava.

Serve hot along with coconut chutney or tastes great with any chutney :)

Happy Cooking!!! :)

Tuesday, 23 December 2014

Peanut butter squares

It's always my worry on a weekday night, of what different breakfast to pack in tiffin for hubby the next morning. I guess each of the ladies with kids or working husbands would have this worry before going off to bed. Not only different, but something that can be made quick and is easy, yet, healthy and tasty. Now to get all these adjectives in one recipe is really a task. There are times when i make the ever-green poha, Upma , Bread poha or Sabudana Khichdi. And at times when i am extremely sleepy or bred, i would even pack away a simple bread-butter toast or a cheese and tomato sandwich. But there are times, when i have time at hand, and i am all excited to make something new. So, those are the times, i make recipes such as today's post.


Peanut squares are basically peanut butter sandwiches with a twist. You can just apply the peanut butter on bread and eat it like that, (I love it this way!!!), or toast the bread and apply the peanut butter or make it this way. I also added mayonnaise in a few bread pieces to make it interesting and believe me, this makes for an awesome breakfast recipe. A little sweet but absolutely delicious!!!


Ingredients:

Bread slices - 4
Peanut butter - to apply on the bread (as per needed or by choice) - Can be replaced with Mayonnaise.
Egg - 1
Cream (I used Amul fresh cream, but you can use homemade cream or even skip this) - 1 tbsp
Milk - 2 tbsp
Sugar - 1 tsp
Butter - 1-2 tbsp to toast the bread


Note: If you don't want a sweeter taste, skip the sugar and add salt. Or add little of both for a neutral taste.


Recipe:

Apply peanut butter on the bread slices. I have kept the sides of the bread, so it gives a crispy feel after toasting. But you can cut the sides, if you don't like them.

In a bowl, break the egg and whisk it. Now add milk, cream, and sugar (or salt) and whisk it all well.

In a pan, heat butter.
Keep one slice of bread on top of the other and dip in in the egg mixture and immediately put it on the heated pan. Let it toast till brown and crispy. Now flip it to the other side and toast till brown.

Remove it and cut the bread into squares.

Have it with a warm cuppa milk or chai. Some great winter mornings are like this: 


Happy Cooking!! :)

Friday, 28 November 2014

Bread Poha

I love making leftover recipes. That's when creativity is best put to use, and it's fun when hubby enjoys the final product not knowing what's gone inside as ingredients ;) Like making parathas of leftover daal, or adding palak to it and giving tadka to make it daal palak, or mixing leftover aloo sabzi with a new fresh vegetable, or making tadka rice with leftover rice!!! It's always a new better dish that comes out of the leftover than throwing it away. Just the same, when you are done with eating bread as toast, with omelettes, in sandwiches and it becomes 3-4 day old or is excess lying in the refrigerator, this recipe comes as a best option.

Some people even call it bread upma and add vegetables (carrots, beans, corn etc) as used in the regular Upma. Some add potatoes (as used in poha) but i always make it with only onions and tomatoes. There are even different ways of cutting/chopping the bread. At times, i remove the sides or i use them and chop the bread in small pieces, and sometimes i absolutely chop it like a loose powder (always by hand). The choice is yours.


So this makes for a perfect breakfast recipe or a tiffin recipe. You can have it as it is or alongwith some chutney or pickle or even dahi(curd). I prefer having it as it is with my morning cup of coffee.

Ingredients:

Bread slices - 6 to 8
Onion - 1 (finely chopped)
Tomato - 1(finely chopped) Addition of more tomatoes will make the dish soggy, so stick to less tomatoes as possible.
Green chilli - 1 big finely chopped
Oil - 2 tsp
Red chilli powder - 1/2 tsp (adjust according to taste)
Corriander  powder - 1/2 tsp
Turmeric powder - 1/4 tsp
Salt - to taste
Oil - 2 tsp
Curry leaves - a few (optional)
Corriander leaves - chopped (to garnish)
Cumin seeds - 1/2 tsp
Mustard seeds - 1/2 tsp
Asafoetida - a pinch
Lemon juice - on top (optional)

Recipe:

Chop the bread pieces or crush them roughly with hand.

Heat oil in a kadhai/pan. Add mustard seeds. When they crackle, add asafoetida and cumin seeds. Then add the curry leaves and onions.

Fry onions till transluscent. Don't over fry and burn them. Then add the green chillies and saute for about a minute.

Add in the tomatoes and cook uncovered till the tomatoes turn soft (not like a paste, but just soft). Keep stirring in between. Add some salt, so that it cooks faster.

Then add the turmeric powder, red chilli powder and corriander powder.

Saute till all the spices mix well with the onions and tomatoes. Now add in the bread, and mix it all well. I normally keep mixing and cook for about 3-4 minutes uncovered, but you can cover it too (though there might be a chance of the dish becoming soggy, but if you like it that way and are in a hurry, cover for about 2 minutes or so).

Adjust salt. Mix it corriander leaves and sprinkle some lemon juice on top (just before serving) for that tangy flavour.


Delicious and quick breakfast recipe is ready :)

Happy Cooking :)

Friday, 5 September 2014

Dadpe Pohe

Dadpe pohe is a typical Maharashtrian dish which is eaten for breakfast or as a mid-time evening snack. The name of the dish has significance in it's cooking method. Dadapne in Marathi means giving pressure. No, this dish is not pressure cooked, hehe... Instead the thin variety of poha is mixed with chopped onions and mixed with tempering and fresh coconut. This mixture is covered for a while which gives it pressure which make the flavours blend well. So technically, there is no cooking involved. Just chopping and mixing. 
Isn't it easy?


And as simple as it sounds, it is made in just 10 minutes to be precise. The main ingredients for the dish being onions, grated fresh coconut and the tempering. Tempering is usually oil, cumin seeds, asafoetida, mustard seeds and at times curry leaves. Traditionally, the dish is made with fresh coconut, but if you don't have it at hand try making it with dessicated coconut (the taste will vary a bit, but if you are experimental with food, you will surely like it). And if you don't have dessicated coconut too at hand, just try it with other ingredients. Yes, we are the queens of our kitchen, and we can create magic with what's available, right?


Ingredients:

Thin poha - 2 cups
Onion - 1 (chopped finely)
Green chillies - 4 (Either chop them finely or cut them in half size according to your choice)
Grated fresh coconut - 1/2 cup or 1/2 cup chopped tomatoes (If you don't have coconut, then add tomatoes, or you can add both but don't add a lot or else poha will become too soggy)
Curry leaves - 5-6 (i didn't have them handy, so i skipped adding these in the picture)
Mustard seeds - 1 tsp
cumin seeds - 1 tsp
Corriander leaves - a few (finely chopped)
Asafoetida - a pinch
Turmeric powder - 1/4 tsp (just to give that colour)
Salt - to taste
Oil - 2 tbsp
Sugar - 1/2 tsp (this is optional, but we maharashtrians always add salt and sugar together to a dish to give that mixed flavourful taste)
Lemon - 1/2

Recipe:

Always use thin variety of poha to make this dish and not the "Mota poha".

You can make a paste of the coconut by adding little water or you can add the coconut as it is. My mother usually adds the coconut as it is.

Heat oil in a pan. Add mustard seeds. When they splutter, add asafoetida, cumin seeds, curry leaves and green chillies. Saute for about 30 seconds.

Now add the onions and cook till translucent. Add in the turmeric powder, mix well and switch off the gas.

Take poha in a mixing bowl and add the above mixture to it (If adding tomatoes, add now). Add salt and sugar and mix it all well.

Now add the grated fresh coconut or the paste, corriander leaves and lemon juice. 

Mix it all well and keep aside covered for about 10 minutes. Dadpe pohe is ready to serve :)


They taste great as it is, but you can even eat it along with some pickle, chutney or dahi (yogurt).

For a change of taste, some add roasted peanuts or roasted chana daal to this poha. Some add buttermilk instead of lemon juice, and some make it without heating the oil (add oil directly to the poha). As i always say, cooking is so regional as the water, weather and ingredients available always play an important role. So you can make your own version and am sure you will love it!

Happy Cooking :)


Tuesday, 24 June 2014

Maggi of the Millennium!!!

You must be wondering this girl has gone crazy that she is posting a recipe of maggi. But a friend once had told me that if a recipe is given to 2 people, and they cook that dish in exactly the way it's written on paper, both the dishes would still taste different. Guess we all have our individualistic unique ways and every hand adds in a different taste. Just like when i make Maggi and when my hubby does, it tastes completely different, and i must agree that the one hubby makes is far better :) ( Far better is a small word, in fact it tastes super delicious !!! ). I don't know if the saying is true that "Men are better chefs/cooks" ( I would love to hear from you, what u think about this !!! ), but hubby definitely is a Maggi-Master :)

I have named this dish "Maggi of the millennium", for the very fact that hubby dearest loves to add this "Millennium" word to anything and everything, and it's like a joke at our home to get us in splits :) So, "Dog of the millennium" ( for every dog i pet-sit ), "Bayko ( wife ) of the millennium" ( to lift my mood up ), or "dish of the millennium" ( for everything i cook ) are some of the common phrases at our home :)) So here's Maggi of the millennium from "Husband of the millennium" !!!! :)


I feel Maggi is completely a boy's dish ! Guess all boys/men know how to cook it, to keep up the hunger in the early bachelor days. My memory of Maggi is one when i had gone for a trek in Ladakh. I had done a 10 day Zanskar river trek where we had to walk on the frozen river for almost 5-6 hours a day! It was one memorable trip of my life and the adventures were some thrilling ones! At times, where the snow was melted, we had to climb up the mountain and then back down till the point we see the frozen snow again to walk on ! Then we had to pitch in tents and the human-porters would cook us a nice meal. Sometimes we would start early morning and then take a break for breakfast and our favourite was maggi ! Having hot steaming maggi with tomato ketchup served in an aluminium plate surrounded by snow-kept mountains and the sound of river flowing... Bliss is the word :) Here's a collage of some pics from my trip and i found a perfect pic ( one of the porters is cooking Maggi!!! ) :))


Well, coming back to the recipe, hubby made Maggi often during his bachelor days of staying away from home for work, and he kept experimenting with it and still does. So sometimes there is addition of peas, sometimes capsicum, sometimes both or sometimes adding different masalas. Here's a recipe that we commonly prepare :

Ingredients:

Maggi ( I love the Atta noodles, but hubby doesn't... so he makes with the normal masala maggi packets ) - 2
Cumin seeds - 1 tsp
Mustard seeds - 1/2 tsp
Asafoetida - a pinch
Corriander powder - 1/2 tsp
Garam masala - 1/2 tsp
Salt - to taste
Pepper - to taste
Green peas - 1/4 cup
Onion - 1 chopped
Tomato - 1 chopped
Oil - 1 tbsp 
Green chillies - 2 chopped ( adjust according to taste )

Recipe:

Heat oil in a kadhai. Add mustard seeds, asafoetida and cumin seeds. When they crackle, add in chopped green chillies.

Saute for 30 seconds and add in the onions. Fry for about 1-2 minutes.

Now add the tomatoes. Add all the dry masalas along with the maggi-masala.

Do not make this a paste ( as we cook for curries or sabzis ). The tomatoes don't have to turn soggy/mushy or soft. Just saute for about a minute and immediately add the green peas.

After about 1-2 minutes, add the maggi ( break into small pieces), and dry roast it with the masala for about 3-4 minutes. Make sure to stir in regularly.

Now add about 3 cups of water. If you like the maggi like a soup, add more water.

Check for salt and add if needed.
Boil on high flame and then simmer till maggi gets cooked. Remove from stove top and serve hot. Sprinkle some pepper.

Note : You can add chopped corriander leaves, or oregano or basil for added taste. You can even make it more indianised by adding sev or bhujia on top. 
You can replace or add veggies of your choice.
In the pictures here, he hasn't added green peas as we didn't have them handy. But normally, he cooks with green peas, hence i have mentioned it in the recipe.

Maggi of the Millennium is ready :)) ( and well it does take more than 2 minutes ))Do you all remember this - "Mummy badi gazab ki Bhook lagi...Maggi chahiye mujhe abhi" https://www.youtube.com/watch?v=8kCuSu7Wzb0