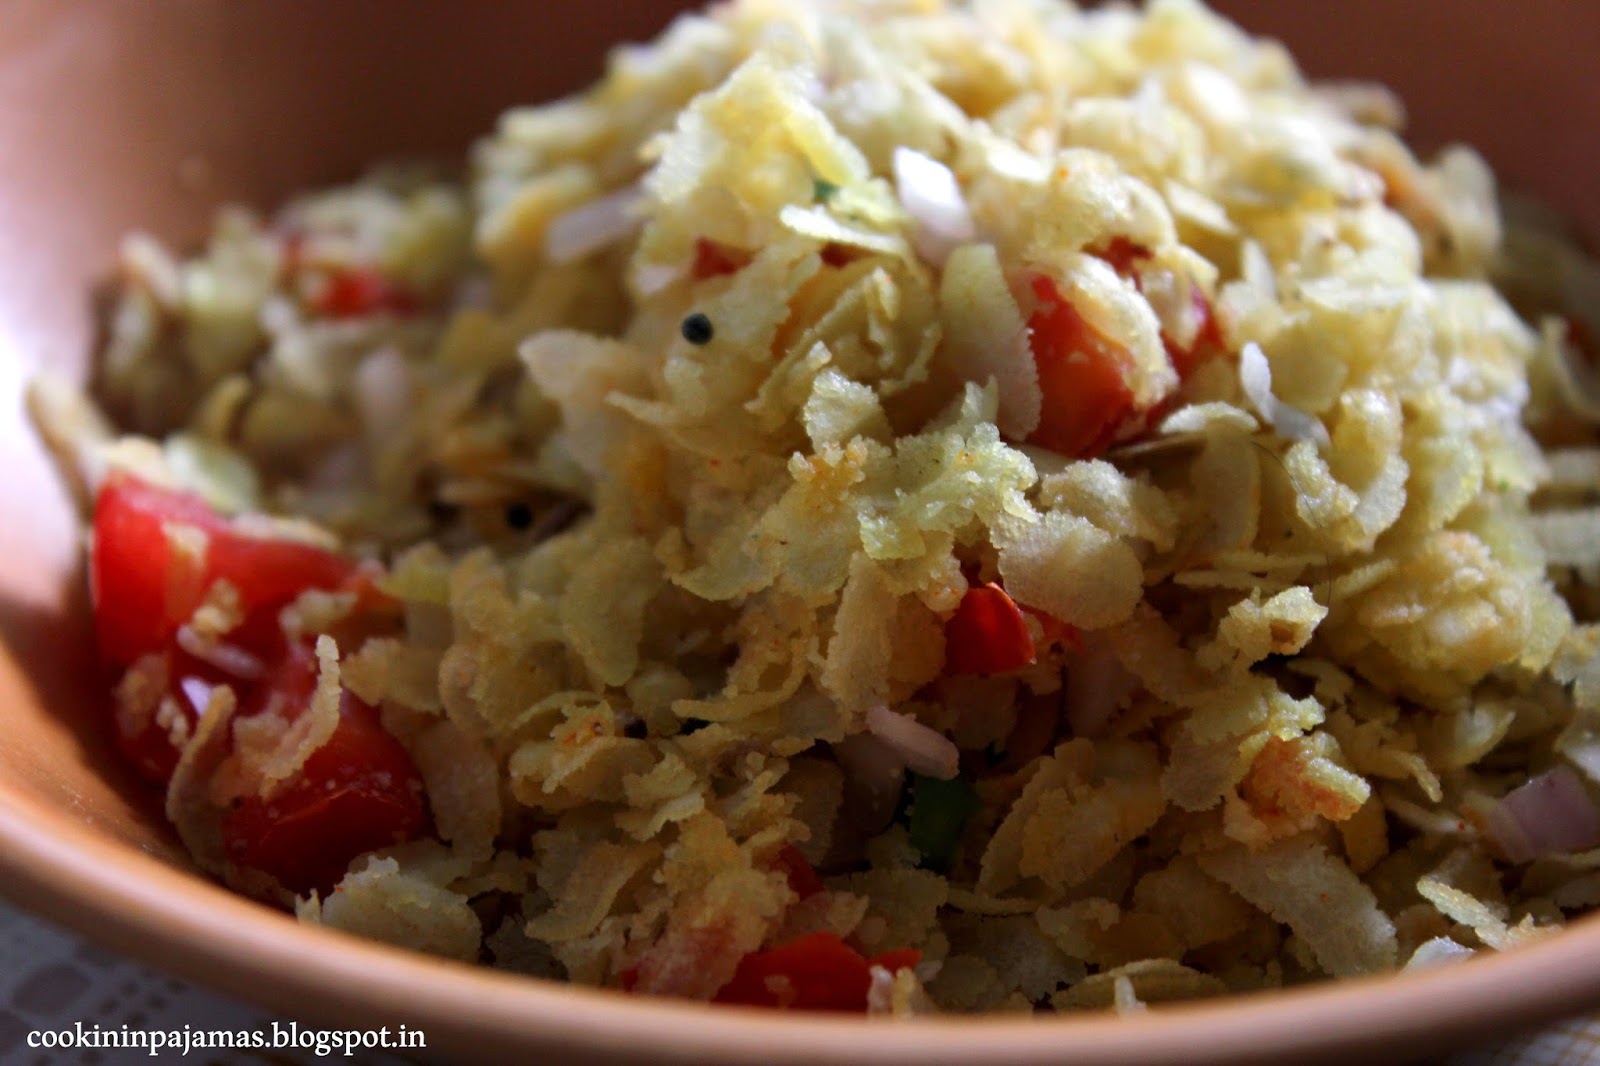
Showing posts with label Healthysnacks. Show all posts

Saturday, 10 October 2015

Vaatli Daal : Ground Chana daal snack

I love this part of the year!! Yes, i have mentioned it before and i will say it again and again. With so many festivities come so many traditions, celebrations and of course food specialties. More so, the sweets and snacks that are prepared in each household adds so much more excitement to the air, that it's fun not only gorging on them but learning about the whole "making" process too. Yes, as kids, it would hardly matter but since the time i have started blogging, i try as much as possible to learn/read about different cuisines, and the history behind each dish or the method it is prepared. Am sure my fellow bloggers will understand this urge to explore :) Here today, am posting the recipe of a typical Maharashtrian delicacy often served on Anant Chaturdashi (the last day of Ganesh Chaturthi)that i made for the first time. I have always seen my mother or aunt making this on the traditional grinding stone (Paata-varvanta as we call it) during Ganesh festival but never really knew that this tasty dish can be made even in mixer-grinder. Of course, the hand ground adds in more flavour but the mixer does justice too. It is also an easy recipe to serve as a tea time snack or for breakfast.


Vatli Daal is literally translated as "Ground Daal"- the daal here being Chana Daal (split and husked Bengal gram). This is a highly nutritious dish and has a nice tangy flavour to it, with the addition of raw mangoes. Since raw mangoes was not easily available during this time here, i have used lime juice. You can also add Amchur powder instead, but the tanginess in the dish is important. There is also a raw version of this daal which i will post soon.


Preparation time: 8-10 hours soaking
Cooking time: 20 minutes
Serves: 2 people
Recipe type: Snacks

Ingredients:

Chana daal - 1 cup 
Lime juice - 2-3 tsp or grated green mango (3 tbsp)
Salt - to taste
Sugar - 1/2 tsp

For tadka:
Oil - 3 tbsp
Mustard seeds - 1 tsp
Turmeric powder - 1/2 tsp
Green chilli - 2(sliced)
Grated ginger - 1 inch piece

For garnish :
Grated fresh coconut
Chopped corriander leaves (optional)


Recipe:

Wash and rinse the chana daal well.

Soak the chana daal in about 2 cups of water for 8-10 hours of overnight. It should turn to be so soft that when you press it, the daal grain should break. Hence, if needed, soak for more time.

Drain the water and clean the daal under running water.

Now grind this to a grainy consistency in mixer grinder adding little water at a time. Don't make it to a runny consistency. It has to be grainy.
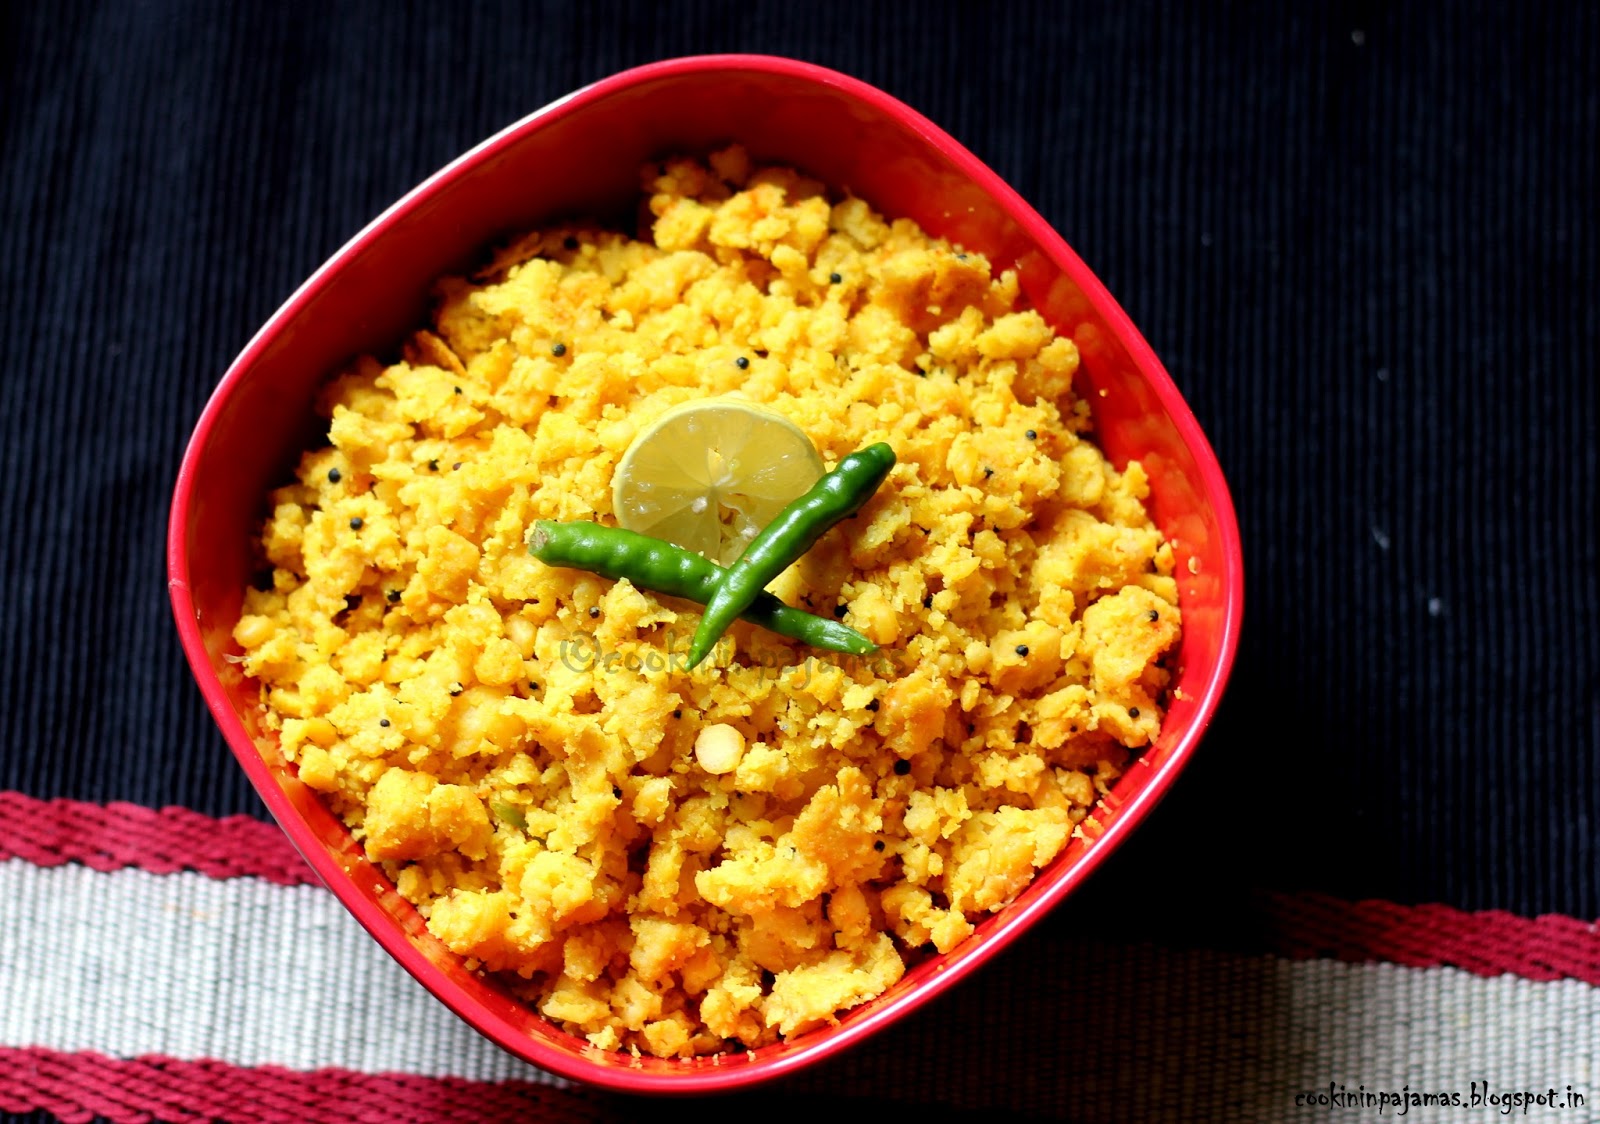


Heat oil in a pan. Now add mustard seeds and let them splutter. Add the turmeric, green chilli and ginger.

After about half a minute, add in the ground chana daal. Mix it all well. Add the lime juice, salt and sugar and again mix it all well.

Add a little water and cover the pan. Steam cook the daal for about 5-7 minutes. Keep stirring occasionally.

Garnish with grated fresh coconut and corriander leaves (if used).

Tangy yummyliscious snack is ready. Hope you all try it and love it.


Happy Cooking :)


Friday, 17 July 2015

Mathri

We all get cravings from time to time...Burger cravings, sweet cravings ( my favourite!!! :)), cheesy cravings, specialty cuisine cravings and then there are tea-time cravings, midnight cravings... The list goes on.. But i always wonder how most of our cravings are related to food, like we don't get a shopping craving at midnight or a craving to read a book one fine day!!! Isn't it? Well, i still remember when we were kids and it was summer vacations, we cousins or friends used to get together for night-sessions of playing games or watching movies or just chit-chats and the next day Mom would find the buiscuits dabba half empty!!! Yes, we would always feel hungry at nights and would hunt down buiscuits or namkeen  from the kitchen :)


I no more get midnight cravings. Maybe because i am not awake so late nights these days or maybe because my eating habits have matured enough to eat right at right time! Or i am just getting old ;) But yes, i do get sweet cravings, so even if it is just a small bite of chocolate or a mini bite of some mithai, i need it after my meals. Thankfully, my mother-in-law keeps sending some homemade stuff and some from my favourite sweet shop "Chitale Bandhu" in Pune, like these "Mango burfi" and "badam burfi" that she sent last month!!!


Also, the last time she came here, she got a huge slab of what is called "Gul-Patti". I specially wanted to mention it in the blog. This is a specialty of Akola, the Vidarba region of Maharashtra in India - My hubby's hometown! It is made with a special type of jaggery that is available there, peanuts and water! That's it! It tastes so so awesome that just writing about it has got me drooling :) It made a perfect in-between snack for us and what more? Healthy too! 


Tea-time cravings or rather coffee-time (since i am a coffee-drinker) have always stayed with me, since the time i have started drinking coffee. So, a piece of Cake ( Chocolate nut cake, Yogurt cake, Fruity sponge cake ) or some Nankhatai or just a small Peanut ladoo is good enough for me. Sometimes snacks such as wafola or Paatvadya tastes awesome and is filling enough till dinner time too. But this time, when my mother-in-law visited us, she taught me one awesome snack that goes so well with tea or coffee. My husband has grown up eating these and now they are my favourites too. I would always have it when we visited Pune, but never really learnt the method of making it. This time, though, i made them along with my mother-in-law. Its so easy that now i always make them and store them in air tight containers. 


There is a different type of Mathri that i see in stores here in Delhi, but they are solid, heavy and stuffy. These, on the other hand, are crunchy, light and super tasty.


Ingredients:

Maida (All purpose flour)- 2 cups
Atta (Wheat flour) - 1 cup
Suji (Rava) - 2 tbsp (optional but helps in making the mathris crisp)
Cornflour - 2 tbsp (optional)
Salt - to taste
Cumin powder - 1 tsp or more as per taste
Pepper (crushed) - 1 tsp or more as per taste
Oil - 1/4 cup


Recipe:

In a mixing bowl, mix maida, atta, rava, cornflour, salt, cumin powder, and crushed pepper. 

Heat 1/4 cup oil and mix it in the mixing bowl with the help of a spoon. Dont mix it with hand as the oil is too hot.

Now warm some water (Not too hot) and knead a dough adding water little by little. The dough should not be too soft and sticky niether too hard. So use water little by little to knead.

Cover the dough and let it rest for about 30 minutes.

Now make equal sized balls of the dough. The balls should be of size of a puri.

Try not to apply flour while rolling the balls. Use only if necessary. Or you can apply some oil on your hands while making the balls from the dough. That way, you won't require to use flour.

Roll the balls into small puris. Now make small cuts on the puri along with a knife. This is to prevent the puri from fluffing up and for the mathri to be crisp. Make sure the cuts are just small and all over the puri.

Heat oil in a kadhai for frying. Now, add the mathris one by one both sides and fry till golden on low flame. Don't fry the mathris too brown.

Let the mathris cool down. They become crisp only when they are cool. If you eat it immediately, they will be soft. Once the mathris have cooled down, store them in air tight containers and enjoy along with tea or coffee :)


Happy cooking!!! :)

Thursday, 22 January 2015

Food from waste: Paratha rolls

Well, i am of the opinion to use as much natural things as possible and to make sure the waste happens to minimum. To the extent, that i recycle my kitchen waste for composting (nothing big to brag about, as everyone should do this) and making sure to eat fresh and natural than the processed stuff. I am reading a lot about homesteading these days, and as much as i want to have my own kitchen garden here, i can't! All thanks to the cute 4 legged's i board who keep going to the balcony either to eat the leaves or at times even release their nature call. :P So, now i am trying to develop our fish room balcony into a kitchen garden. Though it's small, i am sure i can at least harvest some basic herbs in it. Just waiting for the weather to get a little better as it rained here today, and the wind chills have increased. So cosying up below my blanket, here i am writing today's post.

Cooking, i believe, is an art learnt by practicing. It's all about sharing, observing and practicing as compared to any other art of craft, drawing or music where people have an innate talent. I can say this, as through my 2 years of cooking journey (yes, if you have read my first few posts, you would have known that i started cooking only after marriage!), i have observed my own growth. The way food tasted when i cooked first and now, has improved tremendously and am sure 5 years down the line, i would have had much more expertise with experience.
Just as our mothers and grannies don't cook with 'measurements', but 'judgments', we too would reach that level with patience and practice. 


This recipe is just an example of how my journey has helped me to think of this innovation. I always used to wonder why we throw away the stems of all the leafy vegetables that we eat - like spinach, methi or even mooli. Is it because they don't taste well? or is it because they are bad for our health? or is it because they don't have any nutritional value? I don't think the reason is any of this, and neither did i find any answers to it in Google except for the fact that they are dirty and they are thick. So what? Wash them thoroughly and make a paste of it! Simple! I tried incorporating it in our diet and here is what was born...


Looks tempting, isn't it? We love it so much that now the stems will never see the compost bin, but our tiffin boxes :) Yes, this makes for a great breakfast or tiffin recipe. Now lets get to method :


Ingredients:

Stems of all leafy vegetables like spinach, methi, mooli etc. - i took remains of about 1/2 bundle of each
Whole wheat flour (Atta) - 1 n half cup (Add more or less depending on the puree that you get)
Turmeric powder - 1/4 tsp
Corriander powder - 1 tsp
Garam masala - 1/2 tsp
Red chilli powder - 1/2 tsp
Ginger-garlic-green chilli paste ( Just chop them and make a coarse paste in mortar and pestle of about 5-6 garlic, 1/2 inch ginger and 1-2 green chillies )
Salt - to taste
Oil - 1 tsp in dough plus to fry
Mayonnaise - as needed
Tomato ketchup - as needed
Cumin seeds - 1 tsp
Ajwaiin - 1/2 tsp

Recipe:

Chop the stems and wash them thoroughly under running water so that no dirt remains.

Now in a mixer grinder, make a fine paste of these stems. Initially don't add water. Then add little water if needed. If the paste is a little coarse, not a problem.

Now in a mixing bowl, add all the dry spices, the stem-paste, flour, salt, ginger-garlic-chilli paste and 1 tsp oil and knead into a nice dough. Add flour little by little checking the consistency of the dough. The dough shouldn't be too sticky, hence add water accordingly too. Knead a nice soft dough as we make a roti or paratha dough.
The dough looks like this :


Now divide them in equal sized balls and roll out into a paratha.

Heat a tava and fry the paratha, adding oil on both sides and frying till you get nice brown spots on each side.

Now spread some tomato ketchup and mayonnaise on the paratha, and roll it. Now cut it in two halves.

You can also add any filling of your choice or even some leftover sabzi or aloo sabzi, just for a different taste.


Now, isn't that interesting? Food from waste!!! Let me know if you have any such more ideas.

Happy Cooking :)

Thursday, 25 December 2014

Sabudana Khichdi

As much as the health experts say to control eating the 5 white things in kitchen - Sugar, Sabudana, Rice, Salt and Maida - we can't keep ourselves away from any of it ;) Rice is one ingredient that we don't make too often as compared to rotis, but both of us love Sabudana. So, this recipe is a fixed once-a-week breakfast menu on our list. Hubby loves it so much, that whenever (i really mean, whenever) i ask what should i make for breakfast, Sabudana Khichdi is his reply! :)

Well, it tastes best when served warm and is a hassle-free recipe, if you have your things ready, especially the peanut powder. We Maharashtrians normally stock the "Danyacha kut" (Roasted Peanut powder) as we call it, and use it in various curries, sabzis or even chutneys. Danyacha kut is basically a coarse powder of peanuts which are dry roasted and skin removed.


The recipe varies from place to place. Some people add crushed roasted peanuts instead of powder, some add red chilli powder instead of green chillies, some add onions instead of potatoes or both, some don't add sugar but only salt. I make it in different ways each time, just to give a different taste. But this one is the way my mom used to make it and it absolutely tastes delicious!!

The key to make a good khichdi is to soak the sabudana in proper quantity of water. It shouldn't be a lot, as we soak our sprouts in, niether too less that the sabudana doesn't remains raw. Also, we normally leave it to soak overnight, so a minimum of 7-8 hours of soak is good.


Ingredients:

Sabudana - 3/4 cup
Green chillies - 2 (chopped finely)
Boiled potato - 1 (chopped)
Salt - to taste
Sugar - 1/2 tsp (optional)
Peanut powder (Danyacha kut) - Just enough to marinate the sabudana well, so add little by little and see how much is required
Oil - 2 tbsp + ghee 1 tbsp (This is the way to get a great taste out of the khichdi, you can make it in only oil or only ghee, but we prefer mixing both)
Cumin seeds - 1 tsp
Red chilli powder - 1/2 tsp (i added green chilli and red chilli powder both, as we like it little spicy)
Turmeric powder - 1/4 tsp (optional)
Lime juice - on top (optional but gives a nice tangy taste)
Corriander leaves - to garnish (optional)

Recipe:

Wash the sabudana well in cold water 2-3 times and then soak it in water overnight. The water level should be just a little above the sabudana.

Heat oil + ghee in a pan, and add cumin seeds. Once they crackle, add the green chillies and then boiled potato and fry till the potatoes are little golden brown.

Now, marinate the sabudana well with peanut powder, sugar, salt, red chilli powder, and turmeric powder. Add peanut powder little by little, just enough to coat the sabudanas well.

Now add this to the pan and fry well till the sabudana gets cooked. It should take about 4-5 minutes. Make sure to keep stirring, so it doesn't get sticky or stick to the pan.

I normally cook uncovered, that way it doesn't become sticky. 
You will know when it's cooked when it starts changing colour. Also taste for salt and add more if required.

Serve hot and garnish with corriander leaves if you want and put some lemon juice on top.


Isn't it absolutely tempting?

Happy Cooking!!! :)

Wednesday, 24 December 2014

Appe from Readymade Idli Batter

Appe as it is called in Maharashtrian or Konkani language, this is a popular breakfast recipe is South India known as Paddu. They are made of various ingredients - Sometimes with rice, sometimes adding Poha, and at times only with lentils (majorly Urad daal). 

These days, we get readymade Dosa/Idli batter in the market. I have sourced one amazing south indian guy who makes this fresh and sells it near to our home. So, one packet of this in fridge and i can make varied breakfast of idli, dosa, uttapas and at times Appe. My aunt gifted me this special "Appe Tava" that is required to make these. It is a non-stick tava, so naturally makes for a healthy breakfast with less oil. You can make it with no oil too, but i prefer brushing a little oil, just to get a nice brown colour and also to make sure the batter doesn't stick to the tava (as the batter varies from place to place).


Ingredients:

Idli batter - as required 
French beans - a few (chopped finely)
Onions - Half for about 1/4 kg batter (chopped finely)
Turmeric powder - 1/4 tsp
Salt - to taste
Water - little
Corriander leaves - 1/2 cup chopped
Oil - to brush the tava

You can also add pepper for a different taste and replace/add vegetables of your choice like cauliflower, carrots or even peas.

Recipe:

In the appe tava, brush little oil and place it on the stove.

Mix turmeric powder, salt, beans, onions, corriander leaves with the dosa batter and add little water if the batter is too thick. Don't make it too thin like a dosa batter. It should just have the consistency to pour easily.

Once the tava is hot, put small amounts in each mould (about a spoonful), cover the tava with a lid and let it steam-cook till the outer sides become brown. 

Now turn over the appe's, so the other side is cooked. This time don't cover the tava.

Serve hot along with coconut chutney or tastes great with any chutney :)

Happy Cooking!!! :)

Friday, 28 November 2014

Bread Poha

I love making leftover recipes. That's when creativity is best put to use, and it's fun when hubby enjoys the final product not knowing what's gone inside as ingredients ;) Like making parathas of leftover daal, or adding palak to it and giving tadka to make it daal palak, or mixing leftover aloo sabzi with a new fresh vegetable, or making tadka rice with leftover rice!!! It's always a new better dish that comes out of the leftover than throwing it away. Just the same, when you are done with eating bread as toast, with omelettes, in sandwiches and it becomes 3-4 day old or is excess lying in the refrigerator, this recipe comes as a best option.

Some people even call it bread upma and add vegetables (carrots, beans, corn etc) as used in the regular Upma. Some add potatoes (as used in poha) but i always make it with only onions and tomatoes. There are even different ways of cutting/chopping the bread. At times, i remove the sides or i use them and chop the bread in small pieces, and sometimes i absolutely chop it like a loose powder (always by hand). The choice is yours.


So this makes for a perfect breakfast recipe or a tiffin recipe. You can have it as it is or alongwith some chutney or pickle or even dahi(curd). I prefer having it as it is with my morning cup of coffee.

Ingredients:

Bread slices - 6 to 8
Onion - 1 (finely chopped)
Tomato - 1(finely chopped) Addition of more tomatoes will make the dish soggy, so stick to less tomatoes as possible.
Green chilli - 1 big finely chopped
Oil - 2 tsp
Red chilli powder - 1/2 tsp (adjust according to taste)
Corriander  powder - 1/2 tsp
Turmeric powder - 1/4 tsp
Salt - to taste
Oil - 2 tsp
Curry leaves - a few (optional)
Corriander leaves - chopped (to garnish)
Cumin seeds - 1/2 tsp
Mustard seeds - 1/2 tsp
Asafoetida - a pinch
Lemon juice - on top (optional)

Recipe:

Chop the bread pieces or crush them roughly with hand.

Heat oil in a kadhai/pan. Add mustard seeds. When they crackle, add asafoetida and cumin seeds. Then add the curry leaves and onions.

Fry onions till transluscent. Don't over fry and burn them. Then add the green chillies and saute for about a minute.

Add in the tomatoes and cook uncovered till the tomatoes turn soft (not like a paste, but just soft). Keep stirring in between. Add some salt, so that it cooks faster.

Then add the turmeric powder, red chilli powder and corriander powder.

Saute till all the spices mix well with the onions and tomatoes. Now add in the bread, and mix it all well. I normally keep mixing and cook for about 3-4 minutes uncovered, but you can cover it too (though there might be a chance of the dish becoming soggy, but if you like it that way and are in a hurry, cover for about 2 minutes or so).

Adjust salt. Mix it corriander leaves and sprinkle some lemon juice on top (just before serving) for that tangy flavour.


Delicious and quick breakfast recipe is ready :)

Happy Cooking :)

Friday, 5 September 2014

Dadpe Pohe

Dadpe pohe is a typical Maharashtrian dish which is eaten for breakfast or as a mid-time evening snack. The name of the dish has significance in it's cooking method. Dadapne in Marathi means giving pressure. No, this dish is not pressure cooked, hehe... Instead the thin variety of poha is mixed with chopped onions and mixed with tempering and fresh coconut. This mixture is covered for a while which gives it pressure which make the flavours blend well. So technically, there is no cooking involved. Just chopping and mixing. 
Isn't it easy?


And as simple as it sounds, it is made in just 10 minutes to be precise. The main ingredients for the dish being onions, grated fresh coconut and the tempering. Tempering is usually oil, cumin seeds, asafoetida, mustard seeds and at times curry leaves. Traditionally, the dish is made with fresh coconut, but if you don't have it at hand try making it with dessicated coconut (the taste will vary a bit, but if you are experimental with food, you will surely like it). And if you don't have dessicated coconut too at hand, just try it with other ingredients. Yes, we are the queens of our kitchen, and we can create magic with what's available, right?


Ingredients:

Thin poha - 2 cups
Onion - 1 (chopped finely)
Green chillies - 4 (Either chop them finely or cut them in half size according to your choice)
Grated fresh coconut - 1/2 cup or 1/2 cup chopped tomatoes (If you don't have coconut, then add tomatoes, or you can add both but don't add a lot or else poha will become too soggy)
Curry leaves - 5-6 (i didn't have them handy, so i skipped adding these in the picture)
Mustard seeds - 1 tsp
cumin seeds - 1 tsp
Corriander leaves - a few (finely chopped)
Asafoetida - a pinch
Turmeric powder - 1/4 tsp (just to give that colour)
Salt - to taste
Oil - 2 tbsp
Sugar - 1/2 tsp (this is optional, but we maharashtrians always add salt and sugar together to a dish to give that mixed flavourful taste)
Lemon - 1/2

Recipe:

Always use thin variety of poha to make this dish and not the "Mota poha".

You can make a paste of the coconut by adding little water or you can add the coconut as it is. My mother usually adds the coconut as it is.

Heat oil in a pan. Add mustard seeds. When they splutter, add asafoetida, cumin seeds, curry leaves and green chillies. Saute for about 30 seconds.

Now add the onions and cook till translucent. Add in the turmeric powder, mix well and switch off the gas.

Take poha in a mixing bowl and add the above mixture to it (If adding tomatoes, add now). Add salt and sugar and mix it all well.

Now add the grated fresh coconut or the paste, corriander leaves and lemon juice. 

Mix it all well and keep aside covered for about 10 minutes. Dadpe pohe is ready to serve :)


They taste great as it is, but you can even eat it along with some pickle, chutney or dahi (yogurt).

For a change of taste, some add roasted peanuts or roasted chana daal to this poha. Some add buttermilk instead of lemon juice, and some make it without heating the oil (add oil directly to the poha). As i always say, cooking is so regional as the water, weather and ingredients available always play an important role. So you can make your own version and am sure you will love it!

Happy Cooking :)


Friday, 16 May 2014

Chole Kulcha Pizza Style !

With Birizza making news in the market, and getting all sorts of mixed reviews, fusion dishes are making their way in the kitchen. Birizza is a new dish launched by American restaurant chain Pizza Hut, wherein biryani cooked on a tava is sealed with a baked pizza topped with olive. To be honest, i haven't tried it yet so i have nothing to say about it. But i surely tried this fusion dish of serving Chole kulche in pizza style from the recipe of Chef Harpal Singh.


My Dad always says, " Be a Roman in Rome" which explains the fact that one should adapt to the surroundings and be flexible to whatever comes your way. I always apply this teaching of his when it comes to food and travel.As much as i miss eating Mumbai food in Delhi, i love the rich, masaaledar (full of masalas ), spicy, chatpata khana here. Chole Kulcha is to Delhi what Vada Paav is for mumbai. It is one of the most popular Street food dishes and it does taste terrific! As much as i cook chole often here, chole chaat is one dish i love to snack in too. Just boil the soaked chana, add in chopped tomatoes, onions, green chillies, some corriander leaves and some salt. Makes for a great evening snack. 

The same chole chaat served on a readymade pizza bread ( or we even get kulcha breads here ) adds to the presentation and tastes crispy and flavourful too.

Ingredients :

Kulcha bread/Pizza Bread - 1
Chickpeas ( White chana/chole ) - 1 cup ( Soaked overnight )
Onion - 1 medium ( chopped finely )
Tomato - 1 medium ( chopped finely )
Chaat masala - 1/2 tsp
Green chilli - 1 ( Chopped finely )
Red chilli powder - 1/2 tsp ( adjust according to taste )
Processed chesse/ Pizza cheese/ Mozarella - to sprinkle ( as required )
Salt - to taste
Butter - To apply on the pizza bread  


Recipe :

Pressure cook the chickpeas till they are soft ( took me about 3 whistles ). What i normally do is add about 1/4 tsp of turmeric ( haldi ) and 1/4 tsp of red chilli powder and 1/4 tsp of garam masala to the water while pressure cooking the chole. This way, i believe, the flavours merge in well. But it is optional. Let it cool and drain the water ( You can use this water to cook any curry later on, so refrigerate this and don't throw it away )

Cut the Kulcha bread or pizza bread into 4 portions. Now heat a tava and place them on it. Brush a little butter on top side of the bread evenly.
Add a little oil to the tava, and toast the bread till it becomes little brown and crisp ( Make sure not to brown it too much or else the bread will become hard )


Take the boiled chickpeas in a bowl, add the chopped tomatoes, onions and green chillies. Mix in some red chilli powder ( If required, according to taste ), the chaat masala and salt. Mix the mixture well. and divide it equally on top of the 4 portions of bread. 

Now add the grated cheese. Preheat oven to 180 degree celcius for 5 minutes. Grease a baking tray with some oil and place the 4 slices of pizza bread on top. Bake at 180 degree celcius till the cheese melts ( took me about 5 minutes ).

Sprinkle some red chilli powder on top and serve along with ketchup or as it is.


Easy- snack recipe and one wholesome too ! 

Happy Cooking :)


Sunday, 20 April 2014

Fruity Sponge Cake

Very Berry Healthy : A Great Day begins with a Healthy yet Tasty breakfast, but is more good when you have a Healthy snack to munch on when you have that in-between hunger cravings! Me and hubby get those a lot! And instead of having the regular buiscuits and chips, we decided to opt for something healthier and Smarteats came right in ! 
http://smarteats.in/ 
They have some really tasty wholesome snacks which you can carry in your tiffin or the packaging comes so neat with a seal-zip bag that you can carry it anywhere just like that ! They have Diet snacks, Cookies, Granola Bars, Tangy mixtures and dried fruits/dry fruits ! The combinations are so interesting that it really doesn't get to that "Boring snack to watch my diet"!!

I decided to order the "Very Berry Strawberry" and the "Fruity Granola Bar", just to try it out! The Granola Bar which was a mixture of Oats, coconut powder, and the sweetness of apples, grapes and dehydrated peaches coated with honey, brown sugar and butter was one simple yet delicious bar! That's not exactly a meal substitute but makes up as a snack or a lunch supplement.
And the chewy dehydrated strawberries were so flavourful that i finished them off in almost 3-4 days! And not only pop them as a snack, i used them in a recipe !!!!

So here i am making a SmartEat recipe with the dried Strawberries :) As Chai-Buiscuit ( Buiscuut, as it is called :)) is a very common household evening favourite snack, our home has the Chai-Cake fever ! So baking a cake every week is mandatory :) You can add any dried fruits of your choice and make this one, the basic ingredients remains the same.


Ingredients :

Maida /All purpose flour - 1 cup
Yogurt - 1/2 cup
Butter - 1/4 cup
Baking powder - 1 tsp
Baking soda - 1/4 tsp
Powdered sugar - 1/2 cup ( Add 1/4 cup more if you have a sweet tooth )
Egg - 1
Vanilla essence - 1 tsp
Dried strawberries - a few chopped
Tutty fruity - a few
You can also add nuts if you wish to.
Nutmeg - 1/4 tsp

Recipe :

Preheat the oven to 180 degrees Celcius for 10 minutes

Grease and dust a cake tin with butter and flour and keep aside.

Sieve together Maida, Baking powder and Baking soda.

In a bowl, Beat Butter and Powdered sugar together. Now add the egg and beat again. 
Add in the yogurt and mix it all well into a nice creamy mixture. Add vanilla essence and nutmeg powder. 

Slowly add the flour mixture and mix it well with a spatula.

Lastly, add in the dried strawberries, tuttyfruits and nuts.

Put this mixture into the baking tray and bake at 180 degrees celcius for 45-50 minutes.

Remove and set aside to cool for 10 minutes before removing from the cake tin.

Now remove from the cake tin and let it cool on a wire rack.

Soft spongy cake is ready, which tastes and smells like heaven :))


Happy Baking :)


Sunday, 15 December 2013

Idli chilli : Yenna Rascala

Indian- Chinese : A common cuisine in India, where chinese food is adapted according to Indian taste. Not only Chinese, but even pizzas and burgers at popular food-joints like Mcdonalds, Pizza Hut or Dominos are made in such a way that they suit the taste of us Indians...Yes, we like spicy food and yes, we love the way we are :))) I remember a lot of my relatives and friends staying abroad, on their visit to India, want to visit Mcdonalds once, to see how the Burger tastes here and are surprised to see the Maharaja Mac and Paneer Salsa wrap..!!! Though they find the burger too spicy, they would still want to eat it with water running down their nose, for the enjoyment of taking back home memories of eating at Indian-Mcdonalds :) 
Similar way, they are surprised to see the Chinese- thelas ( open-carts ) at every nook and corner, selling chinese noodles, manchurian and American Chopsuey. Indian chinese is definately spicy ( lot of spicy sauces ), more vegetables and i think, they add more of ajinomoto ( seasoning ). There are authentic chinese restaurants too which serve the perfect dishes as they should be ( Dimsums served in covered baskets keeping it warm and soft, Noodles served with the right amount of spice and correct seasonings, and always a green tea or a jasmine tea refill throughout your meal).. But just as we love dining here, we also love the thela-wala's taste :)))

South indian-chinese combo : How Indian can you get, that you think of making idli in a chinese style...It's just impossible to think about... we have heard about chilli chicken, paneer chilli or even veg chilli... but Idli chilli? The name itself sounds strange...
Just as Rajnikant ( the south Indian super star who is also THE "God" for many ) is capable of doing any action stunts (To name a few...his cigarette stunts are the most famous, he travels faster than light, he defies gravity and he doesn't need a bullet-proof jacket because he can stop bullets with his mind!). Rajnikant is known for all his unbelievable and impossible action sequences that he acts. So here is a humble tribute to Rajnikant ( Rajni-anna as we call him ), a terrific actor and full-on entertainer!!! Just as he makes impossible things possible, does fusion-acts and it always turns out to be a super combo, we tried making this south indian-chinese combo and turned out to be a hit!!!


My friend had made this recipe for her grandmother who was a strict vegetarian and didn't like paneer...She highly recommended it to me and i decided to give it a try.... Trust me, it turns out to be a great starter recipe or even as a snack... You can even pack this in a tiffin for breakfast or lunch... Its healthy, its yummy and its easy-to-cook :)))


Ingredients :

Idlis - 4
Capsicum - 1 small
Spring onions - 2 
Ginger Garlic paste - 1 tsp
Green chillies - 2 ( or according to taste ) - Chopped finely
Corn flour - 1 tbsp
Soya sauce - 1/2 tbsp 
Chilli sauce ( i used the thai chilli sauce, and because i like spicy i added 1 tbsp... You adjust according to taste )
Tomato ketchup - 1 tbsp
Salt - To taste
And of course....
Pepper - According to taste
Oil - to fry
Olive oil - 1 tbsp

Recipe :

Cut each idli into 4 parts and deep fry them till they are golden brown. Remove on a kitchen tissue that takes out excess oil.
Slice the capsicum and spring onions lengthwise. Also use the green leaves of the spring onions, they are healthy and add taste.
Mix 1 tbsp cornflour with 2 tbsp of water well and keep aside.
Heat 1 tbsp olive oil in a pan. Add ginger garlic paste, and saute for 30 secs. Now add the green chillies and saute for 15 secs. Add the capsicum and spring onions and let them cook for 10 mins. Don't cover the pan. Let it cook in open, stirring occasionally. This maintains the crispiness of the vegetables.
Now add the cornflour- water mixture to this and immediately throw in salt, pepper and mix it all properly.
Now add the soya sauce, tomato ketchup and chilli sauce.
Mix all the ingredients well and let it cook for 1 minute.
Finally, add the idlis and mix well.

Happy Cooking :)


Wednesday, 27 November 2013

Upma : Dabba Recipe

Recipe for Beginners : For those who haven't entered the kitchen, this recipe is a saviour when you are put in the situation ! Upma is a common breakfast dish in south India. Less oil, less time, less preparation !!!! It tastes great just as it is, or you can even serve it with pickle ( especially lime) or even with corriander or coconut chutney. Some even add sev or bhujia to it, just to add the taste ! Upma is a hot favourite as it can be eaten even as a snack, it surely fills you for long hours.

Fire in the Kitchen : Indian cooking = Onions !!! Onion adds taste to every dish we make :) Every curry, sabzi or daal does require onion as an ingredient. With the rising onion prices in India, poor cooks/chefs/mothers have to think of alternative recipes that can be cooked without onions. Onion is also an important ingredient in breakfast recipes including upma. I always made upma with onions and tomatoes, and sometimes adding 1 or 2 vegetable for nutritional benefits. Now that i have to pack breakfast tiffin everyday for my husband, i have to think of alternate recipes too without using onions! Managing monthly budget is hell of a task!!!!!!! So, here's Upma( cooked without onions ), a hot cup of coffee ( served in my favourite mug) and Newspaper.... A Lovely Morning is here :)


Ingredients :

Rava ( Suji ) - 1 cup ( dry roasted. You can even dry roast in bulk and store in air tight container and use as and when required )
Green chillies - 2/3 ( chopped finely )
Mustard seeds - 1 tsp
Ginger - 1 inch piece (grated or chopped finely )
Peanuts - 2 tbsp ( roast and remove skin)
Carrot - 1 ( peeled and grated )
Green peas - 1/2 cup
Salt - to taste
Ghee- 1 tbsp
Water - 2 cups
Coconut - 1 tsp ( grated ) Optional. To garnish
Corriander leaves - 1/2 cup ( this adds freshness and aroma to the dish ) to garnish
You can even add curry leaves, cumin seeds, split urad daal or split chana daal if u wish.

Recipe :

Heat oil in a pan. Add mustard seeds. When they crackle, add the green chillies. (If adding curry leaves, and the daal, add now and saute till brown ). Saute for 30 secs and then add the peanuts.
Saute for a minute.
Add green peas and grated carrots and fry for 2-3 minutes.
Now add the water to the pan and let it come to a boil on high flame.
Reduce the flame to minimum and slowly add rava. Stir so that no lumps are found.
Keep stirring till the mixture thickens.

Garnish with grated coconut and corriander leaves. Always serve hot.. It doesn't taste great when cold.

Happy Cooking :)


Friday, 18 October 2013

Hara Bhara Kebab - True to its name !!!

When i told my mother today, that i have started with a food blog, she said " Sanjeev Kapoor zindabad "!!! Yes, i truly adore that man and love his recipes. I followed a lot of his baking recipes and they always turned out yummy ! Recently, i am also hooked on to the Food Food channel. Not only his recipes, but he hosts the show so well. All respects and love to him !

I remember he mentioned in one of the shows that he loved kebabs. So here's a dedication to him..Lets make Hara Bhara Kebabs today.

True to its name, this kebab is all greens... yes, a combination of palak, green peas and you can even add beans if you like ! Greens are always healthy and i have had these kebabs a lot of different restaurants ! Infact once i had decided to try out hara bhara kebabs in all the restaurants in my area and choose the best. Every restaurant had a distinct different taste and shape... yes some had even made rounds balls of them and deep fried !!!! 

Hara Bhara kebabs are easy to make... Just boil the vegetables, mix in the spices, make tikkis and stir fry ! 

Ingredients

1 medium bunch spinach 
2 medium sized potatoes ( Boiled )- Mash or grate them.
1 cup green peas/ if you are adding french beans take 1/2 cup beans and 1/2 cup green peas ( Boiled)
1 tsp amchur powder or according to taste
1 tsp chaat masala or according to taste
2 green chillies chopped finely
3 tbsp besan ( gram flour) - Dry roast this till the nutty smell goes away. Dont make it too dark. You can even use cornflour for binding
Salt to taste ( i prefer rock salt - sendha namak- to normal salt as its healthy and enhances taste too )
Oil to shallow fry

Recipe

Remove the stems of spinach and wash it 2-3 times. Boil some water with a pinch of salt. Add spinach leaves and boil for 3-4 minutes. Drain and immediately put the leaves under cold water or immerse them in cold water. This is called blanching.
Squeeze extra water from the leaves and chop them finely.
Mix spinach, boiled peas and potatoes. Add the green chillies and all the dry masalas. You can even add 3-4 pieces chopped ginger and 1 inch grated garlic for taste if you want. Mash the mixture well, add besan and  mix everything together with masher or spoon or hands.( I always prefer hands as i love to feel the food on my hand, guess it adds personal touch :))
Apply some oil on your palms and shape medium sized tikkis. Heat oil in a tava/ pan ( around 2 tbsp) and place the tikkis over them and shallow fry from both sides flipping them. Make them little dark golden brown as they turn crispier this way. Do not cover and cook.

The kebabs are ready!!! You can serve it with green chutney or ketchup. If you like tangy taste, put some lemon juice on kebabs.

And yes, sprinkling "Pepper " on top ??? No, not in this one !!! :)))

Happy Cooking :)