Showing posts with label Maincourse. Show all posts

Sunday, 13 September 2015

Cheese Butter Masala

Hello all you lovely people! Hope you are having a fabulous weekend :) Today i am posting the recipe of Cheese butter masala which i made couple of days back. I had not heard this recipe ever, until my husband asked me to make it. He remembered eating it in his early childhood in some restaurant at his native place - Akola. Sometimes, i really feel lucky to have a foodie husband - a lot i have learnt in life about food is because of him, and so i owe the blog to him in some way :)

On finding out more, i learnt that this is a typical north Indian recipe, just as paneer butter masala. The only difference here is paneer is substituted with cheese. When i made this recipe, i simply loved it and in just a month, i have made it twice :) Yes, cheese and me sort of have a close bonding, can't keep away from it for long, hehe.


Both the times that i tried the recipe, i made it in a different way. The first time, i did add onions and the second time i didn't. Once i made it with cashew paste, and the other time i skipped that and added cream. Also, the first time i didn't boil tomatoes before making a puree while the other time i did. So there are whole lot of variations you can make with this simple dish, just to enhance or suit the flavours and taste according to personal preferences. Here i will post the one with onions.


As the name suggests, it does call for a generous amount of butter, so don't compromise on that. Also, in restaurants, food colour is added to get a nice colour. Here i have chosen red ripe tomatoes instead. You can also skip adding kasuri methi and add corriander leaves in the end while garnishing.
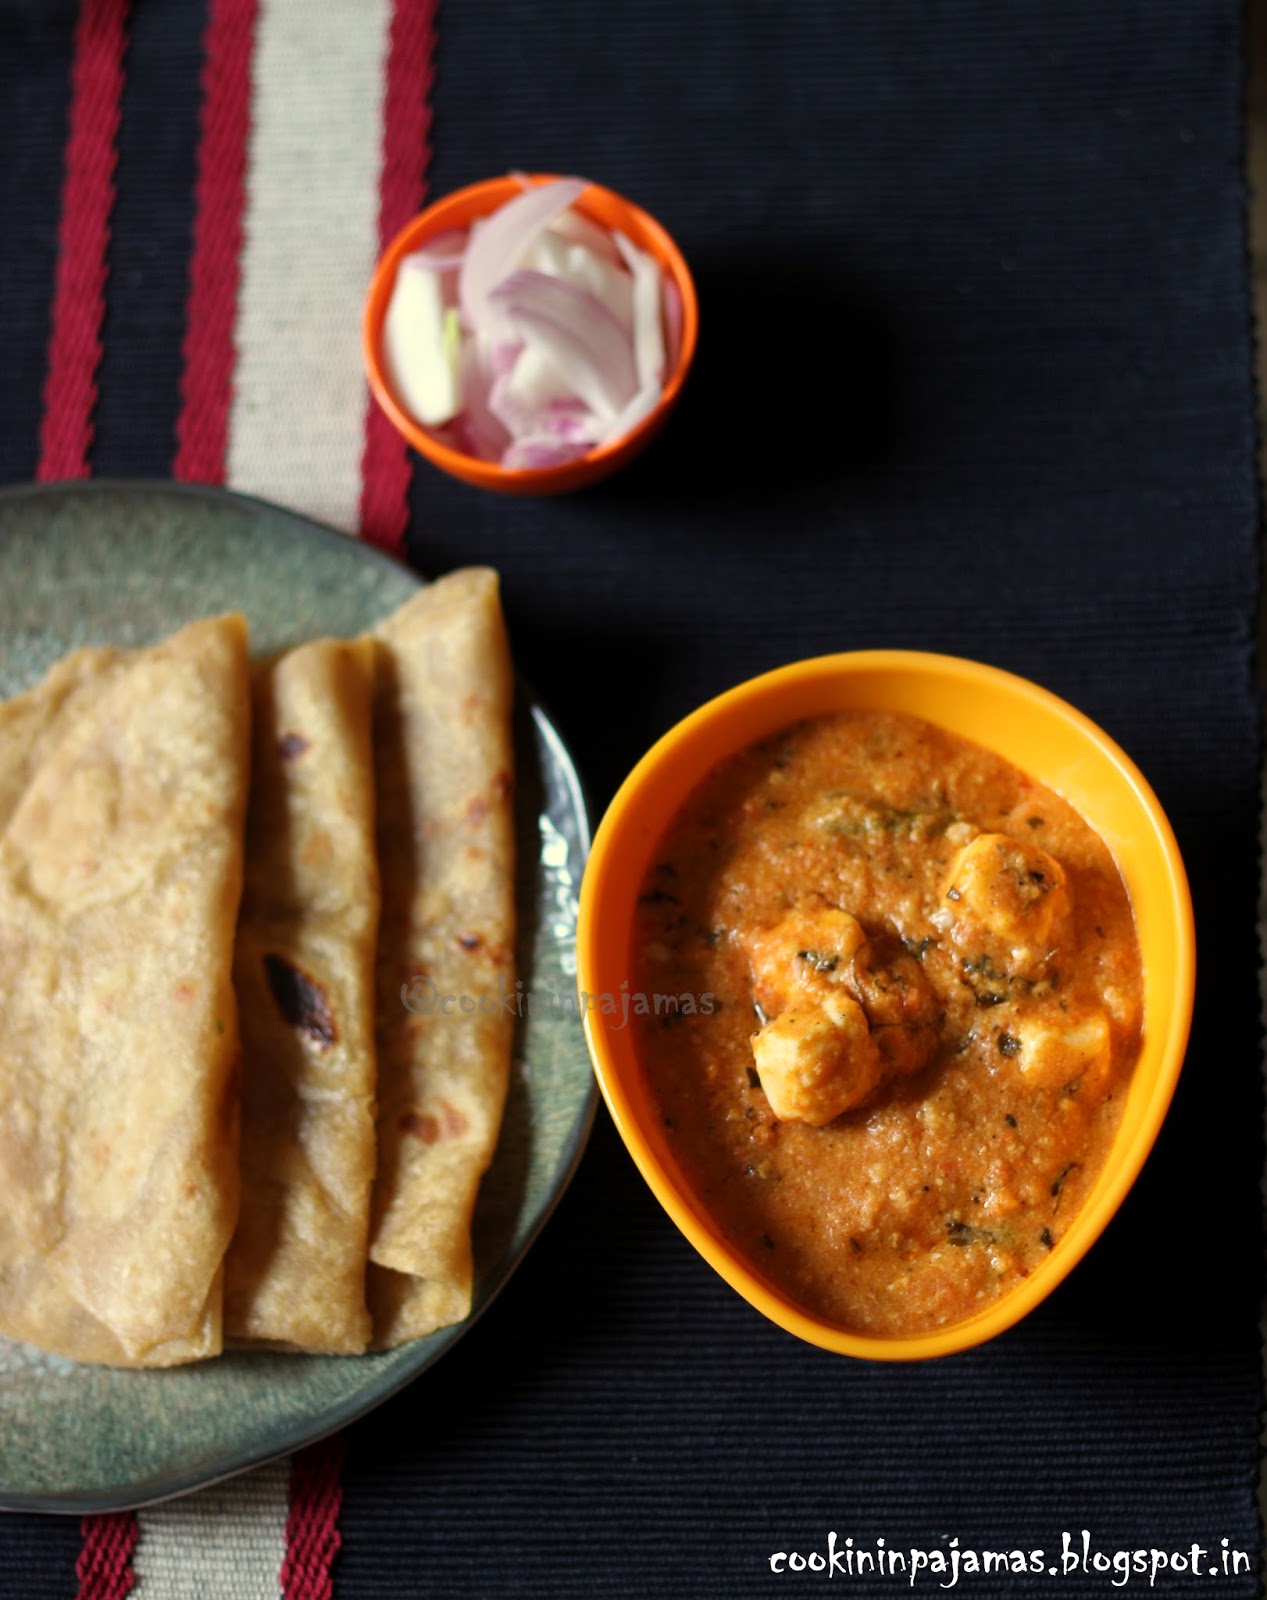


The recipe gets ready within minutes and tastes delicious on it's own. So just serve some parathas or naan or plain roti by the side along with some salad, and you save yourself a lot of time standing in the kitchen!

Preparation time :10 minutes
Cooking time : 30-35 minutes
Serves - 2-3 people
Recipe type : Main course (vegetarian)

Ingredients:

Tomatoes - 4 medium
Onion - 1 medium
Cheese cubes - 4 (I used Amul cheese cubes)
Butter - 4 tbsp
Cumin seeds - 1 tsp
Kasuri methi - 1 tsp
Salt - to taste
Ginger-garlic-green chilli paste - 1 tbsp (I crushed 1/2 inch ginger, 3-4 garlic and 1 green chilli in a mortar and pestle)
Turmeric powder - 1/4 th tsp + 1/4 tsp
Red chilli powder - 1/2 tsp + 1/4 tsp
Corriander powder - 1 tsp +1/4 tsp
Cumin powder - 1/4 tsp
Garam masala - 1/4 - 1/2 tsp
Cream and corriander leaves to garnish (optional)
Sugar - 1 tsp (optional)


Recipe:

Chop the onions. Make 4 square pieces of each cheese cubes (You can even cut them into half)

Wash the tomatoes, chop and make a puree of it in grinder. If adding cashews, add soaked cashews to the tomatoes while making puree.

Now, heat 1 tbsp butter in a kadhai and add this tomato puree. Saute well and add salt and 1/4 tsp each of turmeric powder, red chilli powder, cumin powder and corriander powder. Saute for about 10 minutes till the puree starts leaving oil. Add water little by little if the puree sticks to the kadhai and gets dry.

You can entirely skip this step and add the puree later on. This just enhances the flavour as the masalas get mixed well with the puree.

Heat 3 tbsp butter in a kadhai. Add cumin seeds. When they splutter, add onions. When onions become translucent, add the ginger-green chilli-garlic paste and saute for about 1/2 a minute till the raw smell goes away.

Now add the tomato puree (either sauteed with masalas or without). Now add the spices ( red chilli powder, turmeric powder, corriander powder and salt) and mix well till the masala starts leaving the sides of the kadhai.

Add about 3/4-1 cup water and sugar and let it come to a boil on low flame. Now add the cheese cubes. Add kasuri methi and garam masala. Mix it all well.

Don't cook for long after adding cheese cubes.

You can even add some cream for garnish on top.

Cheese butter masala is ready :)


Happy Cooking!!! :)


Thursday, 19 December 2013

Mushroom Capsicum Fry

Mushroom : The cap fruit?? - Mushroom is widely available in India. Also known as the cap fruit or cap vegetable, we have started getting it at even local vendors and at surprisingly affordable costs. Mushroom is not a household vegetable ( i don't remember my mother cooking mushroom ever ), and infact, many of the people in remote places of India would still not know what a mushroom is!!
I started eating mushrooms regularly only from last year. Till then it was only a topping on a pizza or a filling in a sandwich.

There are so many different varieties of edible mushrooms, but the most common ones that we get here in India are the white button mushrooms. Mushrooms stay upto a week in refrigerator, but its always best to have them fresh. Always look for firm mushrooms with a smooth appearance. You can use the stem of the mushroom too, depending on the dish you are making. But never use tough stems. Also, never soak mushrooms in water for cleaning or any other purpose. They easily absorb moisture. The best way to clean mushrooms is to wash them and then pat them dry. Or you can even remove the black stains on it with a wet cloth and then pat them dry with a normal kitchen napkin.

There is an interesting folk story surrounding mushroom ( mushroominfo.com ).The delicious flavour of mushrooms intrigued the Pharaohs of Egypt so much that they decreed mushrooms were food for royalty and that no commoner could ever touch them. This assured them the entire supply of mushrooms. Many believed that mushrooms had properties that could produce super-human strength, help in finding lost objects and lead the soul to the realm of the gods. 
I surely don't know about the super-human strength, but Mushroom does have a lot of nutrients and is full of minerals. Healthiest, because they are a low-calorie food, they are also a great source of B-vitamins.

Here is a quick recipe of mushroom, which can be used as a sabzi, eaten with parathas or rotis or even as a salad ( as all it contains is salt and pepper ). As simple as it may sound, it is one tasty dish and i recommend it to all the mushroom lovers !


Ingredients :

Mushrooms - 5 big 
Onion - 1 medium
Green capsicum - 1 medium
Salt - to taste
Ajwain - 1/2 tsp ( You can even add cumin seeds for a different taste or can add both ajwain and cumin seeds )
And of course our favourite:
Pepper : Use this with a free hand, as this is what adds taste to the dish
Oil - 1 tsp

Recipe :

Slice the onions and capsicum lengthwise. You can even use yellow or red capsicum for a different flavour.
Remove the stems of the mushroom and slice the buttons lengthwise, or in small cubes as you like.
Heat oil in a non stick pan or a kadhai.
Add ajwain seeds, add the onions.
Fry for about 30 seconds and add the capsicum.
Fry for about the minute and then add the mushrooms. Cover and cook for 2-3 minutes ( till the mushrooms are half cooked )
Now add the salt and pepper. Now cook uncovered till the water evaporates from the mushroom well.

Tasty- yummy-easy dish is ready :))) Add lemon juice if you like, but i like the taste of pepper. So just salt and pepper as seasoning. You can be as creative and add oregano, cilantro, corriander leaves or mint leaves, or red chilli powder or even green chillies...

Happy Cooking :))

Wednesday, 18 December 2013

Mutton Curry

Hubby's special : And it was one of those days when hubby says , "Why don't you rest and i will cook today"...Blissssss...
This weekend was one such bliss when hubby wanted to eat meat and decided to cook it himself, and for me he would make egg curry ( me being an eggetarian)...So, i just relaxed with a mug of coffee watching television, and hubby was in the kitchen enjoying the cooking :) Yes, Thankfully he loves to cook...And he does make some awesome curries :)

Coming from the home of die-hard non-vegetarians, he had always seen his mother and even father cook some really awesome dishes. And the ones he remembers and tells me stories about, are when they used to cook in the farms, with the age old stove of coal and mud vessels... Ahhaaa, am sure it would have tasted heaven ! I also remember him keenly watching his mother cook whenever she's making a special dish on the menu... So i guess, half of his work was done with observation and the other half practicing cooking living alone as a bachelor all the years away from home for work !!!

What we did was, when the gravy was cooked, we removed half in another pan and added boiled eggs to it. You can even add paneer or any other vegetables to the gravy if you like. So, the gravy ingredients quantity are according to meat curry and egg curry both together.


 My Twist :  My mother has given me this roasted dry coconut that i normally add to any gravy, curry, or vegetable. It tastes yumm. You can simply grate the coconut and dry roast it on tava/pan and store it in air tight container. It comes in handy to add taste to any dish. It looks like this :


Ingredients :

Meat pieces : 250 gms
For marination - Curd : 1 tsp
Red chilli powder - 1/4 tsp 
Turmeric powder - 1/4 tsp
Ginger garlic paste - 1/2 tsp

For gravy : Onions : 2 large
Dry coconut powder - 2 tbsp
Tomatoes - 2 medium
Green chillies - 2
Corriander powder - 1 tsp
Corriander seeds - 1 tsp
Ginger - 1 inch piece
Garlic - 4 cloves
Kashmiri red chilli powder - 1/2 tsp
Asafoetida - a pinch
Amchur powder - 1/4 tsp
Bay Leaf - 1
Kasuri Methi - 1/2 tsp
Black pepper - 8-10
Cinamon - 1 stick
Cloves - 3-4
Cumin seeds - 1/2 tsp
Fennel seeds - 1/2 tsp
Green cardamom - 3
Mustard seeds - 1/4 tsp
Sesame seeds - 1 tsp
Salt - to taste
Oil - 2 tbsp + 1/2 tsp
Corriander leaves - 1/2 cup


Recipe :

Wash the meat pieces well and marinate them with Ginger garlic paste, red chilli powder, turmeric powder and curd. Keep refrigerated as long as you can. We kept it for 3-4 hours.

Dry roast Corriander seeds, Kasuri Methi, Black Pepper, Cinamon, Cloves, Cumin seeds, Fennel seeds, Green cardamom, Mustard seeds and sesame seeds in a pan. Let it cool and then grind them in a mixer to fine powder. 

Slice the onions lengthwise. Heat 1/2 tsp oil in the same pan and saute the onions and ginger and garlic till brown. Let it cool.

Grind the onions-ginger-garlic to a smooth paste along with the coconut powder.

Heat 2 tbsp oil in a pressure cooker. Add a pinch of Asafoetida, Bay leaf and the onion-coconut paste. Let it fry for 2 -3 minutes. Stir occasionally.

Meanwhile, cut the tomatoes in large pieces and make a paste along with corriander leaves and green chilli. Add this to the onion paste and mix well. Saute for a minute and now add the powder masala that we grinded, along with kashmiri red chilli powder, corriander powder and amchur powder.

Now let this cook on low flame until the masala starts to leave oil ( add water little by little if needed ). This will take around 10-15 minutes. The masala will start sticking to the sides of the vessel. This is when you know it's cooked.

Now is the time to separate the masala if you want to cook any other vegetarian dish or egg curry too. If not, add the meat pieces, salt and water ( as much as you want the gravy ). We added 2 cups for 250 gms of meat. Let it cook for 5-6 whistles.

Yummyliscious Mutton Curry is ready :)

Happy Cooking :)

Linking this recipe to Meat Lovers Month event at Recipes Passion and Haffa Bexi's Kitchen


Tuesday, 17 December 2013

Egg Biryani : Egg-Mint-o!!!

Jiggi Jikka Jikka : Recently i saw an advertisement of a mouth freshner candy "Mint-O" that is available in mint, eucalyptus and green mango flavours. The commercial is quite funny and claims you will be "Jiggi Jikka" ( LOVED this phrase!! :)) fresh after you pop in the mint!! Mint-o's tag line is "Jab laila ko karna ho impress, khao Mint-o fresh" which means " Eat Mint-o fresh if u want to impress Laila- the girl"....
The ad shows how a village boy after popping Mint-O is able to impress the village girl over a village brat who does everything possible to lure her earlier.
Here is the ad :
http://www.youtube.com/watch?v=PgLqutMZW7s


And yes, Mint-O is good :) Not to lure a girl, but just to get that fresh feeling in the mouth after you eat :) Food such as onions, garlic, eggs, meat always leave a foul smell in your mouth... Mouth freshners always work to the rescue... So, pop in a Mint-O after you eat Egg-Mint-O !!!! :))

Egg Biryani : Just the name makes me drool... Yes, am an eggetarian and i love eggs in any form...May it be boiled, scrambled, bhurji, omlette, half fry, egg curry...the list goes on....
I had made Veg biryani earlier, but never tried my hand at egg biryani...I was always under the impression that you only add eggs to the vegetable biryani and your egg biryani is ready!!! But i decided to make egg-biryani giving it a "hint of mint"... so this is mint rice with the egg biryani masala...It was the first time i cooked this and it turns out super delicious... i recommend everyone to try this recipe ( if you love mint )... If you don't like mint, you can make corriander rice or else leave the rice plain. The addition of mint also gives a nice green colour to the biryani. Make the Biryani only when you have time at hand because it does take a little time to cook, but trust me the patience is all worth it ...You can also make this in pressure cooker if you are in a hurry... but i always feel Biryani shouldn't be cooked in a pressure cooker, it should be cooked at its own pace and time. A mud-vessel is the best, but you can even cook it in non stick or any cooking vessel.


Ingredients :

Eggs - 3 ( Hard boiled, peeled and halved )
Basmati rice - 1 cup 
Cloves - 3
Cinnamon - 2 small sticks
Black peppercorns - 6-7
Cardamom - 3
Bay leaf - 1
Fresh corriander leaves - Around 1/2 cup
Fresh Mint leaves - Around 1/2 cup
Desi ghee - 3 tbsp + 1 tbsp
Green chillies - 2
Ginger - 1/2 inch piece
Garlic - 3-4 cloves
Ginger Garlic paste - 1 tsp
Onions - 2 medium ( sliced lengthwise )
Tomato - 1 big ( cubed )
Red chilli powder - 1 tsp
Turmeric powder - 1/4 tsp
Cumin seeds - 1 tsp
Fennel seeds - 1 tsp
Corriander powder - 1 tsp
Curd - 1/2-3/4 cup ( thick )
Garam masala - 1 tsp ( you can even use readymade biryani masala available in market )
Saffron - a few strands soaked in milk
cashews - 7-8
Salt - to taste

Recipe :

Wash the Basmati rice and soak it in water for half an hour. Drain the water after half an hour.

In a mixer, grind together Garlic ( 1/2 inch piece ), Ginger ( 3-4 cloves ), Green chillies ( 2 chopped ), Mint leaves ( 1/2 cup ) and corriander leaves ( 1/2 cup ). Add little black salt to taste. Grind to a smooth paste( Add only 1 tbsp water if required )

Heat 2 tbsp ghee in a pan... fry the cashews till golden brown. Drain and remove on a kitchen tissue.
In the same pan, add half of the sliced onions and fry until they are dark brown...Drain and remove on a kitchen tissue.


In the same pan, ( add more ghee if required ), add the whole spices ( Cardamom, cinnamon, black peppercorns and cloves ). Fry them for 10 seconds and then add the mint-paste and fry for another 30 seconds. Remove from flame and keep aside.

Add this mixture to rice and cook the rice uncovered ( on low flame ) along with 1.5-2 cups of water. Cook till the rice is done. The rice should be fluffy and not sticky. So fluff it with a fork after its done.

Heat 1 tbsp ghee in the same pan and add cumin seeds, bay leaf and ginger garlic paste ( 1 tsp ).
Saute for 30 secs and then add the remaining sliced onions.
Saute for a minute more and then add the corriander powder, red chilli powder, turmeric powder and fennel seeds. Saute for a while till everything is mixed together well. 
Now add the chopped tomatoes and cook on low flame till the mixture starts to leave oil ( here ghee )...the tomatoes would turn soft and the mixture will leave aroma..Add little water ( spoon by spoon ) if required... Let it cook for about 10 minutes.

Now add the curd and little water ( 1/4 cup ). Let it cook on low flame till the masala becomes thick.
Now add the salt and garam masala. Mix well and cook till done.

Now, in a vessel( Mud or non stick ), make a layer of rice at the bottom, spread the masala on top of it, place the halved eggs on the masala and then again spread the remaining rice on top. Its like a sandwich. 3 layers - top and bottom of rice and in between the masala and eggs. Add a spoonful of ghee on top ( optional). Cover and keep it covered for about an hour ( not on flame ). This helps the Biryani to set and the flavours to blend.

Just before serving, add the saffron milk and fried onions on top and mix in the cashews.

Yummyliscious Egg biryani is ready :)))


Happy Cooking :)


Thursday, 12 December 2013

Thalipeeth : Maharashtrian Delicacy

A pancake is not a cake??? : I remember an incident when one of my very good friends, who is not much of an experimental foodie ( prefers to stick to the regular diet and cuisine), came out for lunch with me at a popular food-joint in Mumbai. Not understanding half of the ingredients that were mentioned as toppings and fillings in sandwiches and pizzas listed in the menu card, he asked me to order the simplest pizza for him! Pizza Margherita it was !!! After finishing our meal, i asked for the menu card to order some Crepes, that the place was famous for !!! "What's a Crepe?", he asked me... And i said, "They are thin pancakes"...He said ok, and liked the idea of ordering a Hazelnut Crepe with Honey...
And when the Crepe was on the table, his reaction was a "Click" moment... He was surprised/shocked to see a flat, thin batter based cake....
"This looks like an omlette,i thought it was a cake", was his reaction and i almost died there laughing!!! 
I sooo remember this incident that its glued to my memory and everytime i think of it, i can't stop laughing... 
As for my friend, well, now he surely knows what pancakes are, and even tasted a few (banana, chocolate to start with ) and relished them :))

Thalipeeth is a pancake : So Thalipeeth is a typical Maharashtrian dish, often eaten for breakfast or even for dinner. It is a pancake made from a dough. The dough can be prepared in different ways. Besan ( Gram Flour ), Jowar flour, Urad daal powder, wheat flour, rice flour, poha ( puffed rice ).... any 3 or all combinations can be mixed together and it just tastes great and healthy!!! The combination flour is called Bhajani mix which is readily available in market these days or you can get all the flours and mix it yourself. Thalipeeth is a good substitute to the normal poha, upma and bread butter that we have for breakfast! We normally make this for dinner and just 2 each makes our tummy's full due to it's rich nutrients.
Thalipeeth is best served with "Loni" ( White butter, that too homemade ), but if you don't have that, you can serve it with butter on top or even Ghee!! Curd tastes best with Thalipeeth too, some even have it with Tomato Ketchup :)

So here's a quick -to-make recipe of traditional Maharashtrian dish : ( My mom makes her own Bhajani, getting all the grains grinded together from a local flour mill... so i have used that Bhajani mix to make this . It has wheat, jowar and chana daal ). The additions can be done according to personal likings, such as onions, cumin seeds and/or cumin powder, sesame seeds, fennel seeds, corriander powder, green chillies or red chilli powder, black salt or normal salt, pepper, chaat masala, ajwain, ginger-garlic or paste, turmeric powder, garam masala, corriander leaves or even mint leaves or basil....You can make it as you like !!!!


Ingredients :

Bhajani mix : 2 cups
Ajwain : 1/2 tsp
Cumin seeds : 1/2 tsp
Green chillies - 2 ( chopped finely )
Corriander powder - 1 tsp
Black salt - to taste
Onion - 2 small ( You can chop finely, but i grated it- Gives a nice and different taste...)
And yes,....
Pepper - Our Favourite!!!! ( Add according to taste )
I normally add 1 tsp sesame seeds and 1/2 tsp saunf ( fennel seeds ), but this one i made in a hurry to pack tiffin for hubby...so forgot to add them both...

Recipe :

Mix together all the ingredients and knead to form a dough. The grated onions will leave water, so dont add water at first as adding too much water will make the dough sticky... First knead all the ingredients and add water slowly ( spoon by spoon ), just enough to knead it all together. It might not form a tough firm dough...
Take around 1/2 tsp of oil now on your palm and knead the dough again applying the oil all over...
Let the dough rest for 15 minutes.
Now take a thin plastic sheet or aluminium foil and place a small ball from the dough on it.
Start to flatten it with hand ( if it sticks to your hand, wet your hand with water and flatten again, it wont stick ).
Make it in a round flat bread ( not too thick, not too thin ).
Make 4 small circles in the flattened bread with your finger.
Heat a tava and grease it with oil... 
Gently hold one end of the foil, and take the thalipeeth in your hand by turning it over and remove the foil and place it on the tawa.( You can even place the Thalipeeth , gently place the edges on the tava and then separate the foil.)
Put little oil in each of the circle made and around. 
Cover the Thalipeeth and keep on low flame.
After about 2-3 minutes , remove the lid... If it has started browning from the sides, means it is cooked. Or else put the lid back again and cook on low flame for another minute.
Now, turn it so it gets cooked on the other side too. This time, don't cover it...
Keep turning it over till both sides are brown and cooked.

Serve hot with Ghee, Curd or White Butter :)

If You are Fasting, you can even make these with Sabudana ( Tapioca Pearls )... I will post that recipe sometime later.

Happy Cooking :)


Wednesday, 4 December 2013

Punjabi Kadhi Pakoras : Kadhi Kadhi???

Kadhi Kadhi ?? : Kadhi in Marathi language means "When"....And this was exactly my state of mind... I wanted to have "Kadhi" since a long time ( It's a thick gravy made out of thinning curd with water, and adding chickpea flour to it ). This is a very popular dish in North India ( it is said that this is a must-have dish in proceedings of a marraige !!!) In Gujrat, Maharashtra and Rajasthan, this is a popular dish too but the preparation varies from place to place. In North India, thick gravy is made and pakoras ( fried dumplings ) are added. In Gujrat and Rajasthan, jaggery is added in the preparation and hence the taste is little sweet. Also the consistency is thin compared to the one made in North. It is soup-like consistency and served with rice.

It had been ages i had Kadhi... This is one dish which i didn't know how to make and thought it to be very dificult ( always afraid i wont get the consistency right ). Also not many Restaurants offer this dish, and if they do they don't have the right taste! I enjoyed Kadhi 6 months back when i had gone to the Jaipur city of Rajasthan. That was a nice typical Kadhi served in a thali ( without the pakoras ). Here is what the Thali ( Plate ) looked like at Suraj Restaurant :


But i wanted to have the Kadhi- Gole ( As is known in Maharashtra, gole means GOL- round... so the gole's are round balls dumplings of gram flour ) and as my mom cooked it... I still haven't got a chance to cook or eat it... When i went home in Diwali festival, i had demanded to my mother that i wanted to eat Kadhi- Gole, but she mentioned that Kadhi is not prepared during festival or auspicious occasions. I still don't know the reason for it... Maybe it's superstition that onions and garlic was not eaten during festivals in earlier days. Or maybe Kadhi is known as a dish that is made when no one wants to cook, its that easy!! And during festives, a lot of dishes are supposed to be prepared and eaten....well, if any of you find the real reason behind this, please let me know....

So, recently i saw a post on a Food Forum by a friend Ranii Kaur about Palak Pakoras in Palak Kadhi cooked in typical Punjabi style !!! I had Palak in my fridge anyway and decided to give it a try. I took the pakora recipe from her and made the Kadhi in traditional way as my mother makes it :)) And it turned out super delicious....Served with rice, peanut chutney ( recipe uploaded earlier ) and Kelyachi koshimbir ( Traditional salad recipe of banana ), this tasted heavenly and made our tummy's full :))))

Well, i got to know, that this recipe was taught by her mother, to Ranii. So lets dedicate this article to Ranii's mother... special Thanks to her !!!!


Ingredients :

For Pakoras :

Palak ( Spinach) - 1/2 cup ( Remove the stems, wash and chop finely )
Besan ( Gram flour ) - 3/4 cup
Garlic - 1-2 ( crushed  or grated )
Salt - to taste
Red chilli powder - 1 tsp ( Or you can add green chillies and 1/2 tsp red chilli powder. Adjust according to taste )
Hing ( Asofoetida ) - a pinch
Onions - 1 ( finely chopped or u can grate too. Adding onions is optional )
Ajwain - 1/2 tsp ( optional but i love to add this to pakoras )
Oil - to fry to pakoras

For Kadhi :

Yogurt ( Dahi ) - 1 cup
Besan ( Gram Flour ) -1/4 cup
Turmeric powder - 1 tsp
Fenugreek seeds ( Methi ) - 1/2 tsp
Oil - 1 tbsp
Spinach - 1 cup ( washed and finely chopped )
Dried red chillies - 2
Cumin seeds - 1/2 tsp
Red chilli powder - 1/2 tsp
Ginger - 1 inch ( Grated )
Onion - 1 small ( chopped ) Optional.
Salt - to taste

Recipe :

Mix all the pakora ingredients together in a bowl ( except the oil ). Heat oil in a kadhai and when the oil is hot enough, add small tea spoonful or round balls of the pakora batter and fry till golden brown. Remove the pakoras on a Kitchen tissue to drain out excess oil. Keep them aside.

Take the yogurt in a bowl and whisk it well... Add besan to it and mix well so that no lumps are formed. Now add about 3 cups of water to this...Always remember the ratio of curd:water is 1:3.
Add turmeric powder and keep aside.

Heat oil in a pan. Add the cumin seeds. When they splutter, add fenugreek seeds and red chillies ( break them into 2 ). Fry for half a minute and then add ginger. When it starts to turn brown, add the onions and fry for about a minute more. Now add the palak and fry on high flame till all the water oozes out from palak ( just for about 1-2 minutes and keep stirring continuosly otherwise it will burn ).

Now add the yogurt mixture to this, let it come to boil...then put the flame to low and let it simmer for 10-15 mins... keep stirring in between.
Lastly, add the red chilli powder... stir well and then add the fried pakoras to this.

Let it simmer ( uncovered ) for another 5-10 minutes. 

Yummy Kadhi -pakoras in Punjabi style are ready... And addition of palak makes it healthy too :)

Happy Cooking :)

Sunday, 1 December 2013

Zapeeta Karela : Bharwan or Stuffed Bitter Gourd

Karela is one vegetable which not many people are fond of, just because it is bitter and doesn't have a pleasant taste of its own. But Karela has immense nutritional benefits. Karela is also known as Bitter gourd or Bitter melon. It surely prevents lot of diseases and people also have it in juice form for the health benefits it provides. Karela is actually a fruit, but is commonly used as a vegetable. Karela has very less number of calories and is rich in vitamins, minerals and anti-oxidants.
Karela helps in digestion and also plays a key role in preventing ageing and cancer. In Africa and some other parts, people eat karela to treat stomach problems. They eat them raw or also soak them in olive oil or honey and then eat. The best way to buy Karela is to look out for bright and dark green coloured ones. Young, fresh karelas are less bitter. They grow bitter as they mature. 

Fusion Dish : Karela should be eaten once a week or once in 15 days for all the health benefits mentioned above. The best way is to cook it in a way it doesn't taste so bitter. These days, we don't get too bitter karelas in market, but there is always a solution to make them less bitter. And this filling is surely going to make things just right for your taste buds :) I am uploading 2 versions here... One is the traditional dish that my mother cooks at home... and another is a fusion dish that i had read somewhere and tried it... Its a fusion dish and i am sure you will start loving karelas once u make this :


Ingredients :

Karelas - 3
Turmeric powder - 1 tsp
Onion - 1 medium ( chopped finely )
Salt - to taste
Green chillies - 2 ( chopped finely )
Oil - 4 tbsp ( preferred olive oil )
Olives - 10-12 Green or black of your choice( cut into halves )
Garlic - 2/3 ( chopped finely )
Ginger - 1 inch piece ( chopped finely )
Cumin seeds - 1 tsp ( crushed or powdered )
Corriander powder - 1 tsp
Garam masala - 1 tsp

Recipe :

Cut the Karelas from between and remove all the seeds and pulp from inside.
Add 1 tsp salt and 1 tsp turmeric powder to this and let it remain for 15 minutes. This removes the bitterness from the Karelas and also they get marinated well.
After 15 minutes, wash the karelas thoroughly with water.
In a pan, add 3 tbsp of oil. Add onions and green chillies and fry for a minute. Add garlic and then saute it all for 3-4 minutes.
Now add the cumin seeds, corriander powder, garam masala, salt and ginger and saute for another minute. 
Now add the olives. Put off the gas and let the pan remain on the gas for a while. Let the mixture cool.
Now, add the mixture to the karelas with a spoon ( like a filling ) and try to close the opening of the karela as close as you can. 
Add 1 tbsp of oil to the same pan, and place karelas carefully. Cover with a lid. Turn the karelas in between, so they get cooked all over. You can even cook them in microwave mode ( on high ) for 5-6 minutes.

Serve this with hot parathas and daal :)

Another traditional version of making stuffed karelas, how my mother makes them is :


Ingredients :

Karela - 5
Cumin seeds - 1 tsp
Oil - 2 tbsp
Hing - a pinch
Corriander powder - 2 tsp
Turmeric powder - 1/2 tsp
Amchoor powder - 1/2 tsp
Red chilli powder - 1 tsp ( we like it spicy, but adjust according to taste )
Fennel seeds - 1 tsp ( you can even use 1/2 tsp of powdered form )
Salt - to taste

Recipe :

Peel the skin of the Karelas and wash them well. 
Cut the Karelas from between, leaving the bottom part.Cut in such a way that the bottom should be joined. You can even cut it in two halves but this way the filling is stuffed better inside and doesn't fall out when cooking.
Take out the seeds and pulp and keep it aside. 
Now apply some salt on the karelas ( inside and outside ) and leave them aside for half an hour. Wash them under running water after half an hour, and squeeze all the water from it. This eliminates all the bitterness.
Heat 1 tbsp oil in a pan. Add hing, cumin seeds. Once they splutter, add turmeric powder, corriander powder and fennel seeds to it. Saute for a minute and then add the pulp.
Saute for about 30 secs and then add the masalas - red chilli powder, amchoor powder and salt.
Let it cook for 5 to 6 minutes. Make sure you don't burn the masala.
Now, add this masala into the karela, like a filling.
Press the masala into karelas and tie the karelas with a thread ( cooking thread ), so the masala doesn't come out. You can even cook it without the thread, but adding thread makes sure that it is tied properly and the masala doesn't come out... This is how my mom always makes it :)))
Heat 3 tbsp of oil in the same pan and add the karelas. Cook covered for 5-6 minutes, then turn the karela and cook covered again for 4-5 minutes. Cook till all the sides are brown.
You can serve this with roti or paratha... Tastes awesome :)))
Don't forget to remove the thread before eating ( the picture above shows thread still tied )

Happy Cooking :))


Friday, 22 November 2013

Stuffed Cabbage Roll : Something "Exotic"?

Honey, Make something Exotic : When i keep watching some cookery show program on TV, or some food channel, my husband always asks me to make something "Exotic" like they show on the TV...There were a few recipes that i tried after noting them down, but the presentation shown on television is somehow always better than the one we make at home... The same way, i had always wondered why home cooked food doesn't taste like the ones served in restaurants. There is always a taste difference...No doubt, that home cooked food is always healthier and delicious, we still love to eat out, for the change of taste and for the excitement of trying something new and "exotic" ! Exotic literally means "Out of ordinary" or something "different". Exotic in cooking would mean, making something which we don't eat everyday or cooking something with ingredients not commonly found. And yes, i always wanted to make something like that....

Inspired by Little MasterChef : The show on one of the leading Indian television channel is a hit with all the foodies and the Mommy's. With cute little kids posing as chefs and cooking a given dish, putting in their creativity and managing to make something different everytime in a given period of time is fun to watch! Kids really add a different taste to the whole show. On one such show, i saw the kids making red cabbage rolls with prawn filling. And though, they don't show the recipe anytime, i just put "2 and 2" together and thought of trying it at home with my version of vegetables. And not only did it taste good, it looked "Exotic" too :) That's something that made my husband happy :)

We are not much of a "Cabbage sabzi" fans, so when we buy cabbage, we normally make Cabbage Parathas or this dish now. Red cabbage is hard to find here, so i tried it with the green cabbage. This is like a complete dish in itself ( when served with sauce ) and filling too, or you can serve it as a starter( without the sauce), or as a dish to be eaten with Rotis or Parathas. Stuffed Cabbage rolls is a common dish in eastern Europe and the stuffing varies from region to region, with the dominant ingredient being meat. You can also add chicken or any other vegetable of your choice to the stuffing. Be as creative as you can :) 


Ingredients :

Potatoes - 3 medium sized ( boiled and chopped )
Carrots - 1 small ( chopped into dices and boiled )
Cauliflower florets - 1 cup ( boiled )
Green peas ( 1/2 cup boiled ) - optional.
Onion - 2 medium size ( chopped finely )
Garlic - 5 ( chopped finely )
Milk - 1/2 cup
Butter - 1 tbsp
Nutmeg - 1/4 tsp
Turmeric powder - 1/2 tsp
Red chilli powder - 1/2 tsp ( you can alternatively add green chillies chopped finely )
Cabbage leaves - 6 big ones ( make sure when you take out those leaves, they are not torn and stiff)
Cream - 1/2 cup
Tomato paste/Ketchup - 1/2 cup
Corriander leaves - to garnish
Thread - to tie the leaves
Salt - to taste
And of course Pepper.... It makes any dish yummy :) Add according to taste


Recipe :

When you boil the vegetables, save the vegetable stock. We would require it later ( around 1/2- 3/4 cup).
Heat Butter in a pan, add milk to it. Add the boiled potatoes and mash it well. Cover and cook it for 2 minutes. 
Then add the boiled cauliflower and carrots ( and/or any other vegetable of your choice) and mix it all well. Let it cook covered for another 2 minutes. 
Then add the turmeric powder, red chilli powder, nutmeg, salt and pepper.
Mix it all well and then add the chopped garlic and half of the chopped onions. Let it cook till everything mixes well. Remove from heat and keep aside to cool.

Boil water in a big bowl, and put the cabbage leaves in it.( Make sure the leaves are entirely immersed in water). Allow it to cook till the leaves soften ( takes around 10-12 minutes )... don't boil the leaves too soft, otherwise it would be difficult to make a roll later on. The leaves start changing colour, that's when you see that they are cooked.
Take them out and place them under cold water for a minute.

Now, as shown, take the cabbage leaf and put around 1-2 tbsp of stuffing in the center.


Fold the side leaf from both sides into center, so the stuffing is packed inside well. Make sure you do it carefully without tearing the leaf apart.


Now wrap the cabbage roll with a thread in the middle and around the sides.


Once you make all the rolls ready, heat a pan with 1 tbsp oil or butter and place the rolls into the pan, fry one side till it gets golden brown colour and turn and fry on the other side well till it gets the same colour. Remove the rolls when done.

In the same pan, add half of the onions kept aside. Add around 1/2- 3/4 cup veg stock, and the tomato paste. Let it come to a boil. Then add the cream and some salt and pepper. Cook till it becomes a nice creamy thick sauce.

Place the rolls in a plate and put the sauce on top. Garnish with some Corriander leaves :)

Your "Exotic" dish is ready!!!!

Happy Cooking :)


Wednesday, 23 October 2013

Dudhaatla Dudhi : Bottle Gourd cooked in milk !!!

Yes, my reaction was the same when i heard about Bottle Gourd cooked in milk !!! My father had talked very highly of this recipe made by my mom. But i didn't pay much attention to it, niether bothered to take the recipe from my mother...until a day, when i had bottle gourd in my fridge and didn't know what to cook !!! I decided to try this recipe with half of the bottle gourd, just in case me or my hubby don't like it. But Voila !!! It turned out super yummy and its so easy to cook too!

I just found out that Dudhi or Bottle gourd or Ghiya as it is commonly known as, is also called Calabash. The rounder varieties are called Calabash Gourds. This was grown not primarily for food, but was used as a water container. Interesting, isn't it??

Ingredients :

Milk - 1/2 cup ( you can even add cream and little milk if u like a creamy texture )
Bottle Gourd/ Dudhi - 1/2 of medium size ( comes around 1 cup when chopped )
Cloves - 2 to 3
Pepper corns ( Kaali miri ) - 5 to 6
Daalchini - 1 small piece
Bay leaf - 1
Dry red chillies - 3 to 4 ( Adjust according to taste )
Ghee - 1 tbsp
Salt to taste
Corriander leaves - to garnish

Recipe :

Wash and peel the Dudhi. Chop them into small or medium cubes. ( smaller ones are easier to eat )
Heat ghee in a pan. Add the pepper, cloves, daalchini and bay leaf and fry for a minute on low flame.
Then add the Dudhi, red chillies and saltand fry for another minute.
Cover it with a lid.
When the Dudhi is half cooked, add the milk or cream. 
Keep the low flame and let it take its own time to cook. This way it takes all the flavours of the raw spices added. Keep stirring in between when the milk starts boiling. Add more milk if u want thinner consistency.
Remove from the flame after Dudhi is cooked and let is cool. To garnish, add chopped corriander leaves before serving.

Happy cooking :))


Tuesday, 22 October 2013

Palak Chicken : Coming from a true vegetarian

One of the very few things where me and my husband have different interests is he loves non vegetarian food and i am a vegetarian ( rather egg-etarian). Having grown up in a Brahmin family, we never cooked non-veg at our home. Eggs were allowed because we all ( including my Dad) loved to exercise and gym and we used to have our share of natural proteins through eggs. I also remember those special Sunday breakfasts of omlette and toast made by mom :) But having a whole bunch of friends from different cultures and communities and countries, i have never really been a " Non veg? Don't even eat on the same table!!! Or Don't even come near my plate" sort of girl. I was also okay touching it as i used to cook rice and boiled chicken for the dogs i used to pet sit.

The only issue was i had never cooked it in my life!!! As much as hubby dearest loved eating it, he never forced me to make some. But one day, i decided to make it !!! And its not that difficult !!! I had seen a few recipes online, also some on the food channels but i decided to play safe and try to make the chicken in Spinach ( coz i knew how to make the palak gravy when i make palak paneer, though i dont add yogurt to palak paneer ). Just a few additions here and there, it turned out great or as hubby says so !!! Now i regularly cook non veg for him.... ( Must Mention : Without tasting or without eating )

Ingredients :

Chicken - 5 pieces
Lemon juice - 1 tsp ( to marinate )
Ginger garlic paste ( 1 tsp to marinate)
Pepper powder - sprinkle according to taste
Corriander leaves - 1/2 a handful to marinate.

Spinach - a medium bunch
Green chillies - 3 or (according to taste or spiciness of chillies, plus i dont add red chilli powder to this recipe. so u can adjust spice accordingly )
Corriander leaves - 1/2 a handful
Oil - 1 tbsp
Garlic - 3-4 chopped finely
Corriander powder - 1 tsp
Garam masala - 1/2 tsp
Amchur powder - 1/2 tsp
Turmeric powder - 1/4 tsp
Curd/ yogurt - 1 tbsp
Salt to taste

Recipe :

Marinate the chicken pieces with lemon juice, ginger garlic paste, pepper powder and corriander leaves. Generally 1-2 hours of marination is good. But what i do is if i have to make the recipe in evening for dinner, i marinate and keep the chicken covered in fridge for 5-6 hours. Ad i remove it from the fridge an hour before i start making it. This way the spices really get mixed well with the chicken.

Cut the stems of the Palak and wash it well. Boil water with little salt and add the palak leaves to it. Boil for 3-4 minutes. Drain and immerse the leaves in cold water or keep under running cold water for a while. This is known as Blanching of Palak.
Once cool, make a paste of these leaves ( remove water from the leaves completely ) with green chillies and remaining corriander in mixer.
Heat 1 tbsp of oil in a pan, add garlic and fry for a minute. Then add the palak paste to it and fry for couple of minutes. Add all the dry spice powders and mix well with the paste. Add about 1/2 cup water. Keep stirring in between. Add 1 tbsp curd. After about 3-4 mins, add the chicken and salt. Cover and let it cook for 8-10 mins. Add more water if required and adjust the gravy consistency according to personal choice.

Happy Cooking :)


Wednesday, 16 October 2013

Corn Pulao

I had Corn Pulao at a function and since then i have always been wanting to make one! I have tried 2-3 variations of it but this one is easiest to make... takes less than half an hour... so you might want to consider making this if you have unexpected guests ( provided you have corn in the fridge :)) for lunch or dinner. This dish in itself fills your stomach, so no need to make a side-dish. You can serve this with pickle/chutney or boondi raita.

I suggest you always have a packet of corn in your fridge..you can make corn chaat, add corn to any vegetable or just plain boil it and toss it with salt and pepper ! It tastes Yummmmmm....Apart from the nutritional benefits of providing vitamins, protein and fiber it gives a great colour to any dish. And all corn recipes are usually time-saving !

You can add any vegetables to this pulao according to your choice. I have added carrots and peas as i wanted the colours to come out ( red/green/yellow). Looks tempting, isn't it? I like the crispiness of the vegetables and didnt want to overcook them, hence i have stir-fried them. If you want, you can boil all of them and mix it with rice and cook, or add the boiled vegetables to cooked rice and steam for 2-3 mins.


Ingredients:

Green Peas - 1/2 cup ( fresh or frozen)
Carrot - 1 medium ( peel and chop lengthwise)
Corn - 1/2 cup ( wash the corn thoroughly)
Rice - 1 cup ( Preferably Basmati rice. Wash and soak it in water for 15-20 mins )
Water - 2 cups
Oil/Butter/Ghee - 2 tbsp + 1 tbsp on top (optional)
Spices : ( you can even use 1-2 tsp of readymade biryani/pulao masala available in market but i prefer grinding these fresh)
Peppercorns/ Black pepper - 8 to 10
Dalchini - a small piece
Cardamom ( Elaichi) - 2
Bay leaf( Tej patta) - 1 small
Jeera - 1 tsp
Fennel seeds ( saunf ) - 1/2 tsp ( optional)
Cloves/Lavang - 3-4
Salt to taste

Recipe:

Heat 2 tbsp of oil/butter/ghee in a Cookware bowl or a Cook-n-Serve bowl. You can even make it in a pressure cooker if you dont have a bowl. If you make it in a pan, make sure it is big enough to hold the rice and vegetables both. I would not recommend cooking this recipe in a kadhai.
Add corn and fry them for 1-2 mins. Then add the peas and carrots or any chopped vegetables of your choice. Stir fry all of it till they are semi cooked ( still crisp and not too soft). Smells great, dont they?? :)
Meanwhile, dry roast all the spices on a tava. Let it cool and then grind it to a powder.  Add this powder to the stir fried vegetables and fry for another 2 mins. Then add the soaked rice ( throw away the water ) and mix everything well. Add about 2 cups of water, salt and cover and cook until rice is done.
Garnish with corriander leaves ( Personally, i like the colours of vegetables so i dont like to add corriander leaves to this. I prefer adding 1/2 tsp lemon juice )
You can even add 1 tbsp of ghee or butter on top.

Happy Cooking :)